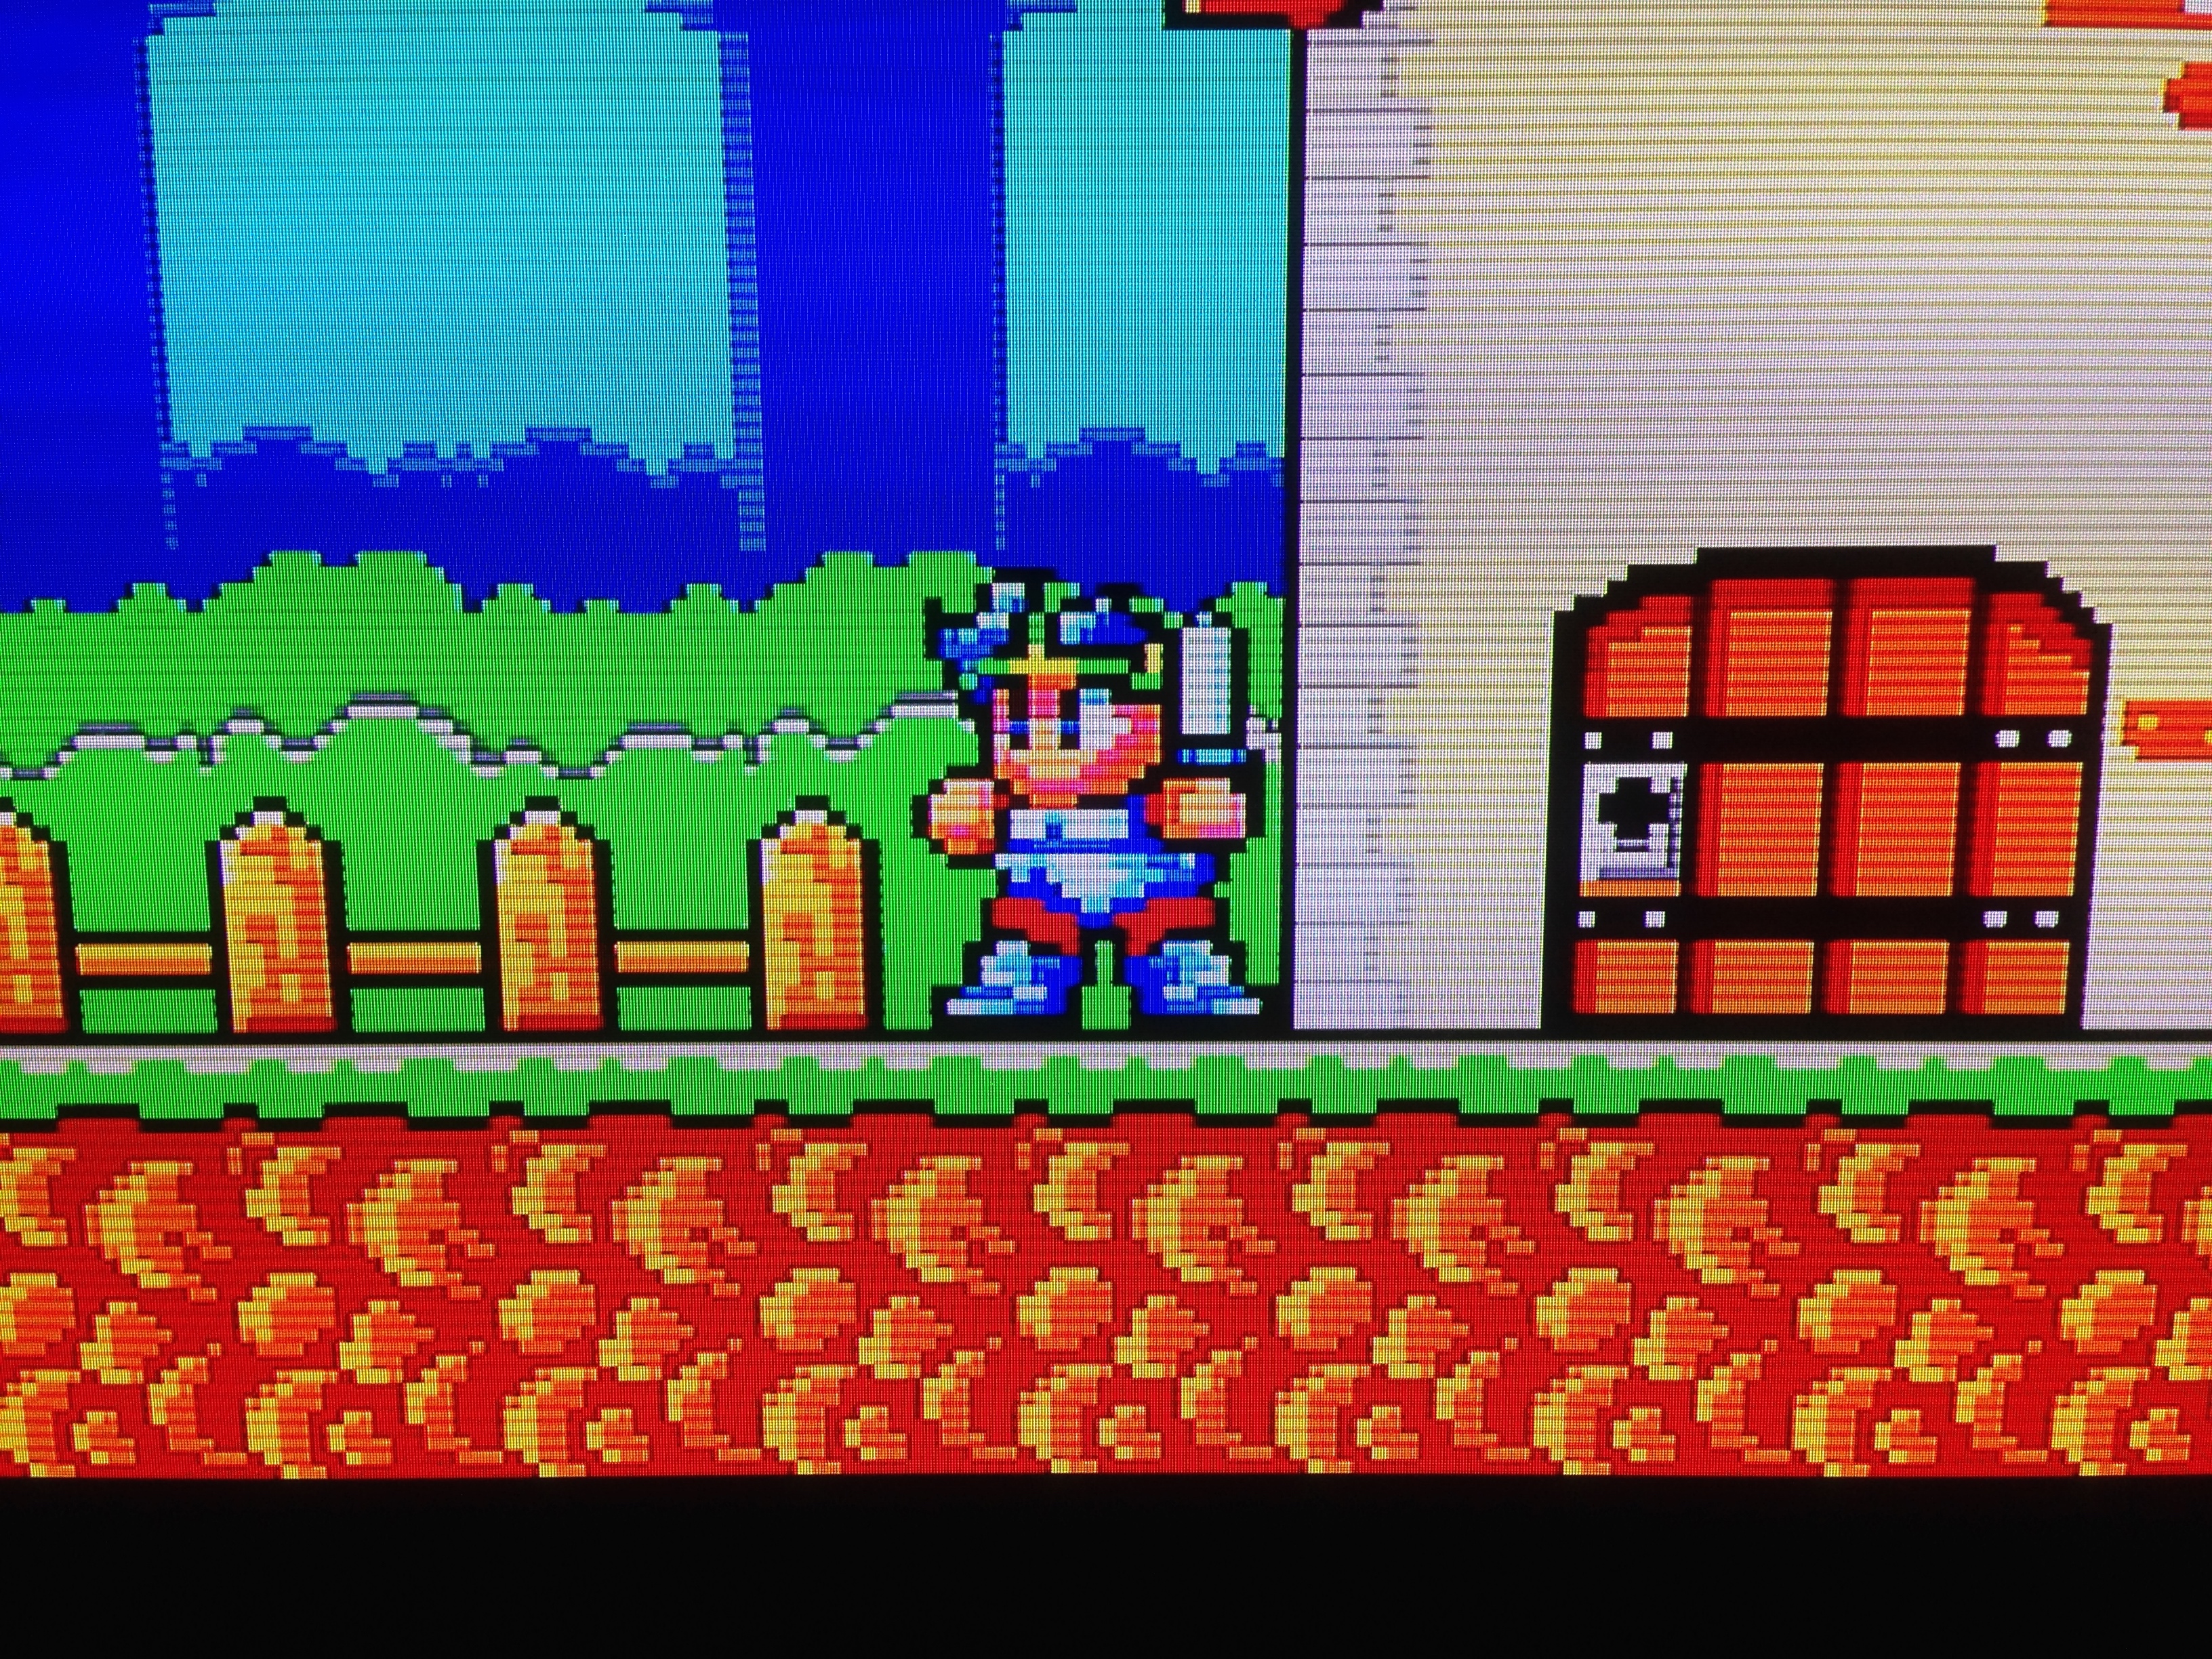
The Mark III’s composite output is pretty bad.
It does have RGB out, using the same pinout as the Master System and Mega Drive.

Unfortunately, unlike later Sega consoles, it’s an unamplified signal. So while Master System and Mega Drive RGB cables fit, the picture comes out far too dark.
I didn’t grab a picture of the native RGB output, but it looks something like this:
Rather than tamper with the console internally, I had a theory I could use the 5V and ground pins of the output to power an external RGB amplifier. I grabbed a cheap RGB cable and did a quick and dirty splice in of a THS7314 based amplifier circuit (commonly used to RGB mod Nintendo 64s), powered and grounded by the console.

Success!
The only issue was that like many older Sega consoles, it has a weak sync signal, and on my XRGB Mini some sync dropouts occurred. I needed to boost the sync as well. I was feeling lazy so rather than do this myself, I ordered a Mega Drive RGB cable with boosted sync built into the scart plug. It is also powered by the 5V output of the console, but I’ll wire my amp in parallel and there should be plenty of current available.
An additional complication is that when using the FM unit, you only get composite video. You route video through the FM unit, which mixes in the FM audio when appropriate and outputs both video and audio from its own AV out. But it’s only a 5 pin din, so no RGB.


I did some quick tests, and due to the way the circuit of the FM unit is designed, you can tap the FM audio from both the input and the output. So I’ll be able to use the existing cable of the FM unit as my FM sound source.
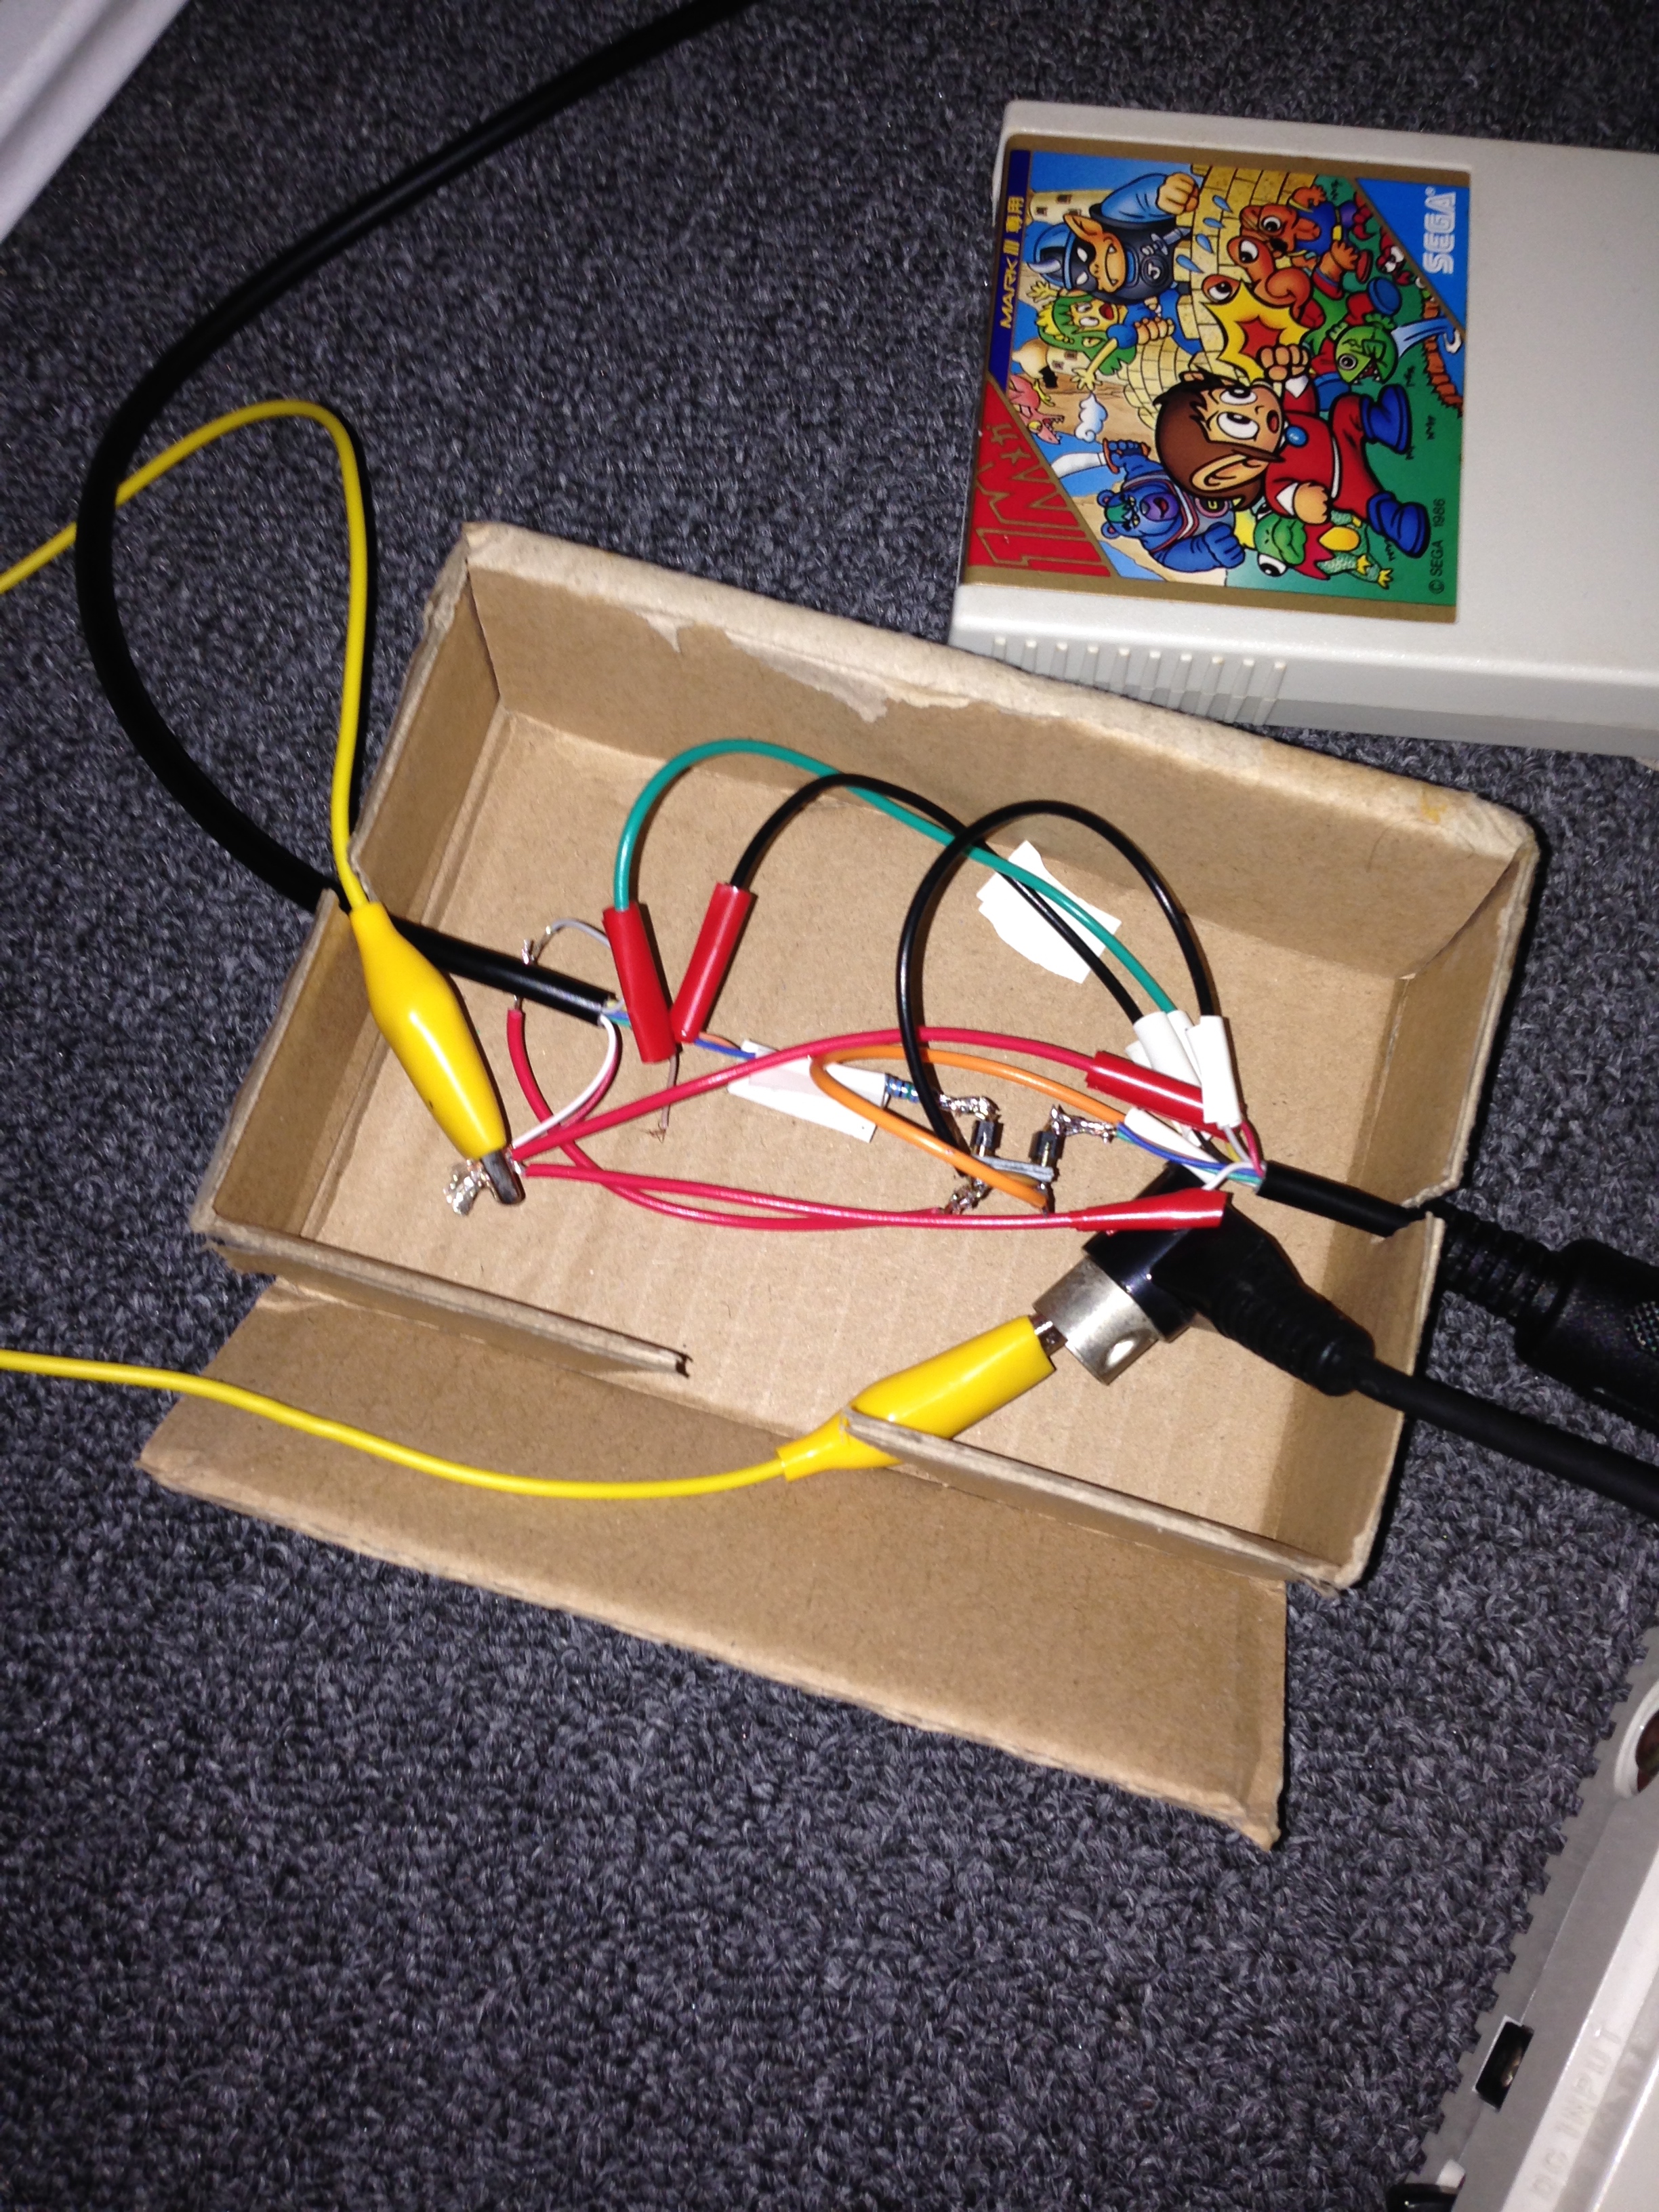
Works perfectly! But doesn’t look too nice like that…

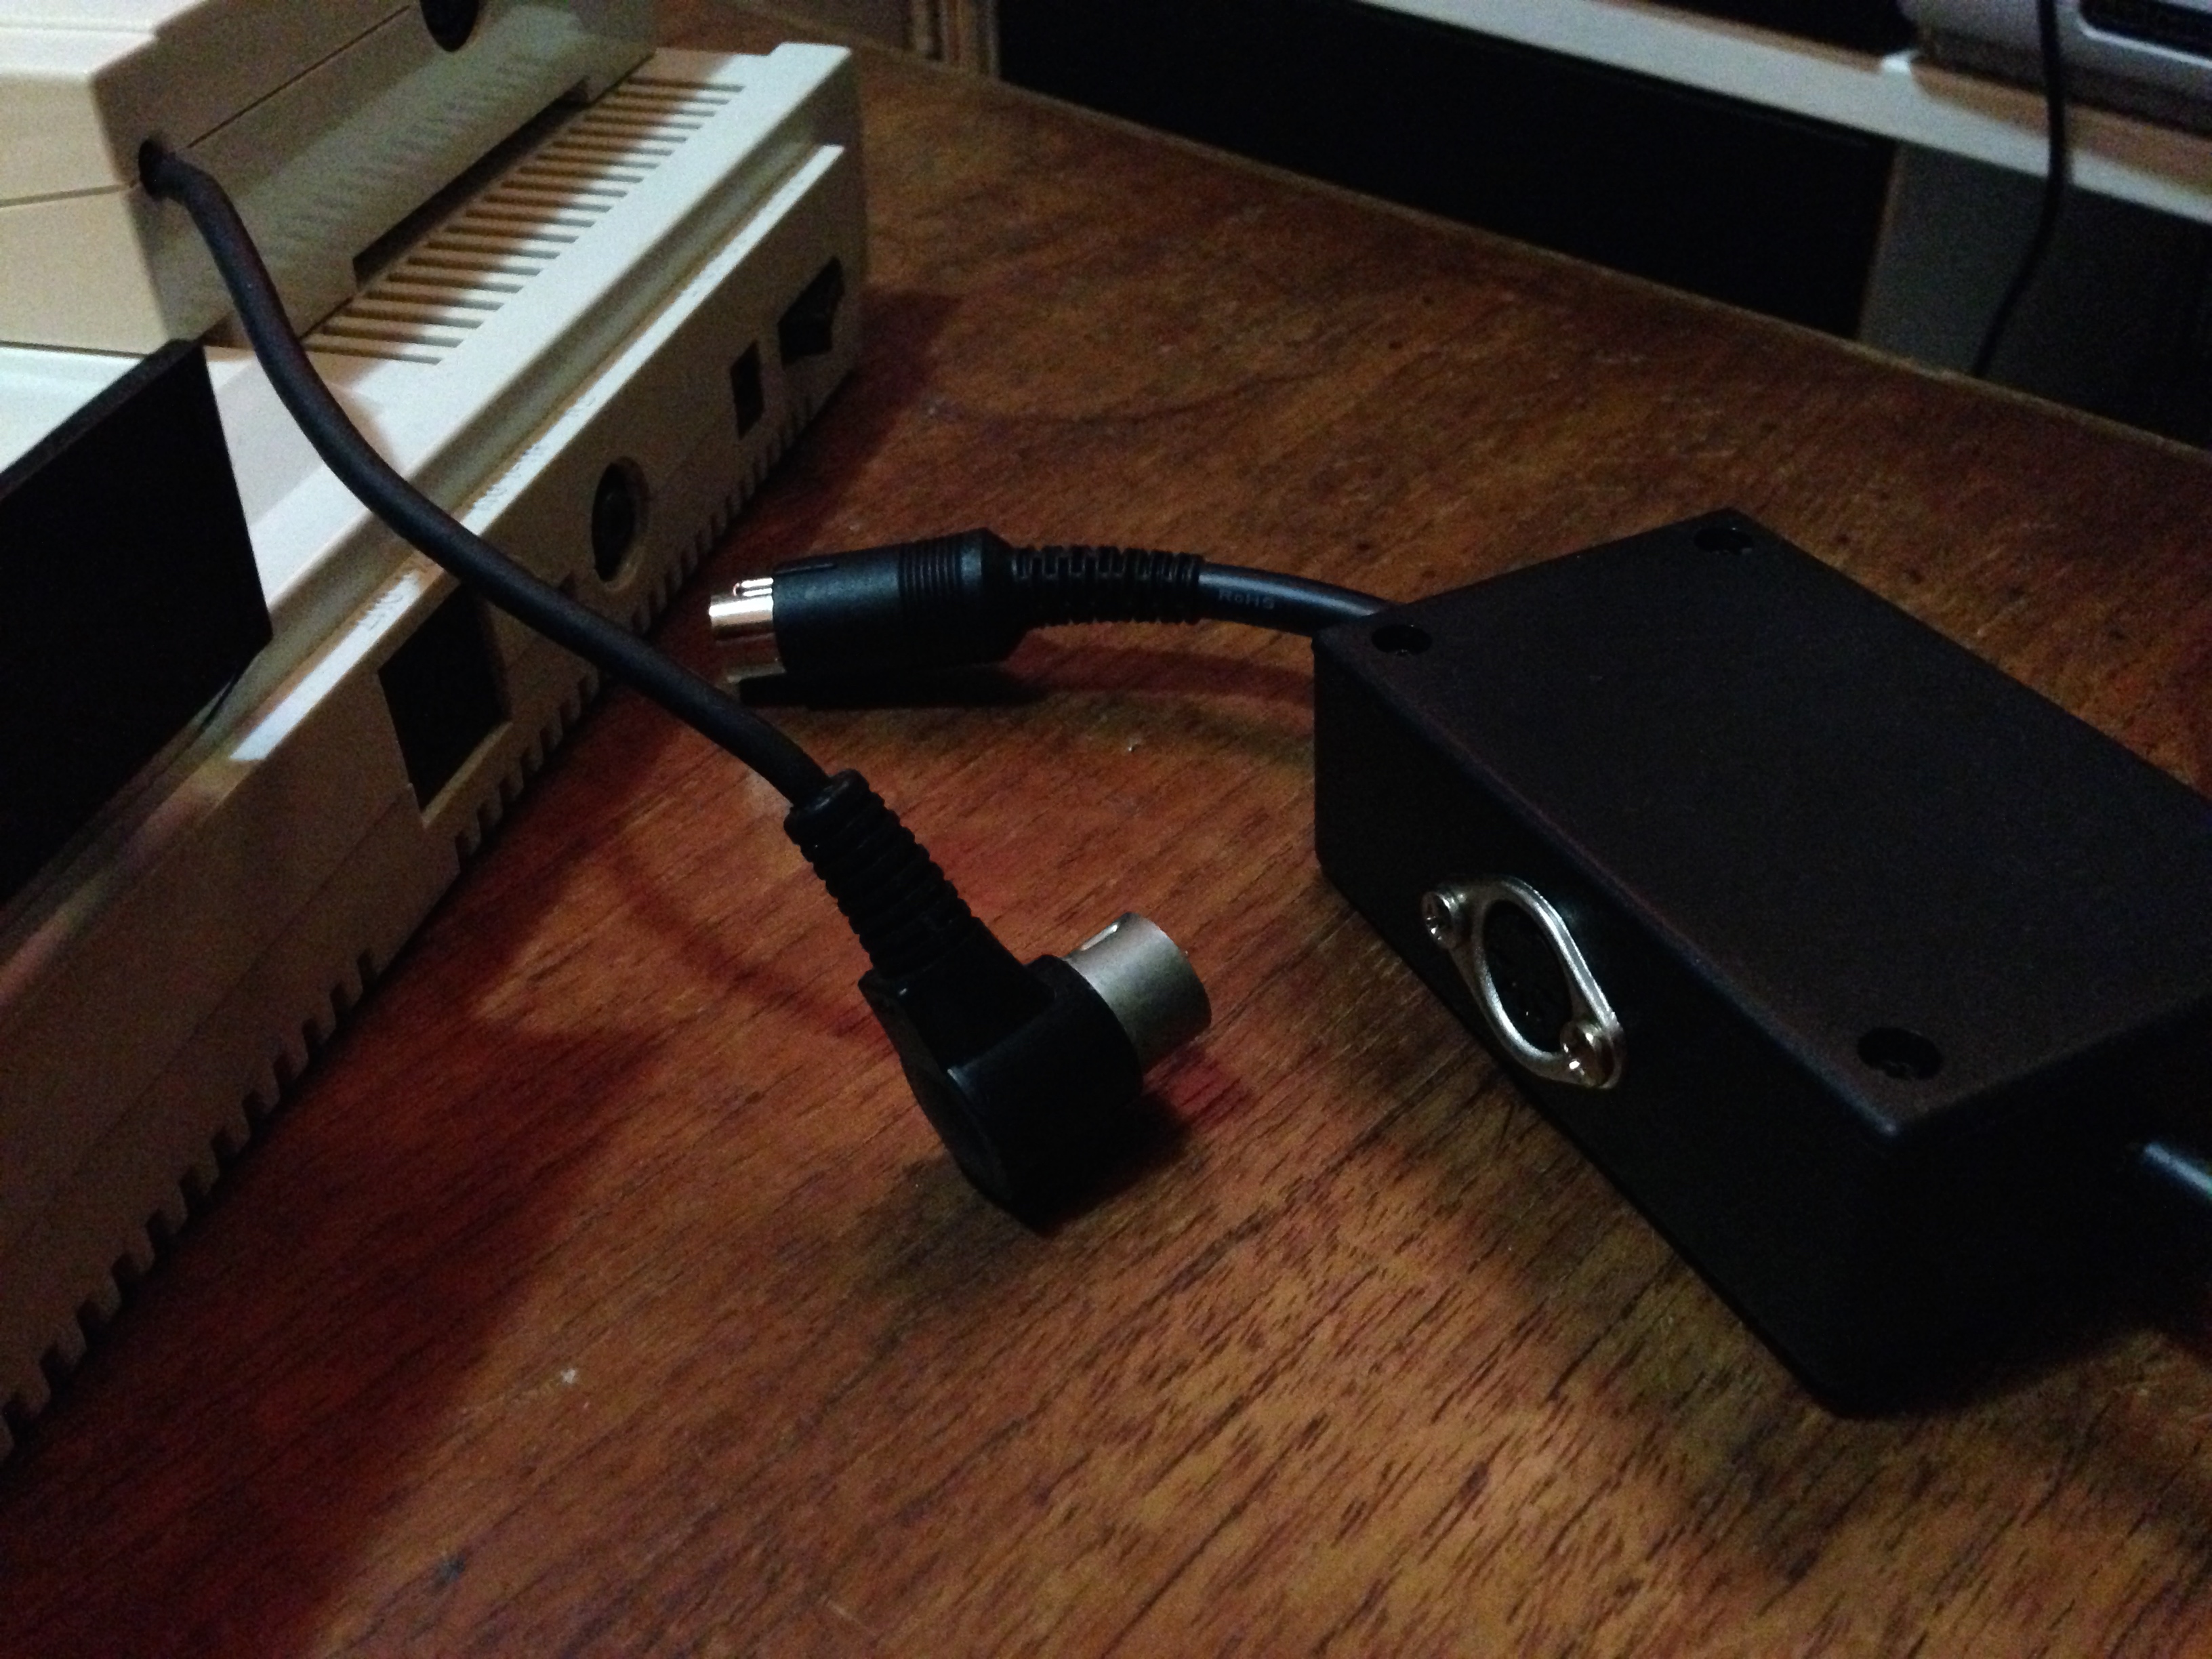
So now I have to get the whole thing into a little project box. I drilled the holes and sliced up my new (nicely shielded) RGB cable. In this pic you can see I’ve added a 5-pin DIN socket to one side, with four of the output pins removed. This is where I’ll splice in the FM audio.

So many wires to fit in. Red, blue, green, sync, 5V, audio… luckily most of the rest are ground, so I can just solder them together and connect them with a single wire. I could just leave them disconnected, but I want good grounding to prevent possible interference, which is common for poorly grounded scart cables.

With the video circuit working, I also lined up the wires and glued them in place, so nothing can be pulled out by the inevitable cord-trip that will happen sometime in the future.
Disaster struck just before I finished – the picture was too bright! It turned out my new scart cable was wired differently, and was missing some 25 ohm resistors on the RGB lines. So I pulled them from the old one and spliced them in carefully, in series with the 75 ohm resistors already built into my amp circuit. Now what was once a halfway neat job became a mess again, oh well.
I also completed the audio circuit, spliced in the FM audio pin of the din socket, and closed up the box.

It connects like so. I have oriented it toward the right of the console, because the power cable connects on the left.

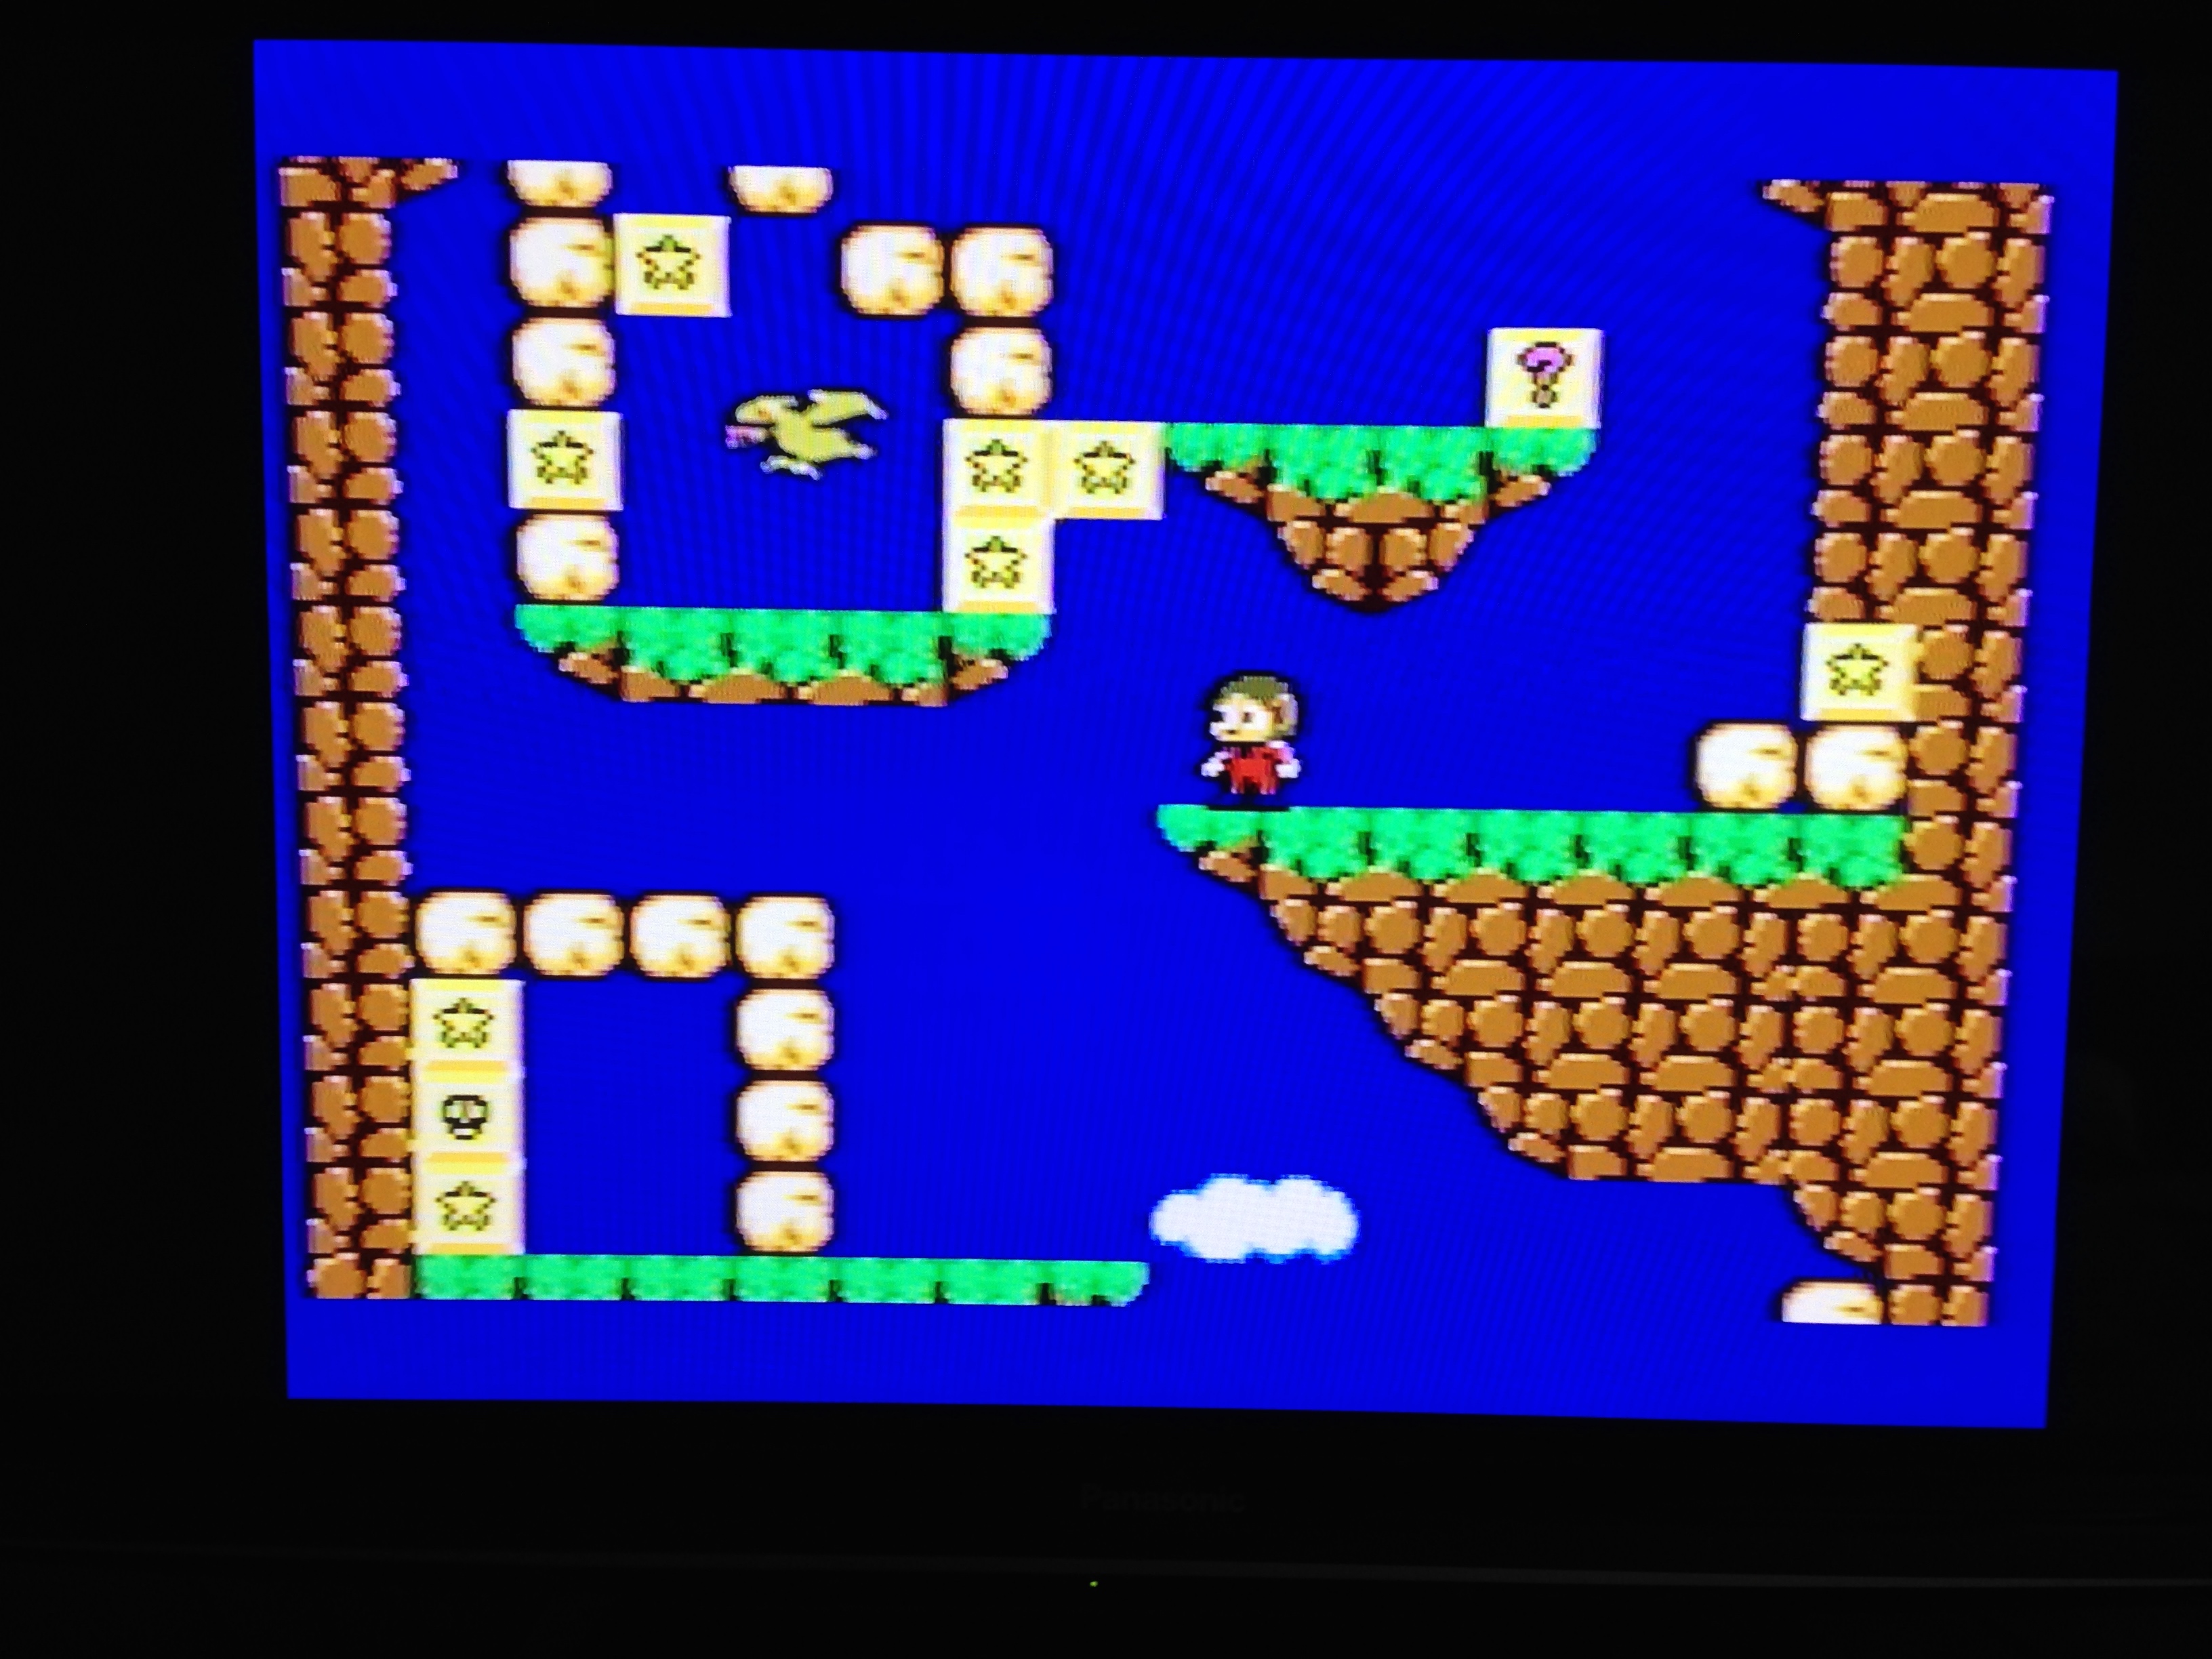
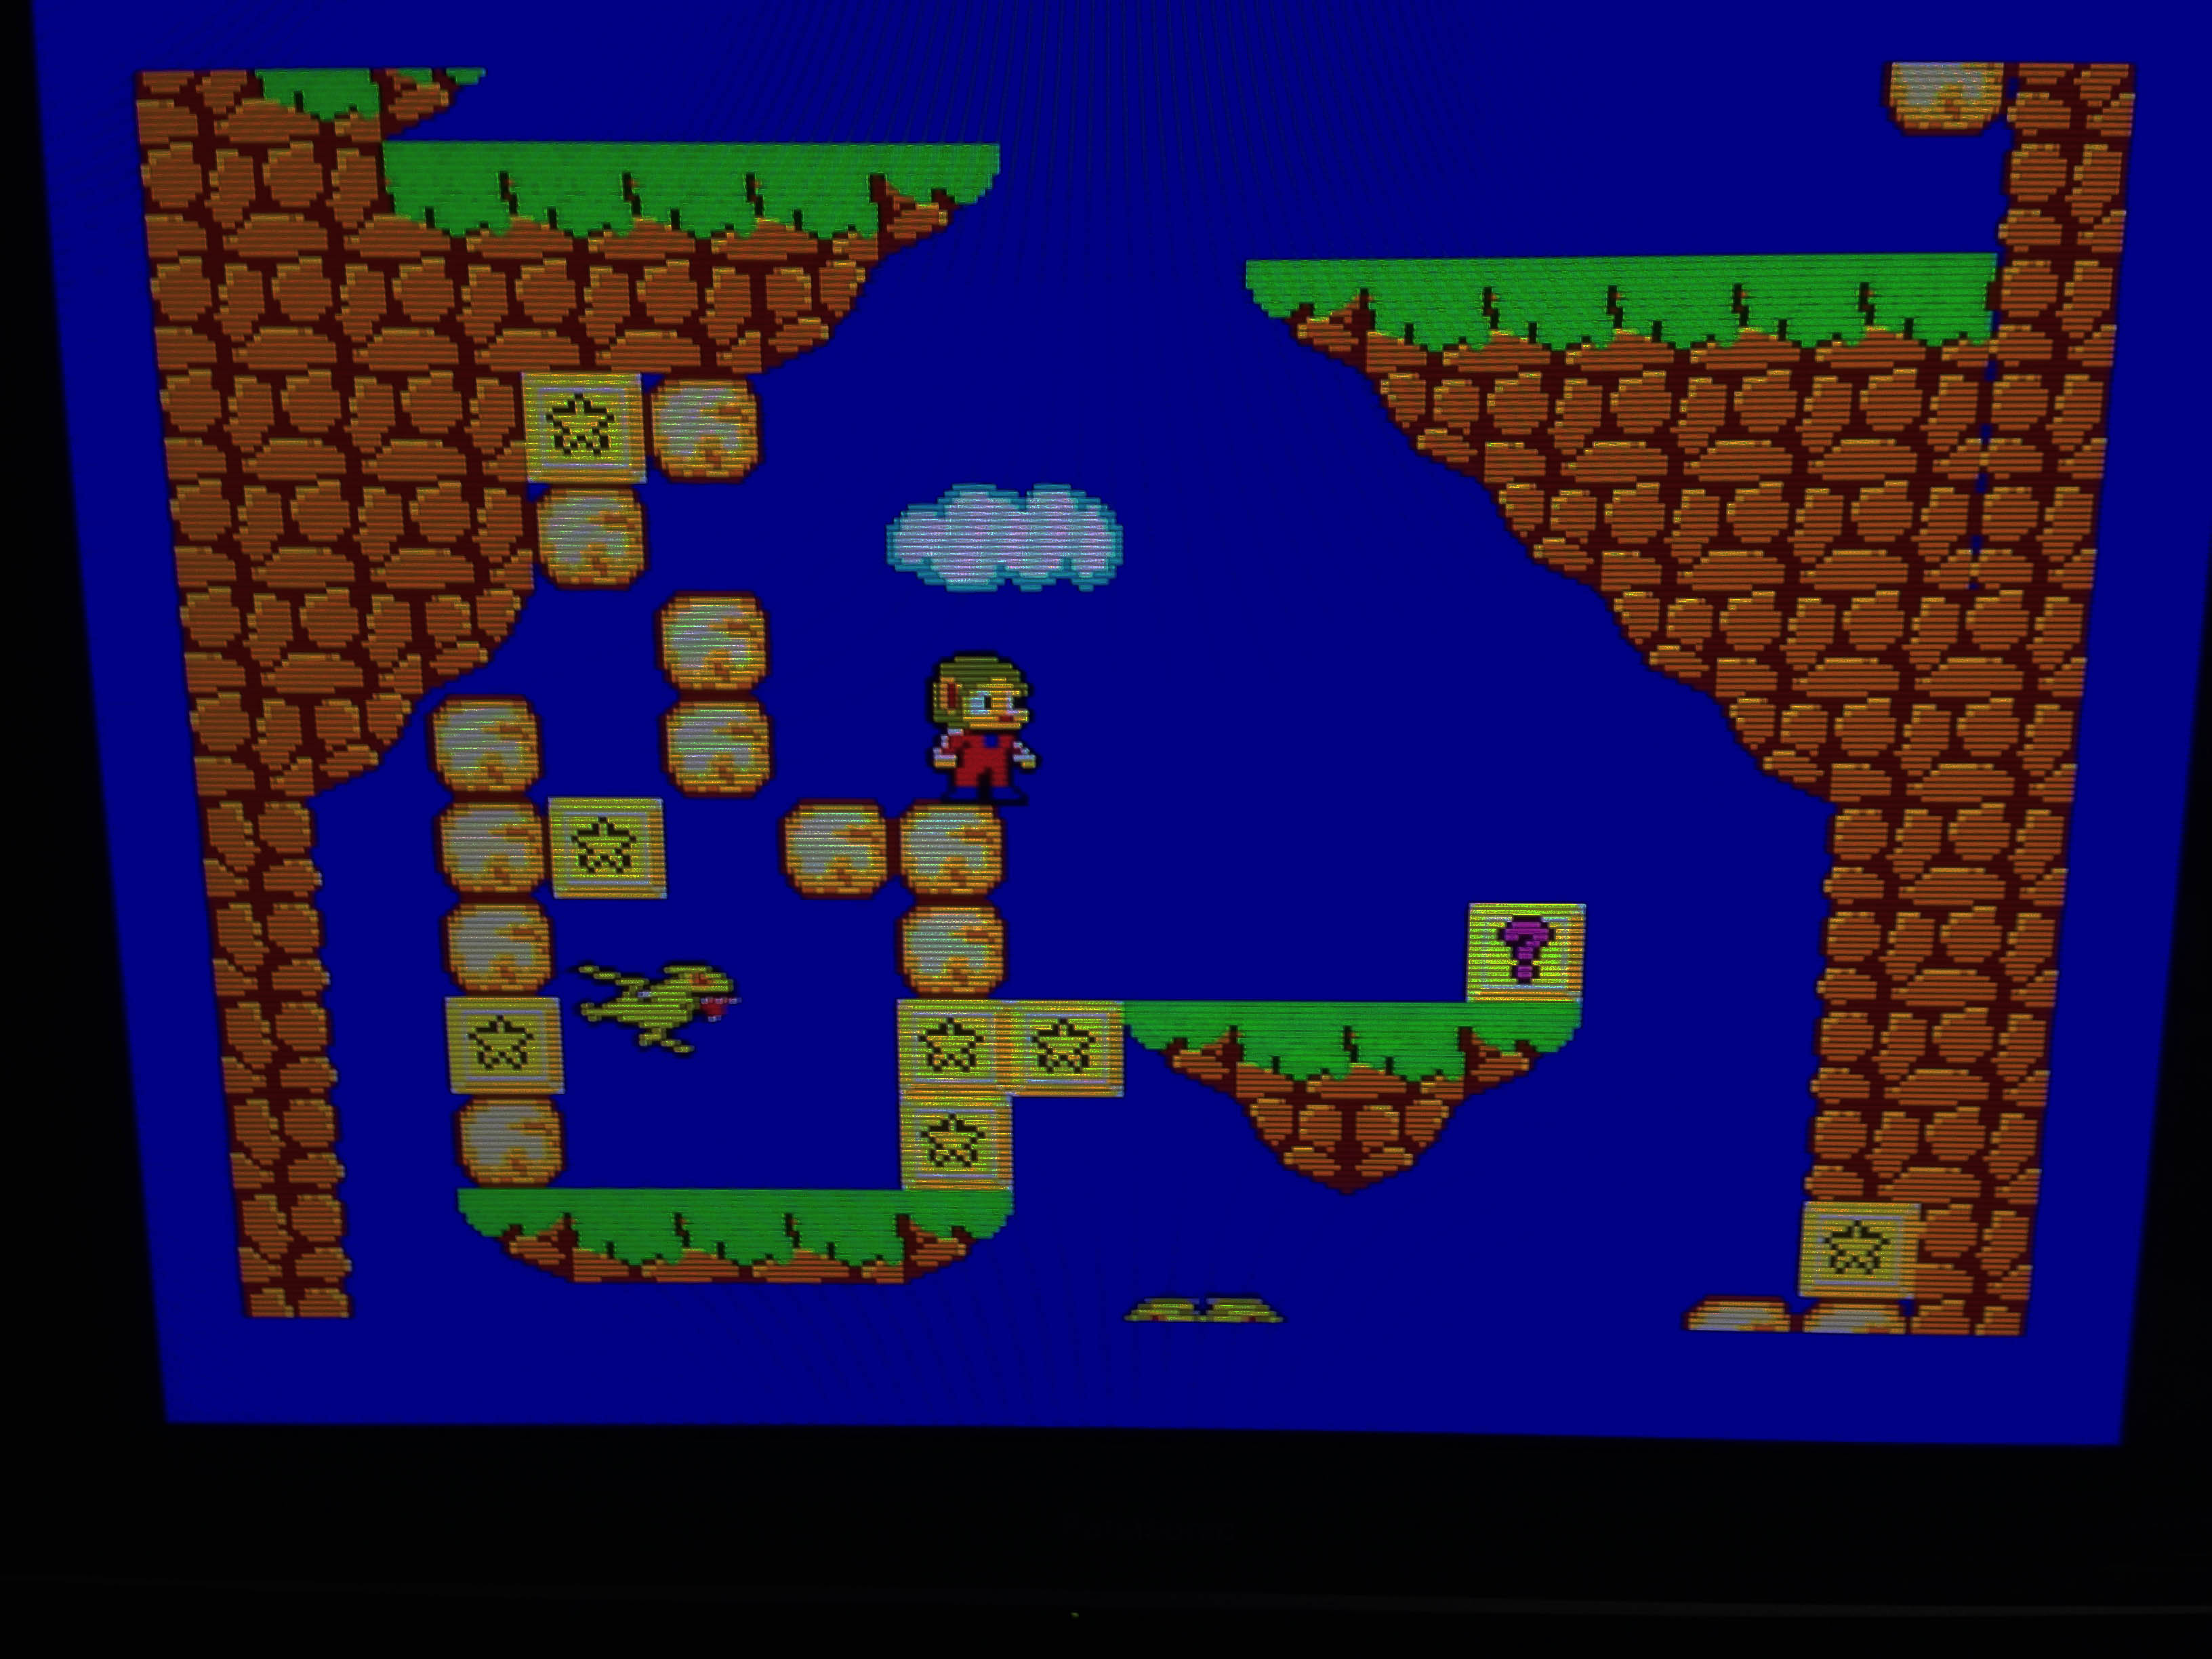
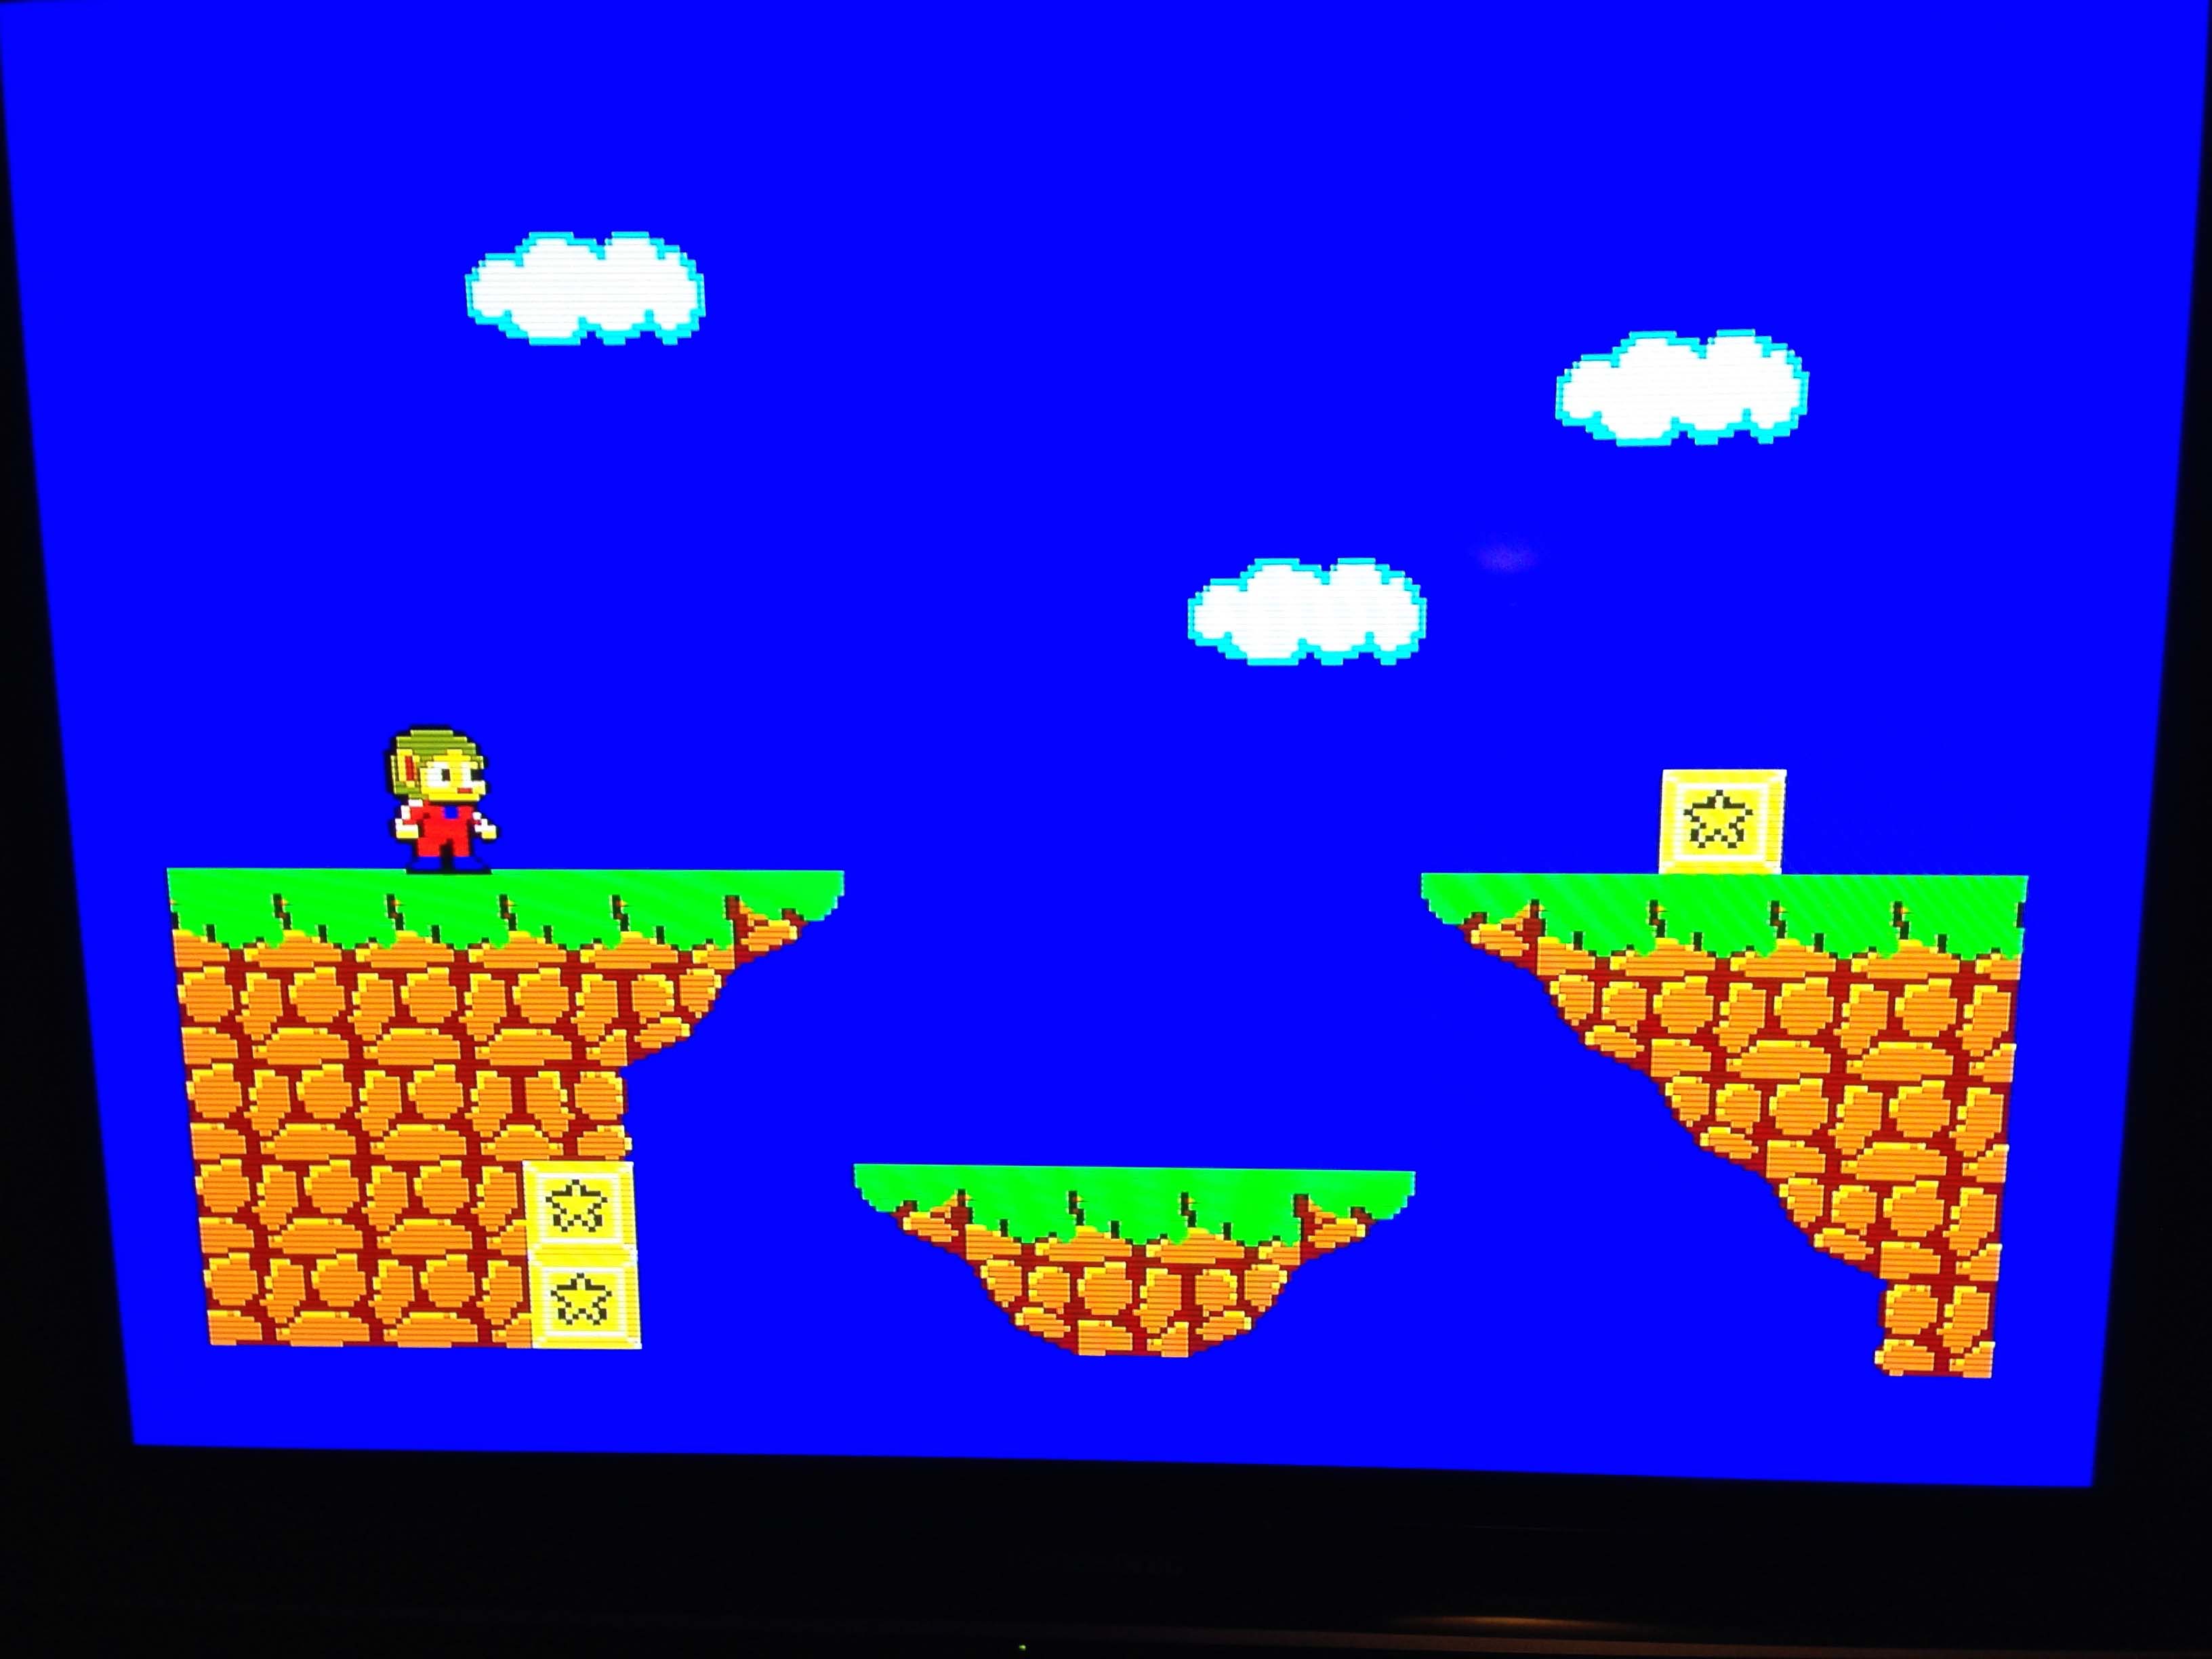
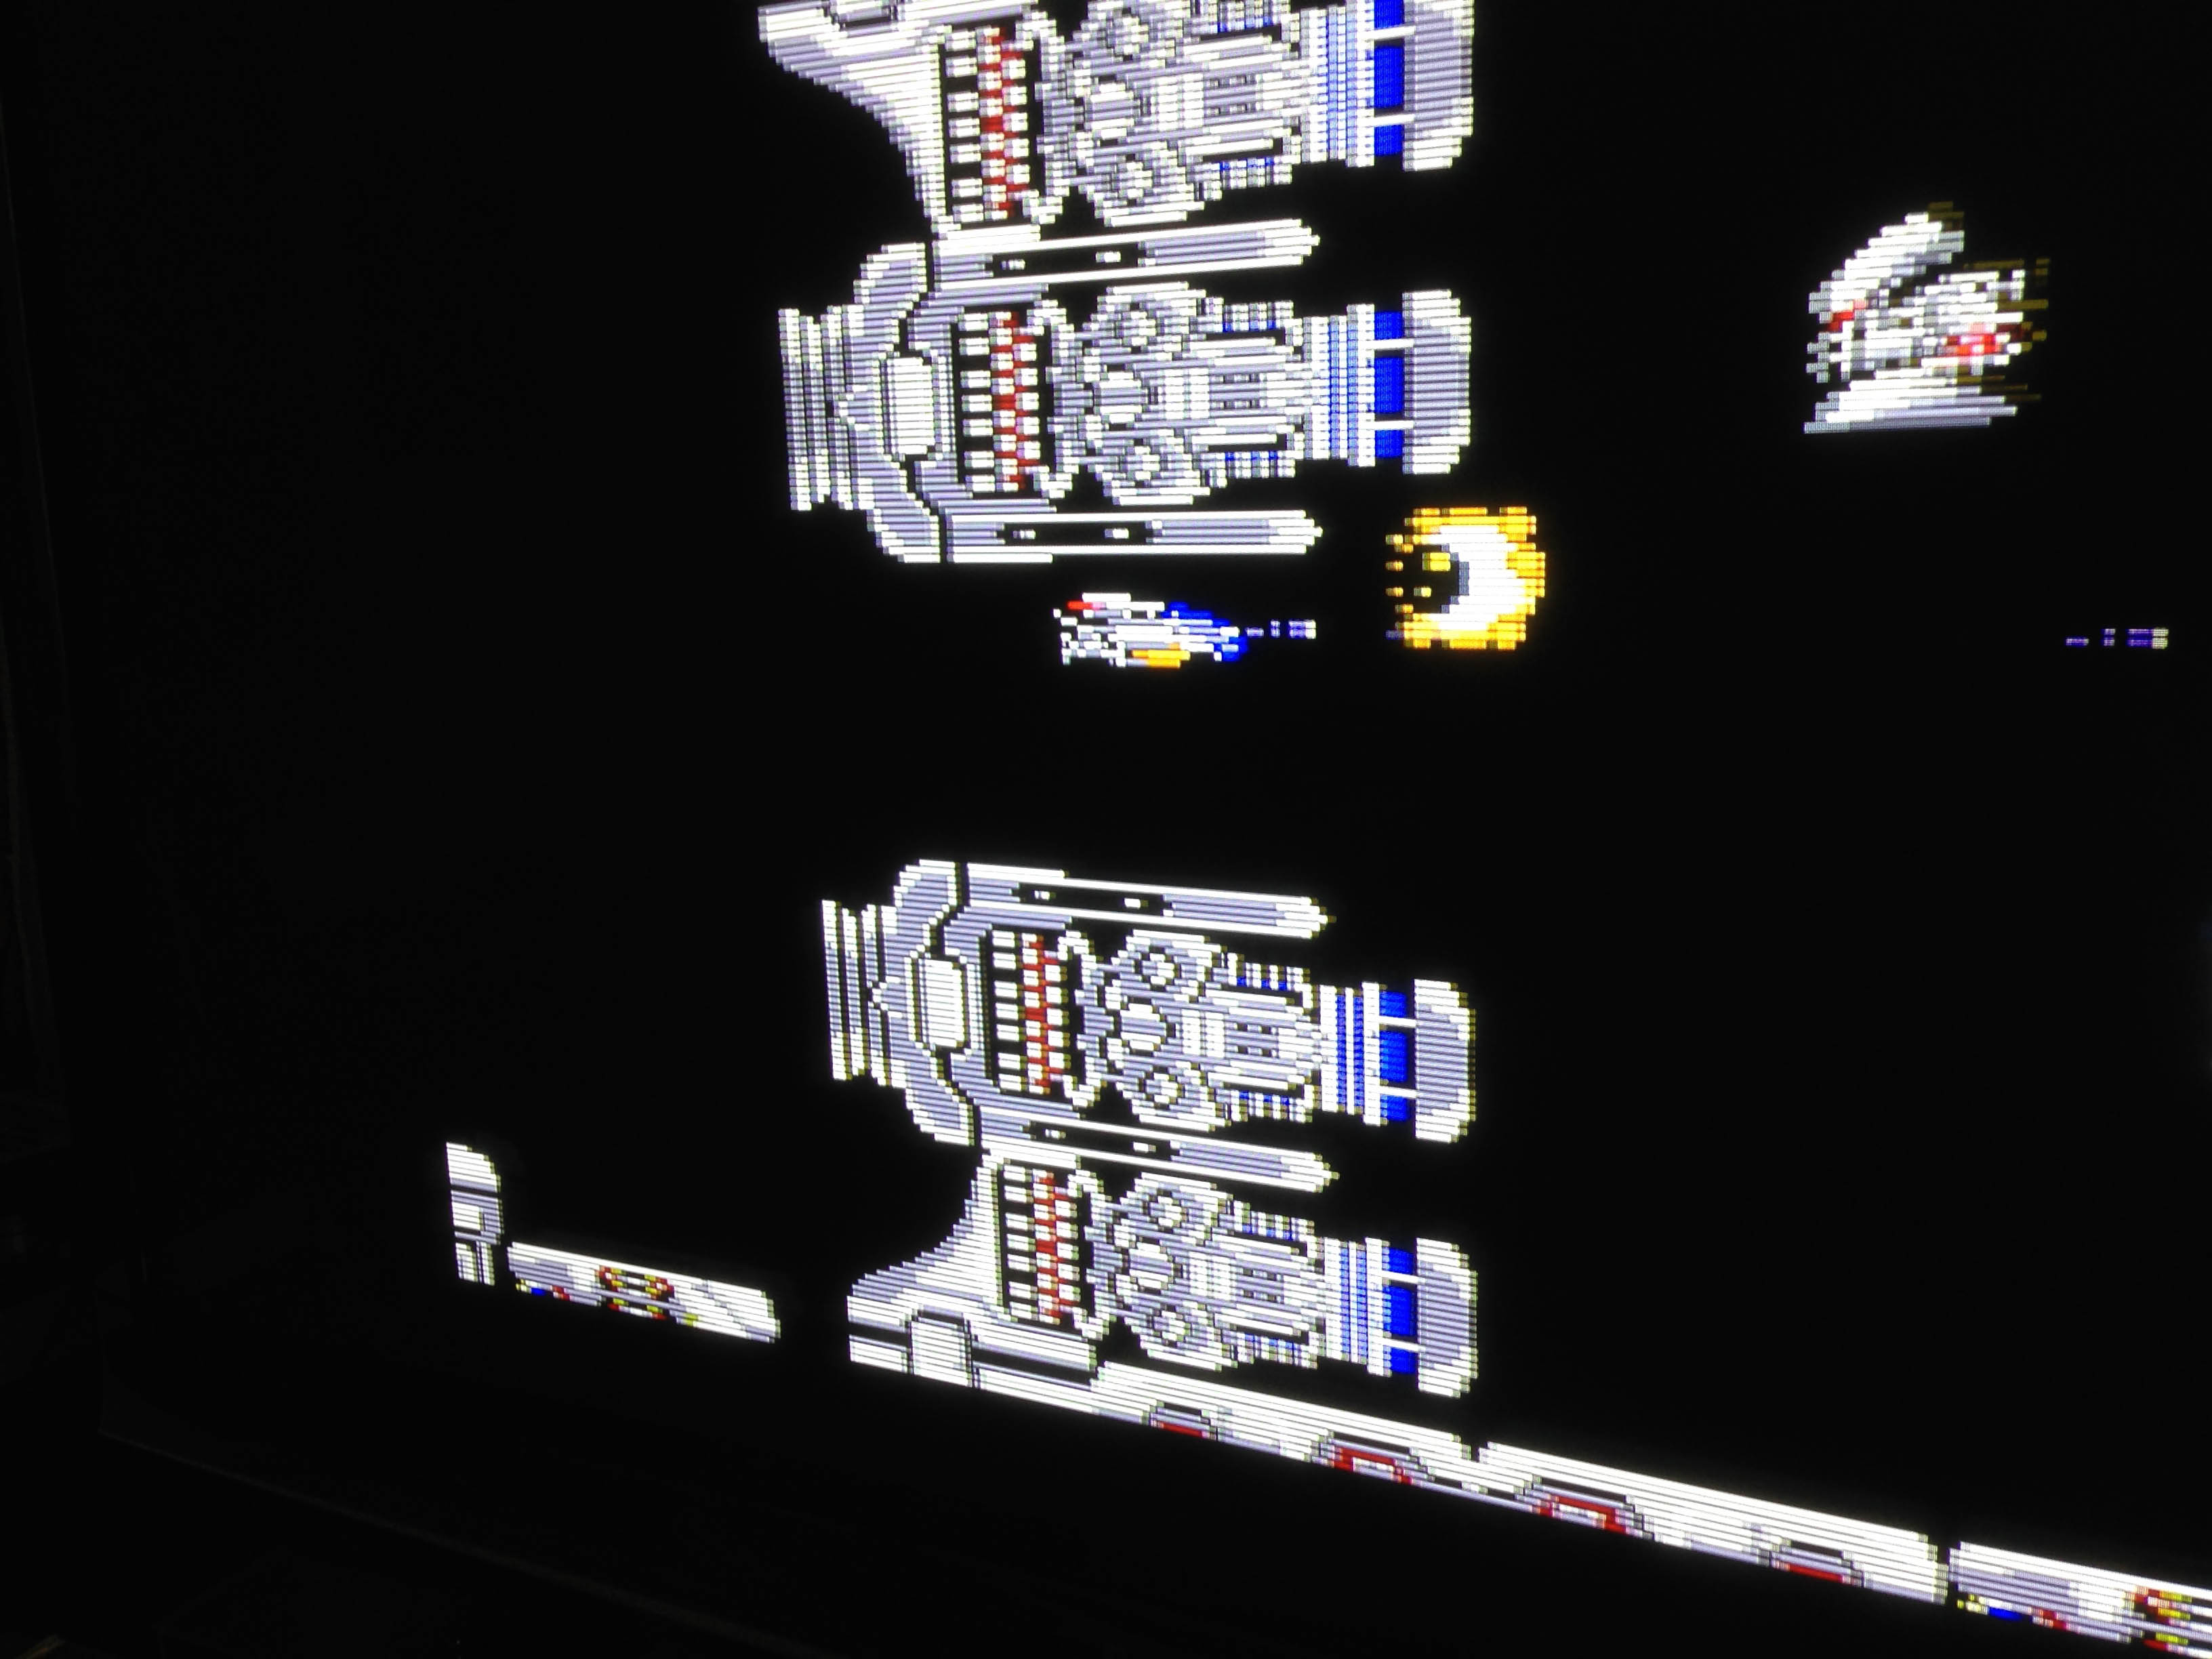
And the results, all through an XRGB Mini to my Panasonic Plasma:


I just bought a Mark III, could you make me one of these?
LikeLike
Hi Steve, it would be quite expensive, the parts would only be $50ish but there is a lot of labour involved.
LikeLike
Could you email me? Yodonlicenavigator@gmail.com
LikeLike