Sega Mark III Telecon Pack (テレコンパック)

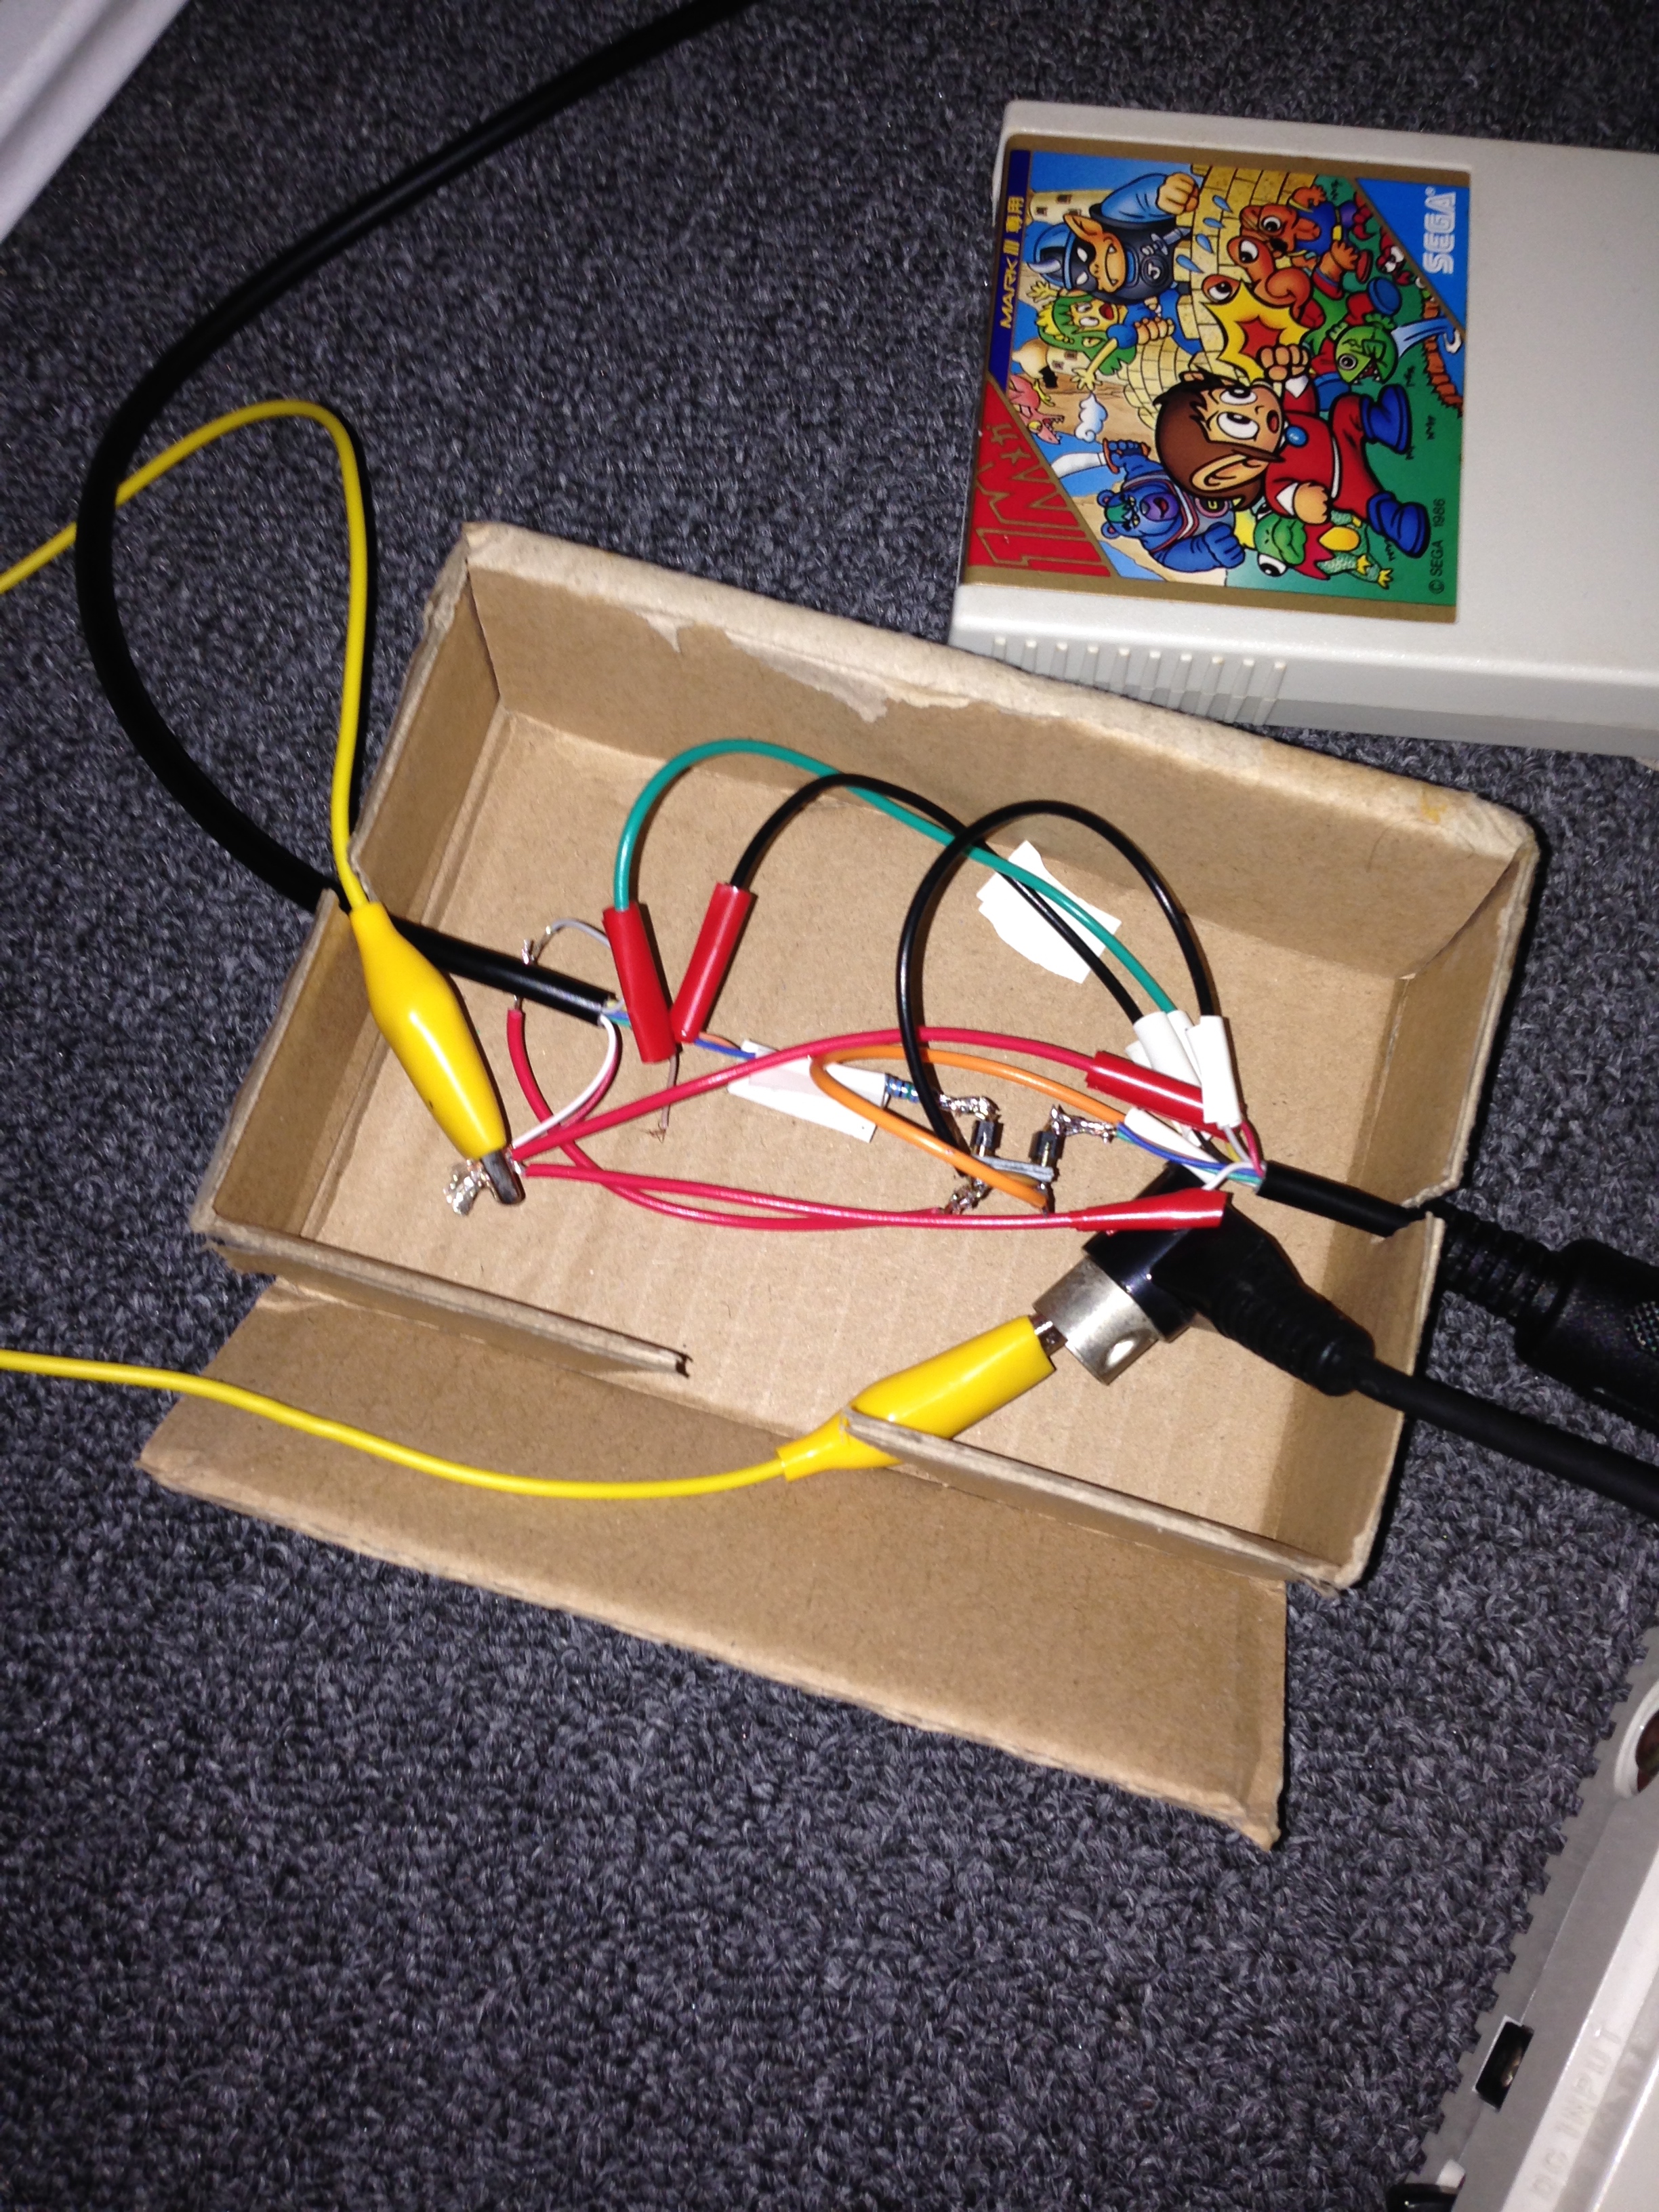
The Telecon Pack is a radio frequency broadcaster for the Mark III.

Sega really went nuts with the accessories in the 80s, but this one makes a lot of sense from a Japanese perspective. In Japan, consoles were designed to sit near the player, and run a long cord to the television. This is the reason Japanese controller cords are so short, and why the SG1000, Mark III and Master System have the pause button on the console – because it was assumed you’d have the console next to you on when playing.

The Telecon Pack would allow you to have the console on a side table at the back of the room with power cord tucked away, and avoid needing a wire to the television for the video and audio.

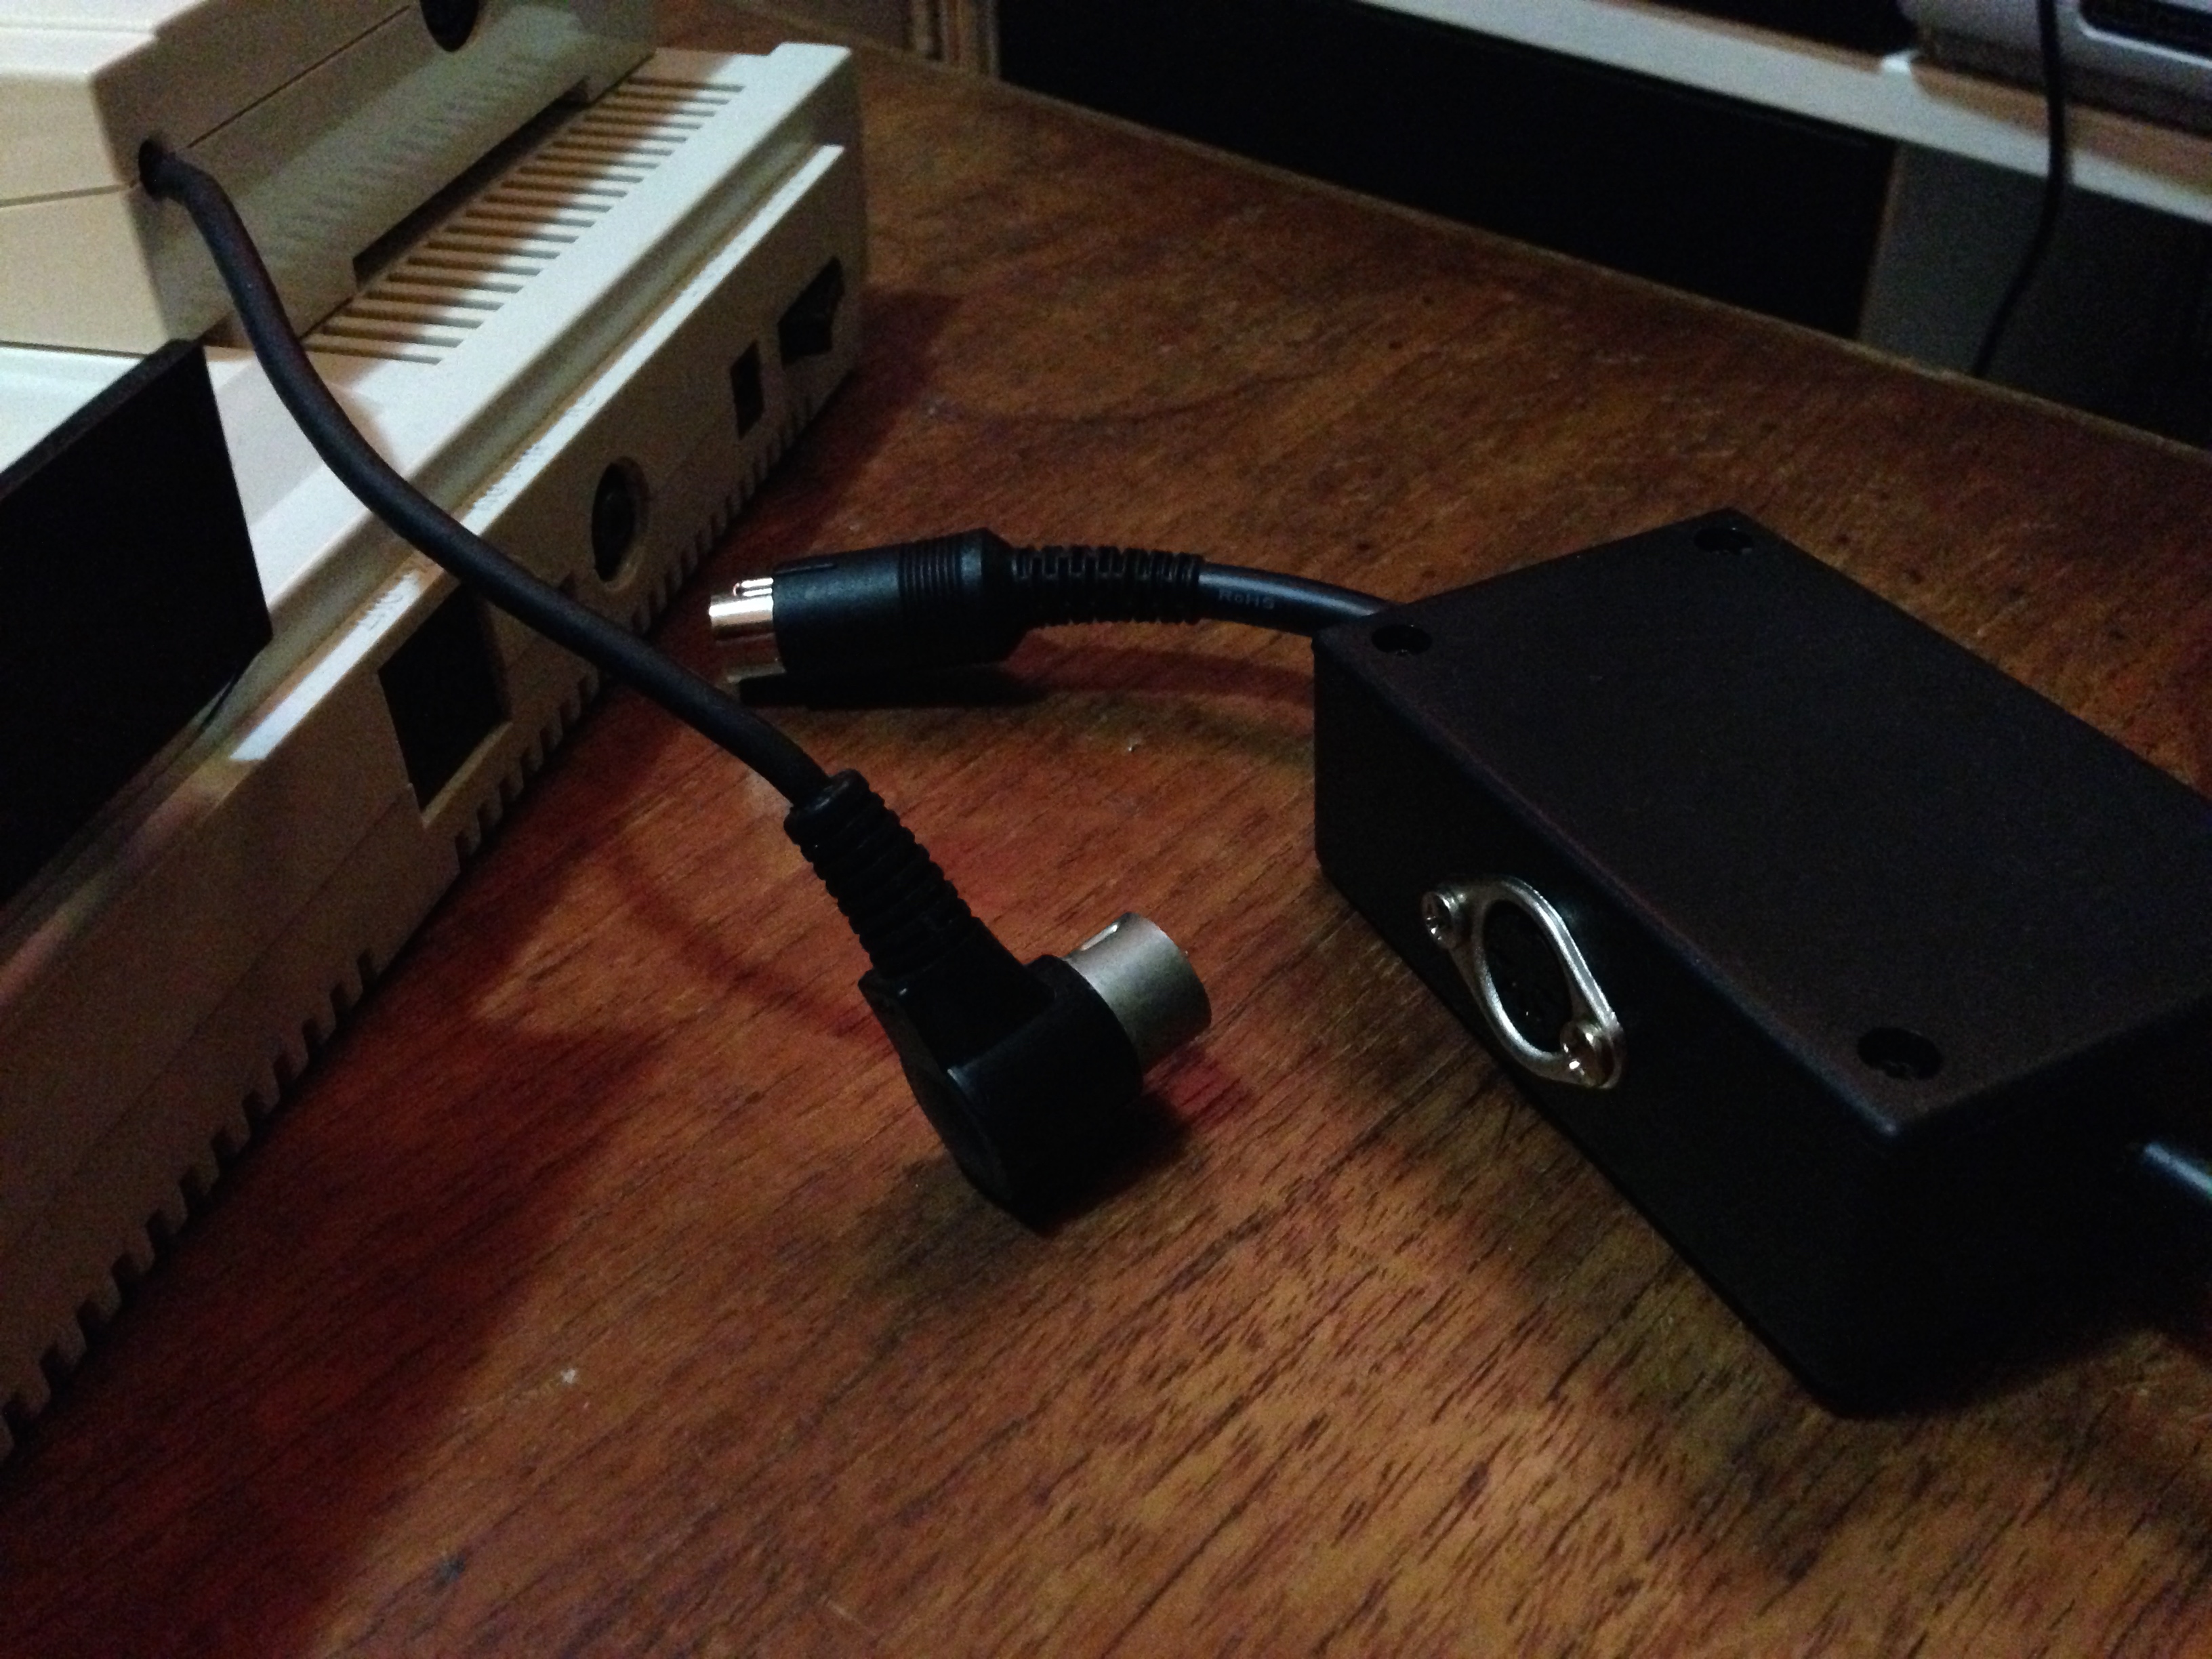
It connects via the AV port, and then broadcasts the composite signal via a Japanese TV channel.

It originally came with a satellite dish you could plug into your TV for reception, which I don’t have right now.

Picture courtesy of Sega Retro

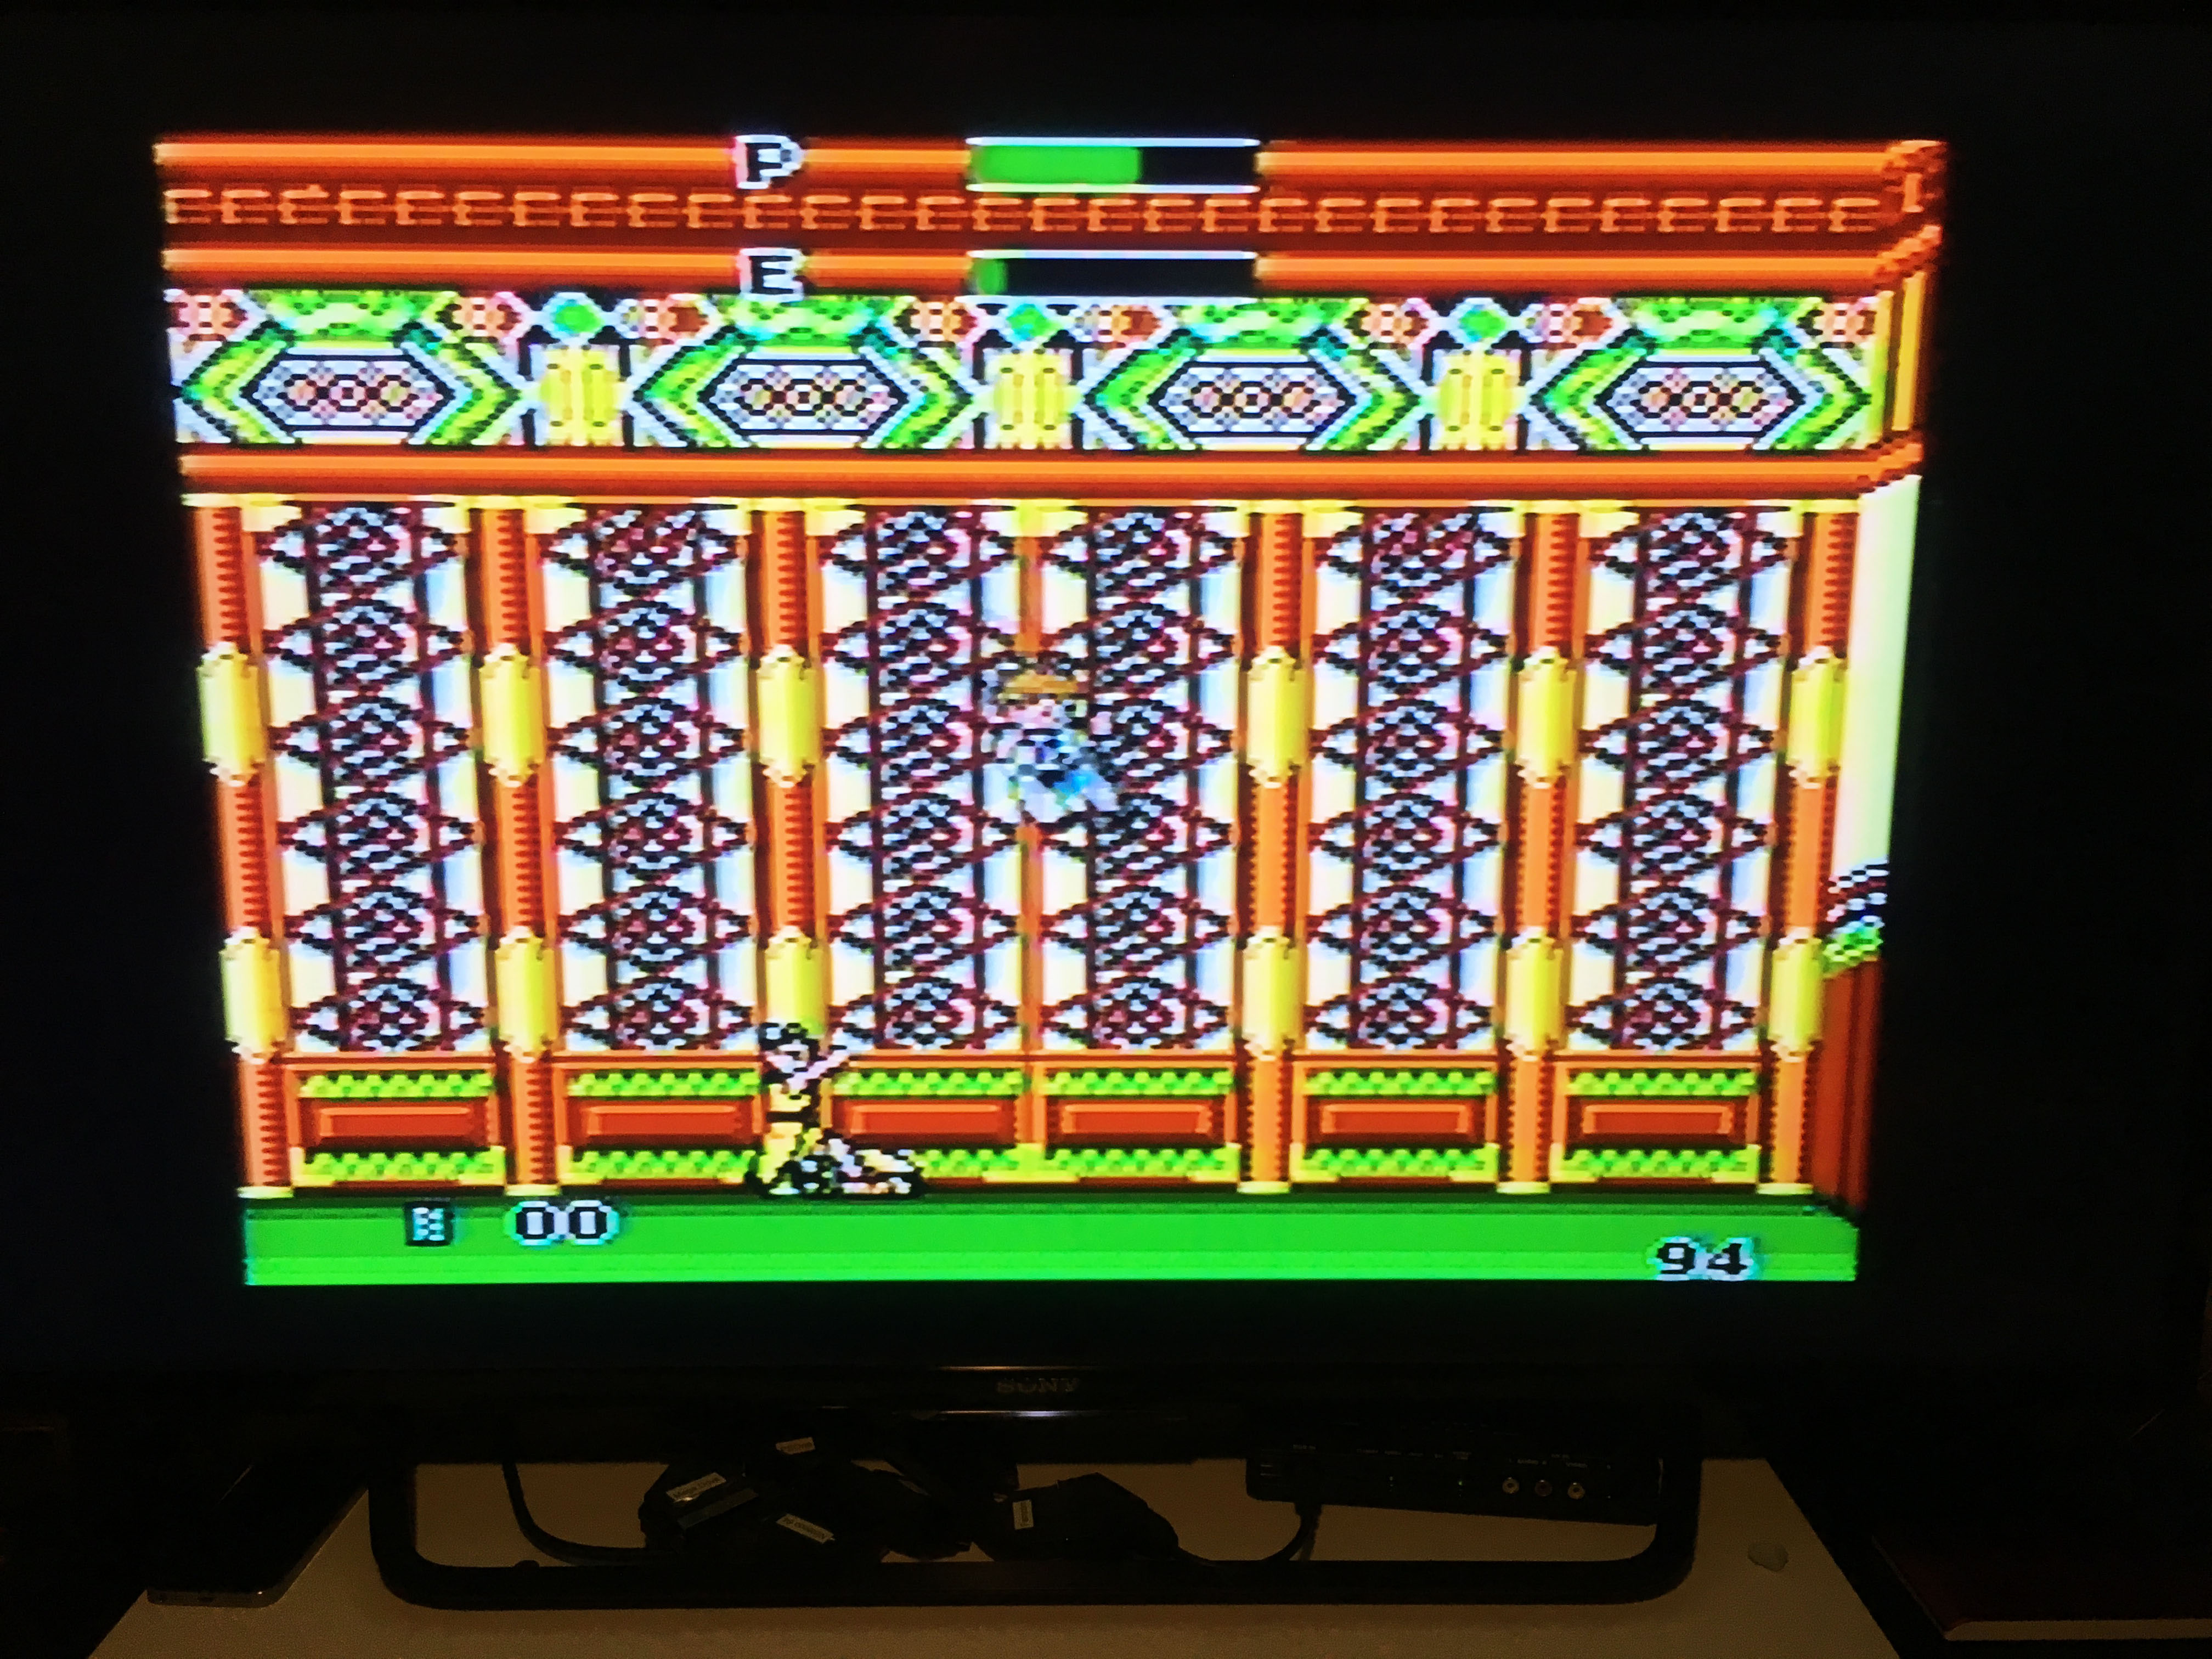
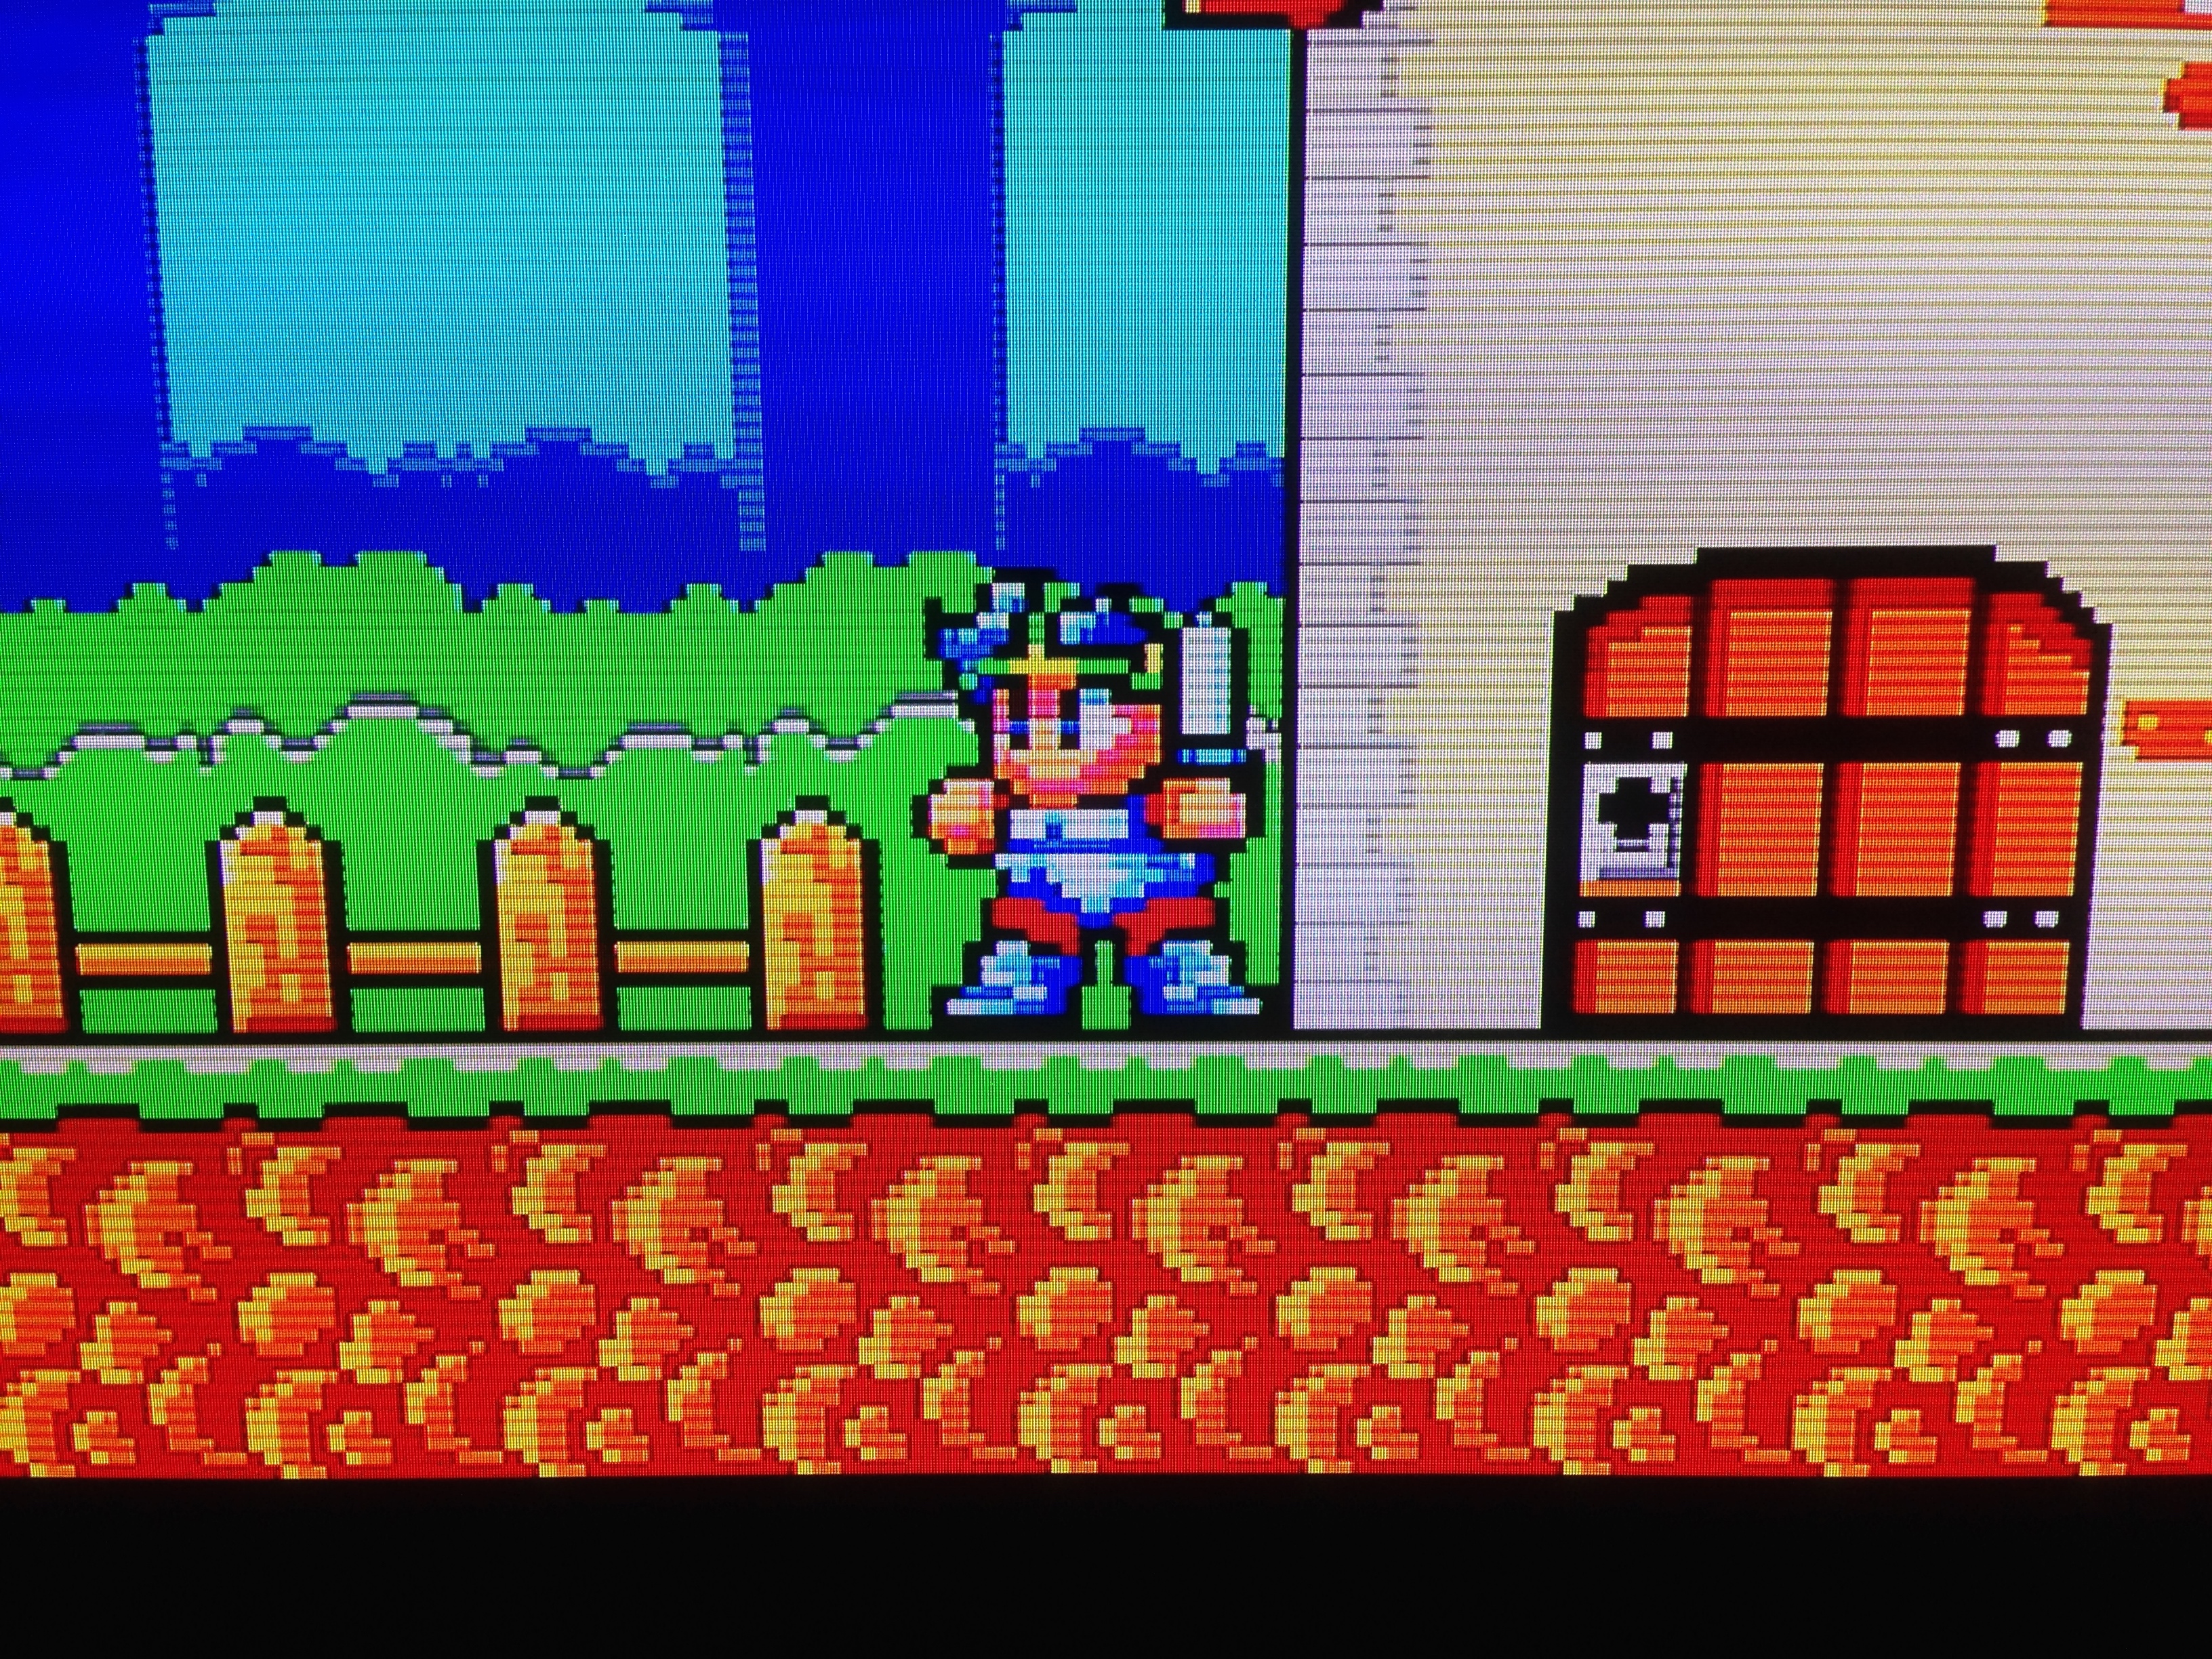
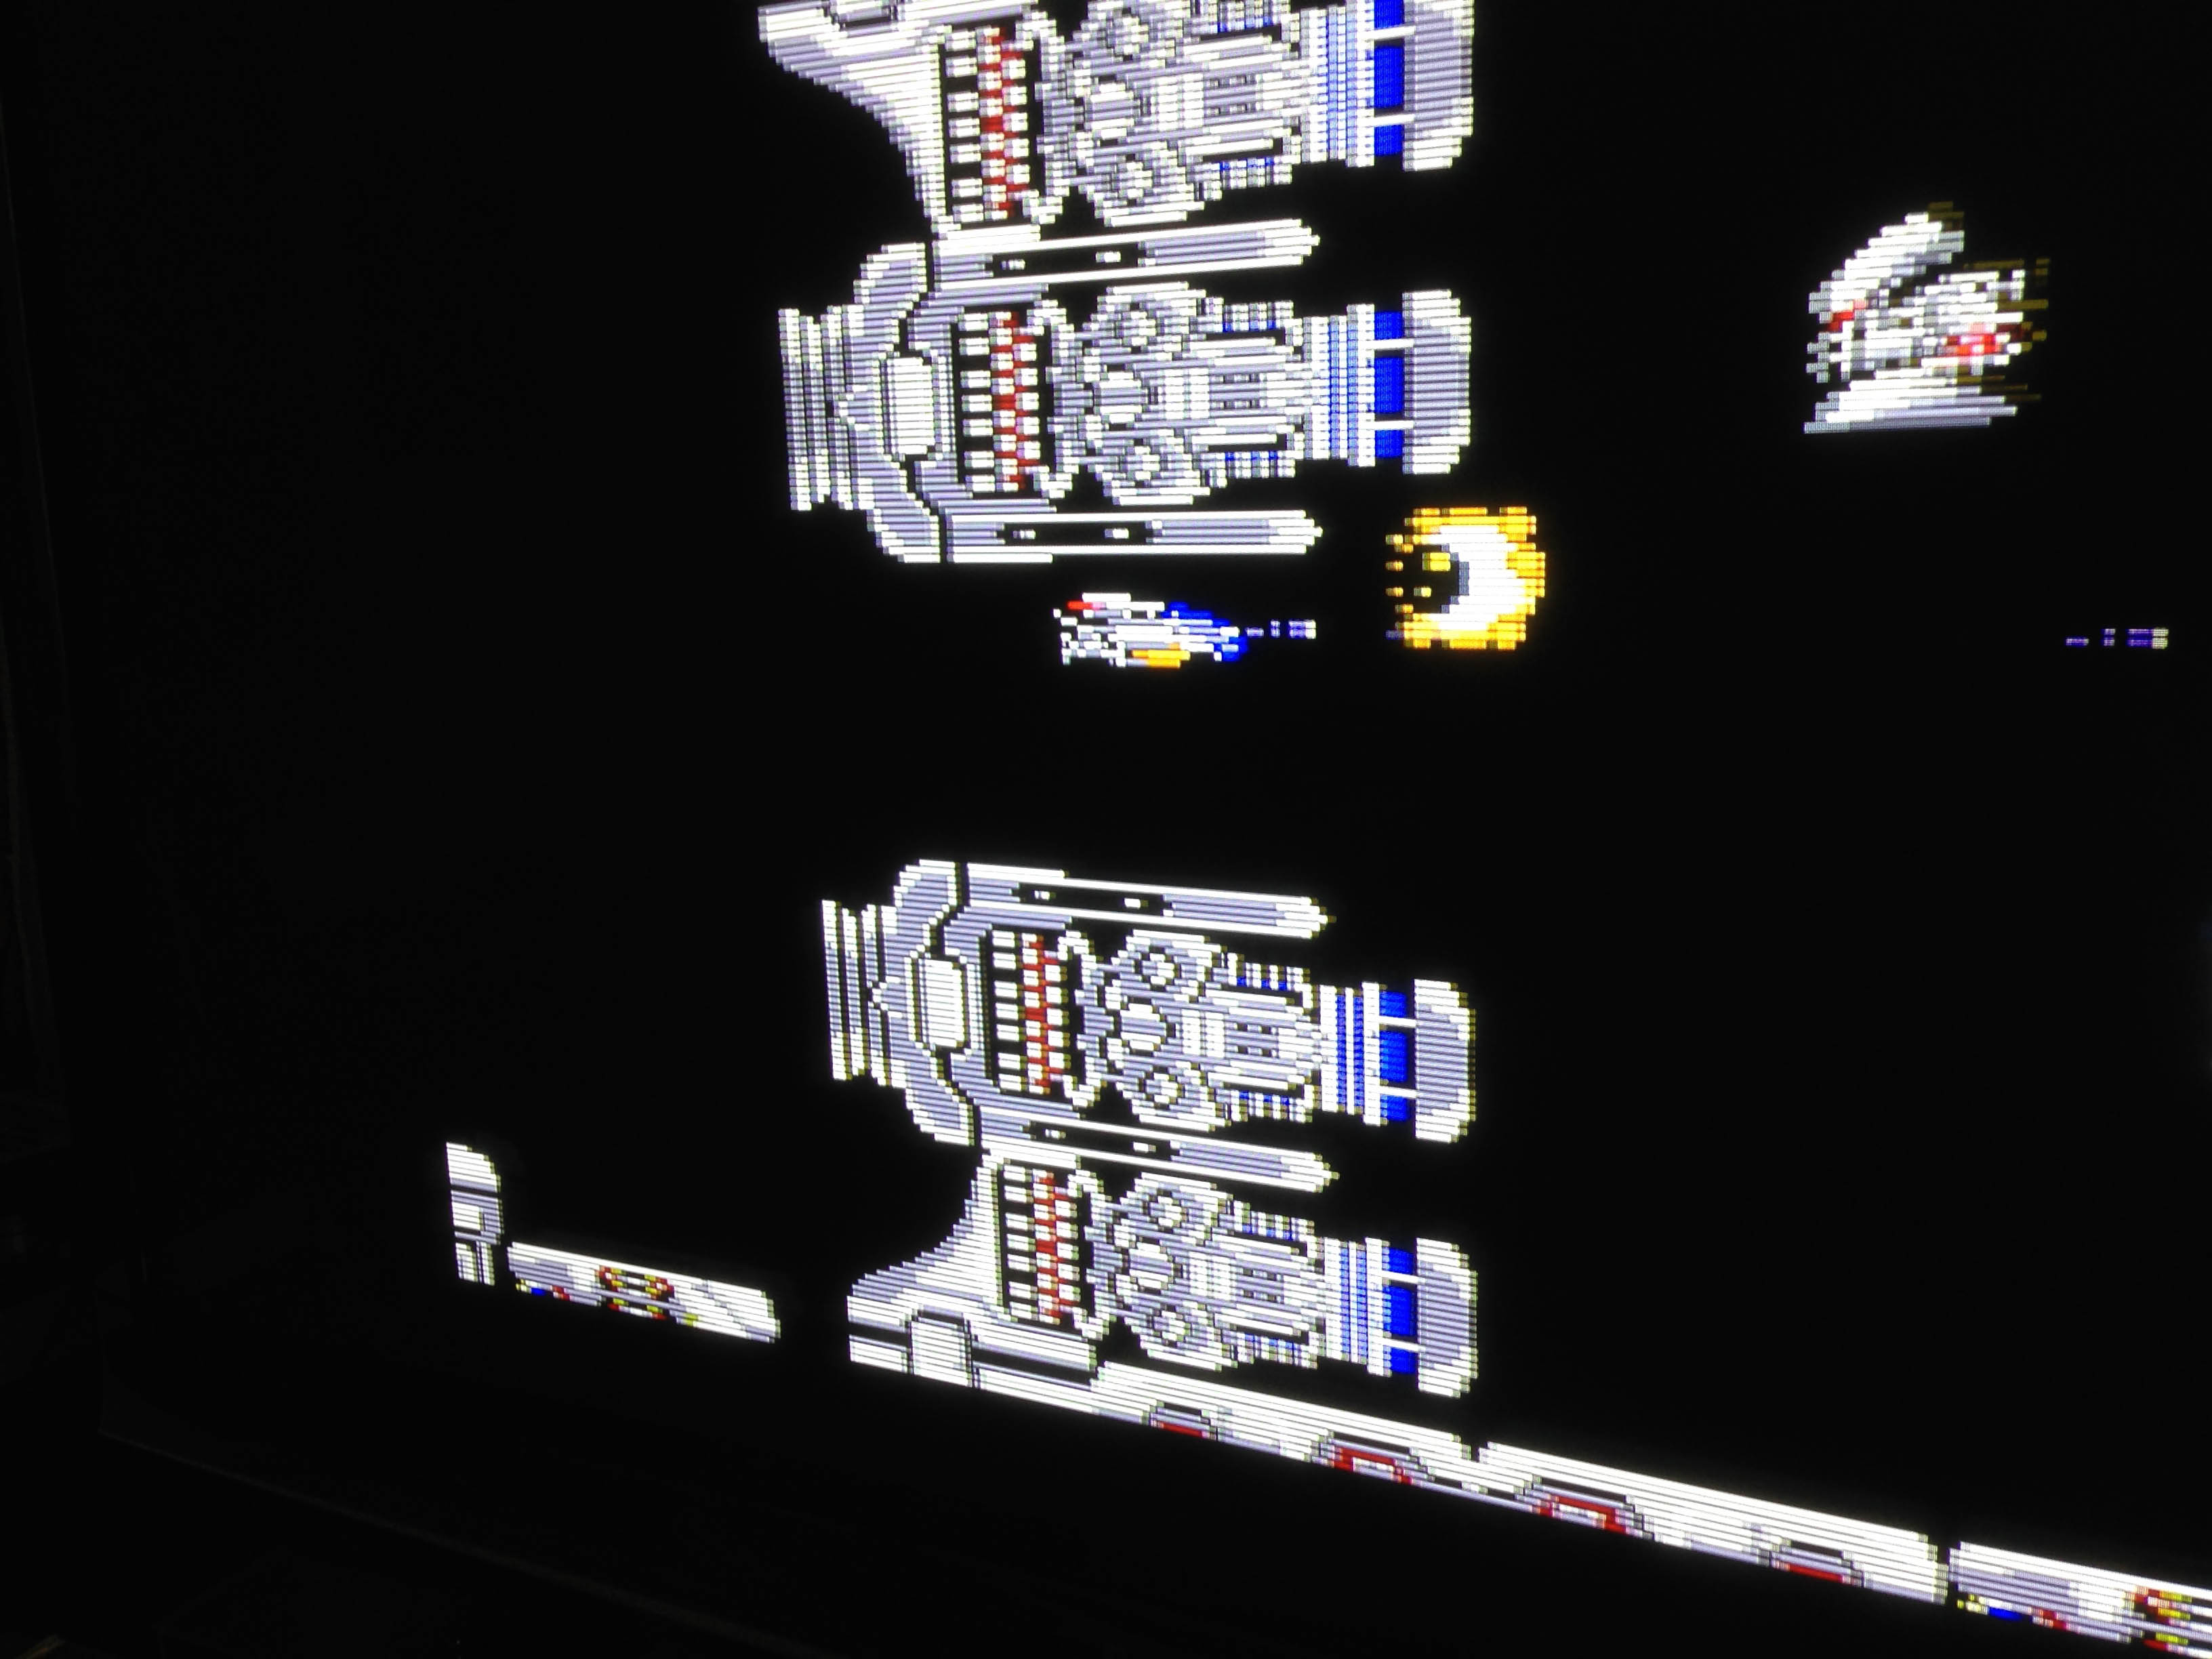
But it actually works fine with a regular television antenna – as long as the TV can tune in Japanese stations. My current TV can, and the results are surprisingly decent. Powering up one of my favourites Makai Retsuden:

RGB via Framemeister for comparison below:

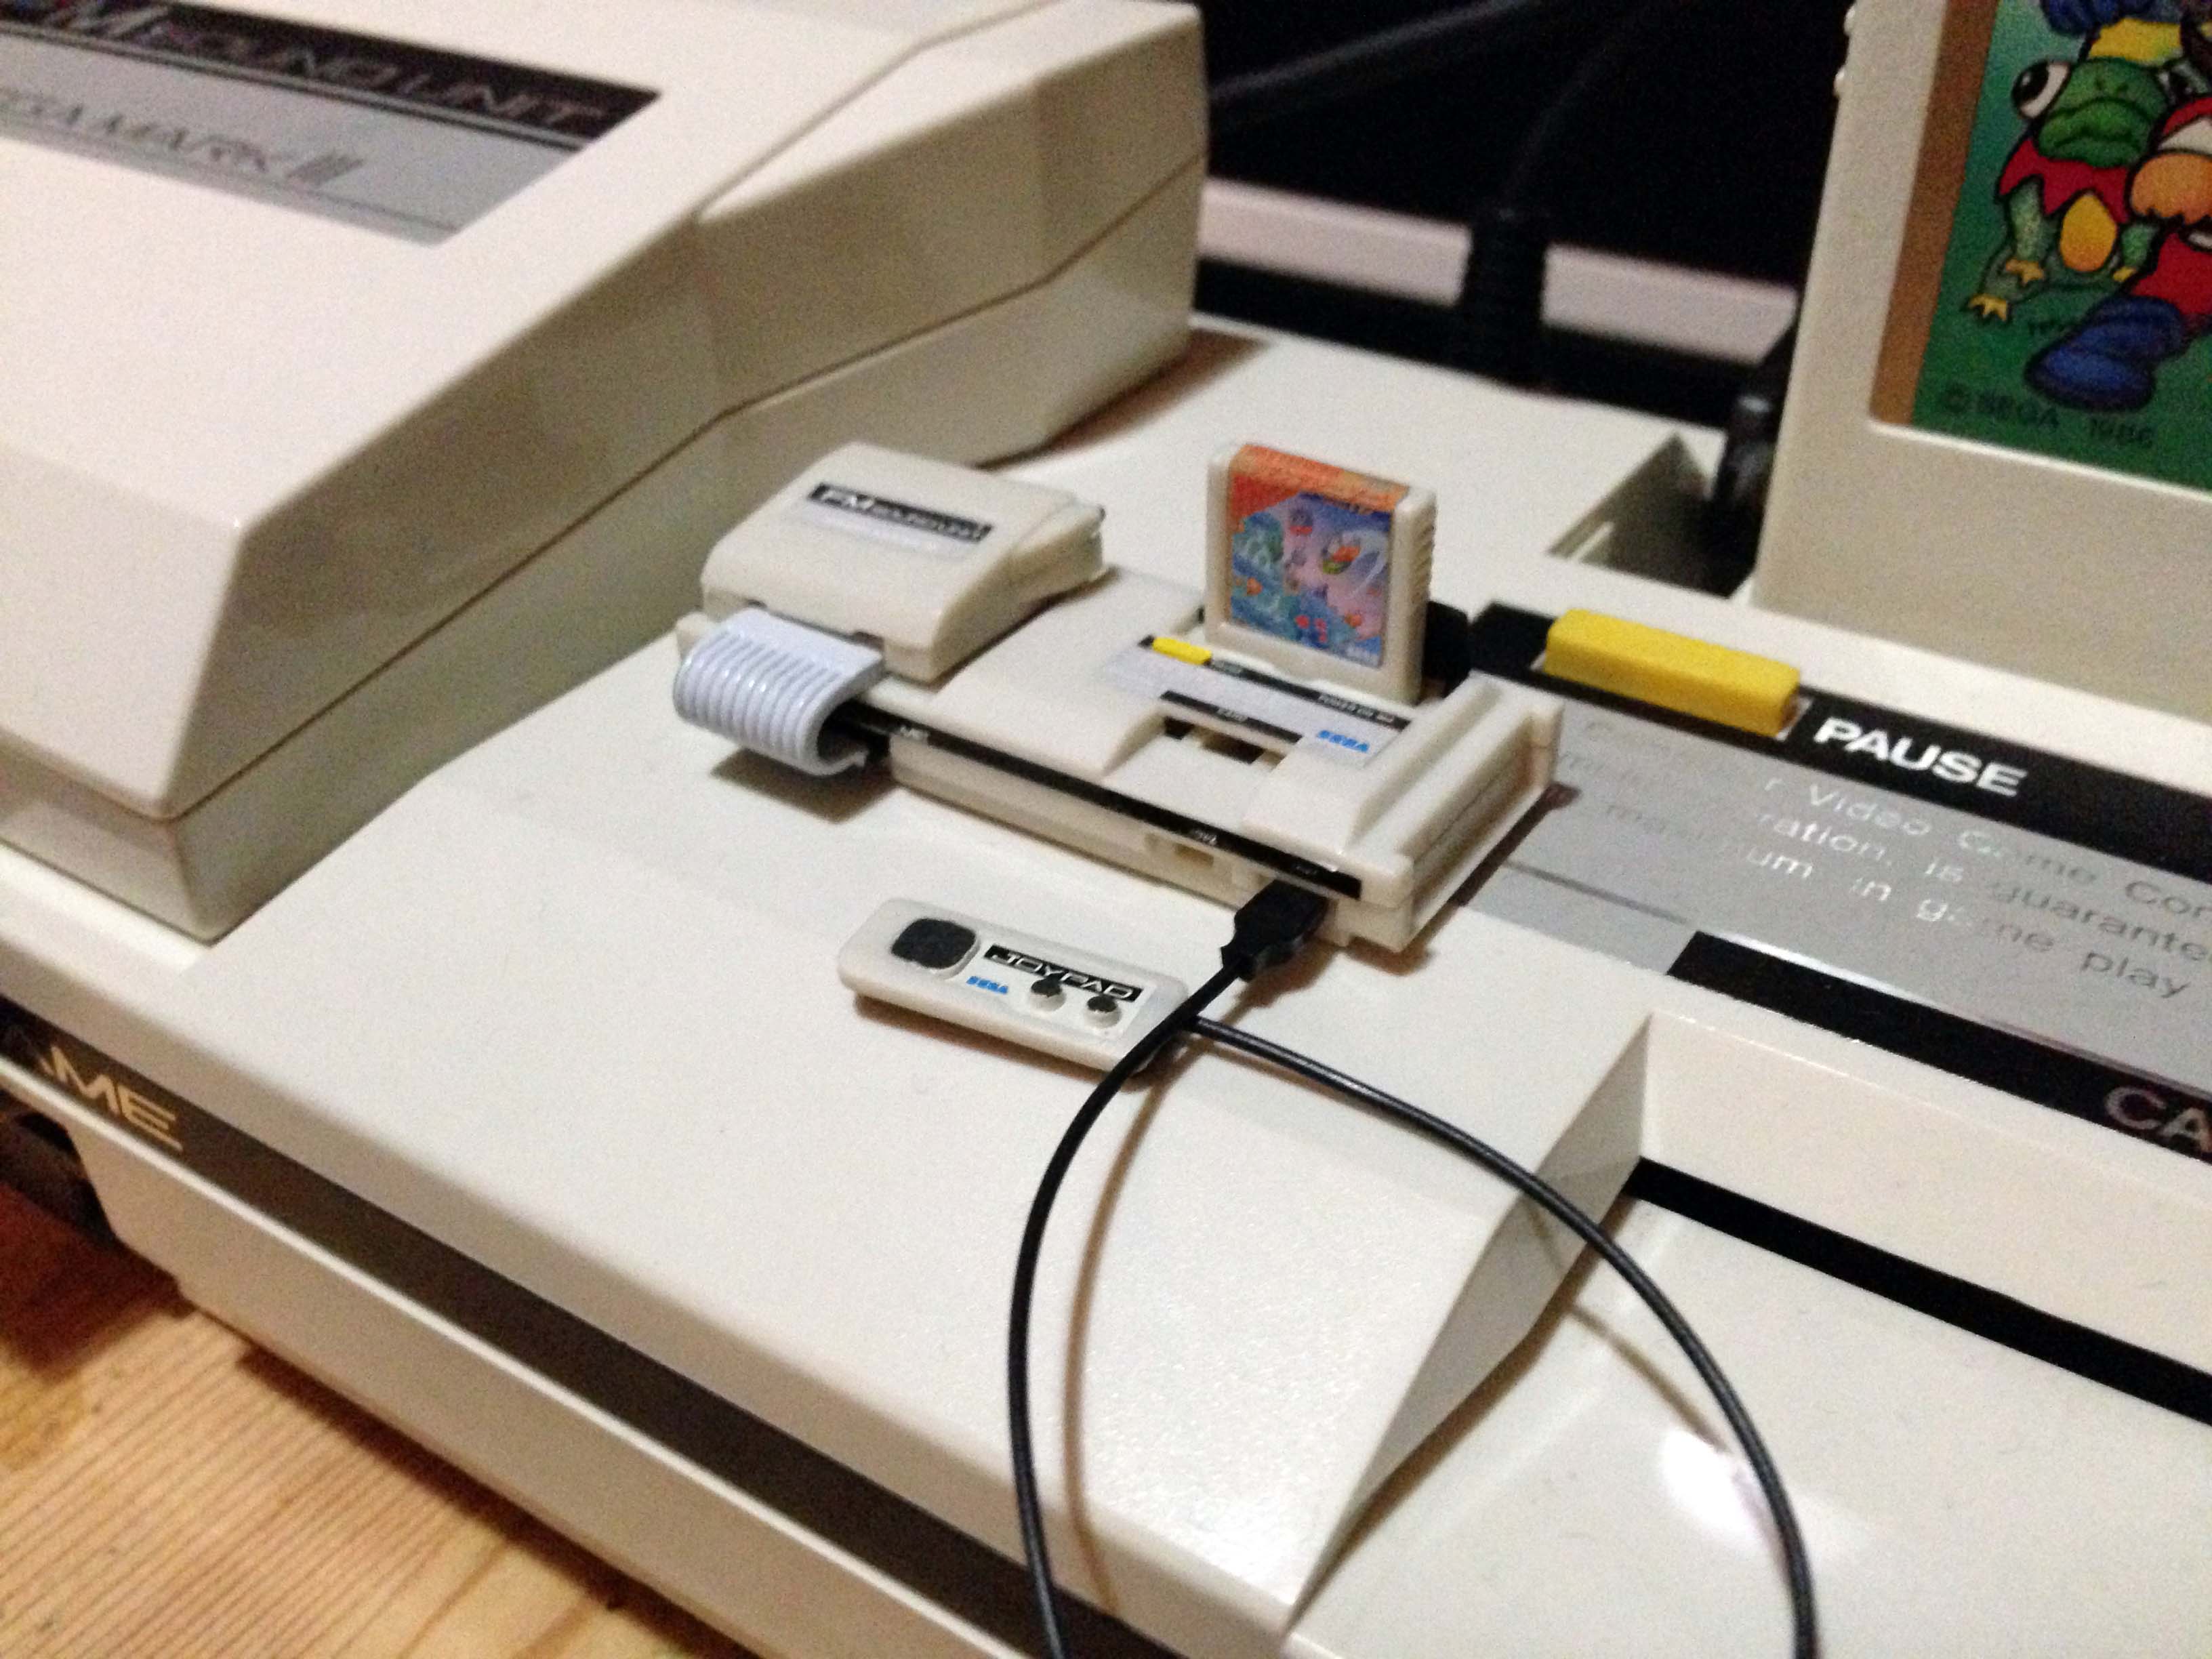
It also works fine with the FM adapter, which has the composite signal passed through the adapter cord.

It looks super neat this way.

FM adapter plus Telecon pack on Mark III is the original Sega Voltron console.

Grand Master Sega Voltron Challenge – Telecon Pack to Game Gear TV Tuner

So now we have a Sega console that broadcasts, and a Sega console that can accept broadcasts. Time for the ultimate combo!

The only Japanese TV tuner I have is from the white Game Gear, but unfortunately the white Game Gear needs repair, so I cannot make an all white Sega Voltron.

So I’ll sub in a working recapped Game Gear. I touched the TV tuner’s aerial to the Telecon pack’s aerial for maximum reception.

And there we have it.

Is it the least convenient way possible to officially play Mark III games? Almost certainly.

Shinobi (忍)- Sega Mark III

Sega were king of the arcade for most of the coin-op format’s history, and their console efforts often attempted to leverage their arcade success into home success. While this would eventually lead them to release one of their arcade boards as a console (the Mega Drive is basically a cut-down Sega-16 board), on their first two consoles it meant ports.

And so we have the Mark III release of Shinobi.

ShinobiBox_3534
It’s a late enough Mark III release to have the Master System co-branding.

Shinobi is a basic 2D side scrolling action game, which was already a fairly recognisable format by 1987. It stars Joe Musashi, on a mission to stop bad guys who are kidnapping children from his ninja clan.

 Shinobi09Shinobi07

You move along the stage, attacking bad guys with swords and ninja stars while freeing the kidnapped kids. The game’s gimmick is multiple ‘planes’ of action, and at certain points in stages you can switch between planes with a giant ninja jump. Luckily the bad guys are nice enough to pause and wait for your jump to complete (it’s really supposed to be a sort of ninja movie slow-motion effect I think). Otherwise controls are decent, solid but standard.

It’s broken into five missions of three or four stages each, with a boss at the end of each mission. Along the way you can power up your life bar and weapons, swapping out ninja stars for bombs and a knife, and your sword for nunchucks and eventually what appears to be a Castlevania-style chain whip.

Shinobi18 Shinobi15

Some later stages can get quite frustrating, introducing bottomless pits and annoying enemy placements. Enemies get weirder and more supernatural as you progress, including some zombie-ninjas and demons.

Bosses are quite good, and largely rely on you working out attack patterns and counter-attacking. With one exception – a giant wall of hindu (Vishnu?) statues. After a million attempts I finally worked out the only solution was to spam it with knives, which worked. Frustrating.

  Shinobi13 Shinobi17

There’s also a very difficult bonus stage once a mission, where you throw ninja stars at two planes of ninjas, shooting gallery style.

Shinobi04 Shinobi03

Graphically it’s decent, but nothing special. Pretty middle of the road for the Mark III. Some incredibly strange palette choices make some parts, especially the first stage, look quite garish, but other stages are fine.

Shinobi02
What is up with these colours?

Shinobi19 Shinobi20

The Mark III version is a reasonable interpretation of the arcade game. The arcade game is a much faster, more fluid experience, whearas the home version is a slower and more methodical. There are less enemies, but despite the very different feel, the levels have been recreated quite faithfully.

ShinobiArcade1 ShinobiArcade2

The graphics have also taken a hit from the 16-bit arcade game, but the bright Mark III colours arguably make it more appealing in parts than the drab original.

ShinobiArcade3 ShinobiArcade4

One disappointing element is a common one for Mark III games – small cartridge size. The Mark III had some design flaws that meant it got less graphical tiles from the same amount of ROM than most consoles, and on top of that Sega often chose cheap small cart sizes. What this means is only a couple of tunes for the whole game (much like Makai Retsuden). And what happens when you beat the final boss, the Masked Ninja?

Shinobi21 Shinobi22

You get this amazing ending:

Shinobi23
Wow, what a reward.

The tunes at least have FM instrument support, and sound pretty cool if you have an FM Unit.

ShinobiBox_3542

Overall it’s a pretty nice early ninja game, and pretty fun, even if incredibly difficult at points.

Shinobi01 Shinobi06

Shinobi05 Shinobi12

Shinobi11 Shinobi14

ShinobiBox_3538

Sega Mark III external RGB amplifier with FM audio break-in

The Mark III’s composite output is pretty bad.

M3RGB_0001

It does have RGB out, using the same pinout as the Master System and Mega Drive.

Mark3FM2_1620

Unfortunately, unlike later Sega consoles, it’s an unamplified signal. So while Master System and Mega Drive RGB cables fit, the picture comes out far too dark.

I didn’t grab a picture of the native RGB output, but it looks something like this:

M3RGB_0005a

Rather than tamper with the console internally, I had a theory I could use the 5V and ground pins of the output to power an external RGB amplifier. I grabbed a cheap RGB cable and did a quick and dirty splice in of a THS7314 based amplifier circuit (commonly used to RGB mod Nintendo 64s), powered and grounded by the console.

M3RGB_0002

Success!

RGB

The only issue was that like many older Sega consoles, it has a weak sync signal, and on my XRGB Mini some sync dropouts occurred. I needed to boost the sync as well. I was feeling lazy so rather than do this myself, I ordered a Mega Drive RGB cable with boosted sync built into the scart plug. It is also powered by the 5V output of the console, but I’ll wire my amp in parallel and there should be plenty of current available.

An additional complication is that when using the FM unit, you only get composite video. You route video through the FM unit, which mixes in the FM audio when appropriate and outputs both video and audio from its own AV out. But it’s only a 5 pin din, so no RGB.

Mark3FM2_1623 Mark3FM2_1621

I did some quick tests, and due to the way the circuit of the FM unit is designed, you can tap the FM audio from both the input and the output. So I’ll be able to use the existing cable of the FM unit as my FM sound source.

M3RGB_0003

Works perfectly! But doesn’t look too nice like that…

M3RGB2_9999

So now I have to get the whole thing into a little project box. I drilled the holes and sliced up my new (nicely shielded) RGB cable. In this pic you can see I’ve added a 5-pin DIN socket to one side, with four of the output pins removed. This is where I’ll splice in the FM audio.

M3RGB_0011

 So many wires to fit in. Red, blue, green, sync, 5V, audio… luckily most of the rest are ground, so I can just solder them together and connect them with a single wire. I could just leave them disconnected, but I want good grounding to prevent possible interference, which is common for poorly grounded scart cables.

M3RGB_0012

With the video circuit working, I also lined up the wires and glued them in place, so nothing can be pulled out by the inevitable cord-trip that will happen sometime in the future.

Disaster struck just before I finished – the picture was too bright! It turned out my new scart cable was wired differently, and was missing some 25 ohm resistors on the RGB lines. So I pulled them from the old one and spliced them in carefully, in series with the 75 ohm resistors already built into my amp circuit. Now what was once a halfway neat job became a mess again, oh well.

 I also completed the audio circuit, spliced in the FM audio pin of the din socket, and closed up the box.

M3RGB_0015

It connects like so. I have oriented it toward the right of the console, because the power cable connects on the left.

M3RGB2_1631

M3RGB2_1632

And the results, all through an XRGB Mini to my Panasonic Plasma:
M3RGB2_1648 M3RGB2_1645 M3RGB2_1641 M3RGB2_1635

Creation of a Sega Mark III Everdrive flash cart

My preferred manner of playing Sega 8-bit games is on the original Sega Mark III. It’s just a great looking system, and with RGB and FM Audio I have a pretty nice set up. I wanted to reduce stress on the cartridge port to prolong its life, so a flash cart would be a good solution. Unfortunately there is no dedicated Mark III or SG1000 flash cartridge.

So I theorised I could create a normal looking flash cart for my Mark III, combining a Master Everdrive with a new-style Master System to Mark III converter. They arrived, and worked!

Mark3Everdrive_0001

I needed to downgrade the firmware to version 5. It seems from version 6 and up, developer Krikz changed the video mode slightly, and the game select menu no longer works on a Mark III or other non-Master System hardware (e.g. a Game Gear in Game Gear mode via a modified converter).

Mark3Everdrive_0002

However, the combined cart/converter was a long way from fitting into a regular Mark III cartridge shell. First of all, the SD card sticks out.

Mark3everdrive2_1587

I looked around for a micro sd card adapter that would work, but a couple I got didn’t fit, or were not low profile enough. Then I came across this. Many SD cards can simply be cut in half! Sure enough, the 2GB SD I was using was just empty plastic in the top 2/3, so I sliced off the excess plastic.

Mark3everdrive2_1590

Now it sat well clear of the edge. This extra gap became very important later on, as I needed that extra few millimetres of clearance on the case.

Mark3everdrive2_1591

Next I had to open up the shell I was going to use – a cheap copy of Space Harrier was my sacrificial lamb. To open Mark III carts you have to access some screws under the label, so I used a hairdryer to warm up the label glue, then a pin to start peeling the label.Mark3Everdrive_0003

It’s fairly easy this way, with no damage to the label or cart.

Mark3everdrive_1737

Mark3everdrive_1738

After getting inside, I sliced away all excess plastic, but the combined cart/converter was still sticking out the bottom of the shell quite a lot.

Mark3Everdrive_0005 Mark3Everdrive_0006

I gained a couple of millimetres by shaving down the top plastic rim

Mark3Everdrive_0008 Mark3Everdrive_0020

But the real gains would be had by filing/sanding back the contact pins on both the flash cart and the adapter. Contact pins are often far longer than they need to be, they really only need 1-2mm – just enough to make a solid connection. Wear and tear is much less of an issue than back in the day, as I won’t be inserting and removing the flash cart from the adapter ever again, and the cart itself will stay in the console most of the time. So I brought them down to about half their original height.

Mark3Everdrive_0009 Mark3Everdrive_0021

And now it’s going to sit just 3-4mm higher than a regular cart would! I could have gone further, but wasn’t going to push it too far and risk damaging the flash cart or adapter beyond repair.

Mark3Everdrive_0022

Next up I had to brace the combined cart inside the shell. I superglued some plastic that I cut to a shape that would hold the board well, braced them against the bottom of the cart shell, and backed it with hot glue for support from the sides.

Mark3Everdrive_0023

It slots in under the adapter’s slot section, and holds flawlessly, so now I have a snug but secure brace for the board! The braces push slightly outward at the front, and combined with the label over the top, also keep the cart securely closed, so it needs no additional screws or glue with regular handling (it would probably open if dropped however).

Mark3Everdrive_0024

Close up the cart for the finished product! It sits slightly higher than a regular cart, but low enough to be quite stable within the cart slot, as it still sinks into the slot about 10mm. It sits lower than an unplugged cart resting on the cart slot, for example. At a glance you can’t even tell.

Mark3everdrive2_1592

The LED when the everdrive loads shies through the explosion behind the dragon on the label too, which is nice.
Mark3everdrive2_1605 Mark3everdrive2_1604

The Sega Mark III FM Sound Unit (FMサウンドユニット)

The Mark III was released two years later than the Famicom, and has slightly more powerful graphics hardware. But it still has worse sound capabilities. So Sega developed the FM unit for those customers who would be happy to pay more for superior audio. It adds in a Yamaha FM sound chip for Mega Drive-like sound effects and music.

Mark3FM2_1627

The FM unit sits snugly on the recessed top part of the console, and plugs into the front expansion port.

Mark3FM_1290

A cable extends out the back of the FM unit to capture the console’s video and regular audio.

Mark3FM2_1621

It plugs into the AV out, using five of the eight pins (so no RGB available)

Mark3FM2_1622

You then attach your AV cable to the FM unit’s AV out, which passes through video, regular audio and adds in the FM audio for supported software.

Mark3FM2_1623

Yes, supported software. Games had to be specifically coded to support the FM unit. This was displayed on the front of the box on the bottom left, see my copies of Kenseiden and After Burner below.

Mark3FM8000

Is it worth it? You bet! It makes your Segamaku sound like a Mega Drive! Definitely a worthwhile upgrade, even though working FM units regularly sell for up to 10,000 yen these days.