Modding the Sega Mark III for more recent Master Everdrive support

I decided to mod my Mark III consoles to work with the later Everdrive OS versions. The original Master Everdrive works on a Mark III using the oldest versions of the operating system, and this is what I used to make my Mark III Everdrive back in 2015.


It also seems in the intervening years some sellers have commercialised this idea with 3D printed shells, based on images I’ve found.

However, this version of the Master Everdrive is no longer sold, and the new version (and most clones) just won’t work on Sega’s white wonder.

Using info found on SMS Power by user Neto, you can get it booting by changing the value of the capacitor at C18.

Finding the points on the bottom of the board, I add some extra fresh solder, then heated up the points and used a solder sucker.

Unfortunately the first time I did this, when pulling the legs of the old cap up from their bent position, the solder pad came off. I guess messing with 38 year old pads can have issues.

To repair I followed the trace it on the board and connected it up where it should be, the console booted but acted weird, it would keep resetting.

I had to pull up the schematics:

And found killing the pad had essentially killed two traces, and I had to wire the positive leg of the cap between a resistor and a leg on an IC, and then it was up and running.

On my second Mark III it looked like I would have the same issue, as I pulled up the capacitor leg the pad started coming with it, so I just clipped the legs of the old cap on the top of the board and fed the new one through.

I then soldered it up and clipped of the excess. And now it’s up and running perfectly with the latest firmware.

There is one downside. It seems changing this value on bootup affects region selection in some way, and some real western Master System carts now fail to utilise the FM module, and revert to PSG audio.

It only affects some games – of those I tested I found Rastan, Galaxy Force and Wonder Boy III: The Dragon’s Trap played in PSG, while Cloud Master and Wonder Boy in Monster Land still worked with FM.

There are two potential fixes. The first I worked out myself is that this process can be semi-interrupted by holding reset on boot, this returned FM sound to Rastan but it still failed on others.

The second is even better. A recent post by ApolloBoy six years later on the exact same SMSPower thread suggests another capacitor value, 1uF instead of 0.1uF, which has the everdrive still working but FM restored in at least one game. I’ll test this soon!

IPS Screen Mod for Neo Geo Pocket Color

There have been plenty of screen mods for more famous consoles for a decade at this point. Big mod developers have industrialised Game Boy mods, and the Game Gear has a few options around. But the more niche consoles like SNK’s lone handheld, or the Bandai Wonderswan, haven’t gotten the same traction.

However, over the last year or two some some no-name screen mods started floating around on Chinese websites like Aliexpress. Much like Game Boy screen mods, the developers adapt various cheap Chinese phone screens and make adapter board/cables to support the old hardware.

It’s always a risk to spend a decent amount on something somewhat unverifiable and try these things out on limited vintage hardware, but some comments on the listing seemed promising, And some videos from the likes of Macho Nacho showed they do actually work well.

Finally one appeared specifically for my preferred Slim console and this one also needed no shell mods, which is important to me as I can use my favourite graphite console without butchering it.

And, well, the results are insane.

It’s not quite centred, the spacers the kit it comes with push it too far left, so I’ll fix that at some point. But it’s just fantastic.

Here it is with my FunnyPlaying Laminated IPS Game Boy Color with a custom shell. In many ways this NGPC one is better as it’s the original screen size, so doesn’t need a custom shell/lens and looks completely correct to the original, just playable indoors now.

There are various pixel modes. I prefer pixel grids if done well, but the pixel grid mode here takes away too much brightness. I’ve found the scanlines one to look best overall as no filter looks too modern, like an emulated look.

Horizontal scanlines

Vertical scanlines (like a Game Gear)

Pixel Grid (looks a bit washed out here due to phone auto adjusting exposure, in reality it’s darker than the above two)

And no filter.

I’d have to say I’ve been playing a lot more Neo Geo Pocket Color because of this!

If anyone is interested here’s the exact listing I used, hopefully it stays active

https://www.aliexpress.com/item/1005003591590242.html?spm=a2g0o.order_list.order_list_main.243.74c318027HRCEM

On another note, there are also new shells now selling with or without the kit. I grabbed one in case I needed it, and it looks fantastic, exactly like the original clear model and very high quality, so these too are recommended.

Famulator (ファミレータ) Famicom clone (+mod to fix the audio)

I’ve always been fascinated by Famiclones.

The first Famiclones were straight pirated Famicom hardware clones, but by the 90s this had been consolidated down to single chip designs, usually referred to as NOAC – NES on a chip. While NOACs lose accuracy, they can be produced very cheaply and thus proliferated as the gaming machine of choice throughout copyright-infrinegment playgrounds like Eastern Europe, South America and greater Asia throughout the 90s. If you take pirate consoles into account, the Famicom is surely by far the highest selling system of all time. There’s a decent number of Famiclone models documented here.

Famiclones had a second life in Japan after Nintendo’s patent on the hardware expired in 2003. Due to the vast majority of Famicoms in Japan being RF-only, there was a market for a cheap AV Famicom as the retro boom began. One I’ve always wanted to get my hands is was the Famulator, released in early 2008, and I finally grabbed one recently.

Famulator_8811

Famulator_8813

One reason is simply the name Famulator, which is too cute, but the tasteful design, of course evoking the original Famicom, sets it apart from your average junk looking Famiclone.

Famulator_8814   Famulator_8818

And it’s tiny, barely bigger than a Famicom cart, and less than half the size of the original. Kawaii as hell. The controller, which connects via standard Famiclone DB9 connector, is also quote excellent, there’s very low travel on the buttons, giving it a Game Boy Advance SP feel.

Famulator_8820

It’s great looking and plays well, and is a pretty decent NOAC Famicom. There is one catch. The earliest release of the Famulator overamplifies the the sound, leading to peaking levels and distortion. And the expansion audio is not connected, so Famicom Disk and other expansion audio games are missing the extra sound channels. Luckily I found quite an easy fix for both on this Japanese website.

The audio can be fixed simply by chopping off the transistor at the position marked Q2, and soldering the right two leftover legs together. It worked perfectly and the regular audio was fixed.

Famulator_8665

To add support for expansion audio, you can simply insert connections for pins 45 and 46 to the circuit at positive leg of the capacitor at C9.

Of course with plenty of real Famicom hardware around it’s not like this will get a lot of play time, but it’s a cool little toy to have, and yet another part of the rich tapestry of Famicom history.

Famulator_8675

Famulator_8671


Adding a Sega controller adapter to an original SG-1000 (home made JC-100)

So you want to play some SG-1000 games old-school style…

SG1000adapter_5510

…but the original SJ-200 joystick controller is a complete nightmare to use…

SG1000adapter_5505

Sure, there’s a plug on the right for player 2 which can use any DB9 connector Sega pad, but player 1 is stuck with the SJ-200 tethered to the console.

SG1000adapter_5513

Sega acknowledged their first controller sucked, and released a small modification/adapter called the JC-100, which allowed original console owners to to use the new pads released alongside the SG-1000 II.

It would be impossible to get hold of a JC-100 now, but you can easily make one yourself. All you need are the following:

  • Mega Drive/Master System extension cable
  • Header plug with crimp connectors with correct spacing and at least seven pins – I’m using a pretty standard eight pin
  • Crimp tool
  • Phillips head screwdriver

SG1000adapter_5519

First up open up the console (only four screws) and you can see the controller is removable, plugged in via a PC-like seven pin adapter.

SG1000adapter_5514

SG1000adapter_5515

SG1000adapter_5516

The way DB9 controllers work is to ground a line corresponding to a button when pressed, so there’s a whole line for each button/direction, plus ground. The pins are handily numbered, and align to the following:

  1. Button 1
  2. Button 2
  3. Right
  4. Left
  5. Down
  6. Up
  7. Ground

To make the adapter, start by slicing the extension cable at whatever length you like, then stripping the cover and the end of each wire. The internal insulation cotton can also be removed.SG1000adapter_5520SG1000adapter_5521

You’ll need to do some tests to see which wire is which, as in my case they wire colours did not line up to the colours of the original controller wires. In mine the colours lined up to:

  • Blue – Ground
  • Red – Up
  • Black – Down
  • Grey – Left
  • Pink – Right
  • Green – Button 1
  • Yellow – Button 2
  • White and Brown – Unused

Crimp the relevant wires to the pins using the crimp tool. You can get away with using pliers, but a crimp tool will make a much cleaner and stronger… well… crimp.

SG1000adapter_5523

The pins can then be plugged into the header plug in the correct order. Since I’m using an eight pin connector, it will stick out the back a bit, but there’s room and I’m not using position eight.

SG1000adapter_5525

Slice off the unused two wires and we’re done.

SG1000adapter_5527

Plug it into the console and close it up.

SG1000adapter_5528

SG1000adapter_5531

Now you can use pretty much any pre-Saturn Sega pad on your console. You can go period-accurate and use an SJ-150

SG1000adapter_5533

All the way up to what was possibly the last DB9 Sega controller released – the wireless six button Mega Drive pad (doesn’t actually work but looks crazy)

SG1000adapter_5536

Or if you’re insane, the standalone DB9 connector SJ-200, completely defeating the purpose of the exercise!

SG1000adapter_5534

The best part about this ‘mod’ is it is completely reversible. However it would be relatively easy to install a DB9 socket on the side if you wanted something more permanent. Similarly, the rest of the extension cable could be soldered onto the original tethered controller, making it a standalone unit.

Famicom NES controller

Want that classic Famicom feel without the hassle of having to sit two feet from the console?

Here’s the solution.

FamiNES Controller_2140

It’s an NES controller board and cord in an original Famicom pad shell.

FamiNES Controller_2142

Glorious gold faceplate on rich burgundy plastic. Rounded corners for that premium experience.

FamiNES Controller_2143

All the class, prestige and comfort of the original classic, without the hassle.

FamiNES Controller_2144

Perfect for the discerning Famicom enthusiast’s AV Fami needs.

FamiNES Controller_2145

FamiNES Controller_2148

I do the same with The Super Fami. None of the SNES’ ugly lavender concave button nonsense, but with a much longer controller cord than the Super Fami pad.

FamiNES Controller_2154

Of course, Super Famicom Jr. controller cords are the full length already. But this sucker is staying mint in the box for now.

FamiNES Controller_2158

My ready-to-go Nintendo controller drawer. Sometimes you want Famicom, sometimes you want dogbone, and sometimes you want to rock out gajin style on the squared off NES pad.

FamiNES Controller_2161

Sega Mark III external RGB amplifier with FM audio break-in

The Mark III’s composite output is pretty bad.

M3RGB_0001

It does have RGB out, using the same pinout as the Master System and Mega Drive.

Mark3FM2_1620

Unfortunately, unlike later Sega consoles, it’s an unamplified signal. So while Master System and Mega Drive RGB cables fit, the picture comes out far too dark.

I didn’t grab a picture of the native RGB output, but it looks something like this:

M3RGB_0005a

Rather than tamper with the console internally, I had a theory I could use the 5V and ground pins of the output to power an external RGB amplifier. I grabbed a cheap RGB cable and did a quick and dirty splice in of a THS7314 based amplifier circuit (commonly used to RGB mod Nintendo 64s), powered and grounded by the console.

M3RGB_0002

Success!

RGB

The only issue was that like many older Sega consoles, it has a weak sync signal, and on my XRGB Mini some sync dropouts occurred. I needed to boost the sync as well. I was feeling lazy so rather than do this myself, I ordered a Mega Drive RGB cable with boosted sync built into the scart plug. It is also powered by the 5V output of the console, but I’ll wire my amp in parallel and there should be plenty of current available.

An additional complication is that when using the FM unit, you only get composite video. You route video through the FM unit, which mixes in the FM audio when appropriate and outputs both video and audio from its own AV out. But it’s only a 5 pin din, so no RGB.

Mark3FM2_1623 Mark3FM2_1621

I did some quick tests, and due to the way the circuit of the FM unit is designed, you can tap the FM audio from both the input and the output. So I’ll be able to use the existing cable of the FM unit as my FM sound source.

M3RGB_0003

Works perfectly! But doesn’t look too nice like that…

M3RGB2_9999

So now I have to get the whole thing into a little project box. I drilled the holes and sliced up my new (nicely shielded) RGB cable. In this pic you can see I’ve added a 5-pin DIN socket to one side, with four of the output pins removed. This is where I’ll splice in the FM audio.

M3RGB_0011

 So many wires to fit in. Red, blue, green, sync, 5V, audio… luckily most of the rest are ground, so I can just solder them together and connect them with a single wire. I could just leave them disconnected, but I want good grounding to prevent possible interference, which is common for poorly grounded scart cables.

M3RGB_0012

With the video circuit working, I also lined up the wires and glued them in place, so nothing can be pulled out by the inevitable cord-trip that will happen sometime in the future.

Disaster struck just before I finished – the picture was too bright! It turned out my new scart cable was wired differently, and was missing some 25 ohm resistors on the RGB lines. So I pulled them from the old one and spliced them in carefully, in series with the 75 ohm resistors already built into my amp circuit. Now what was once a halfway neat job became a mess again, oh well.

 I also completed the audio circuit, spliced in the FM audio pin of the din socket, and closed up the box.

M3RGB_0015

It connects like so. I have oriented it toward the right of the console, because the power cable connects on the left.

M3RGB2_1631

M3RGB2_1632

And the results, all through an XRGB Mini to my Panasonic Plasma:
M3RGB2_1648 M3RGB2_1645 M3RGB2_1641 M3RGB2_1635

Creation of a Sega Mark III Everdrive flash cart

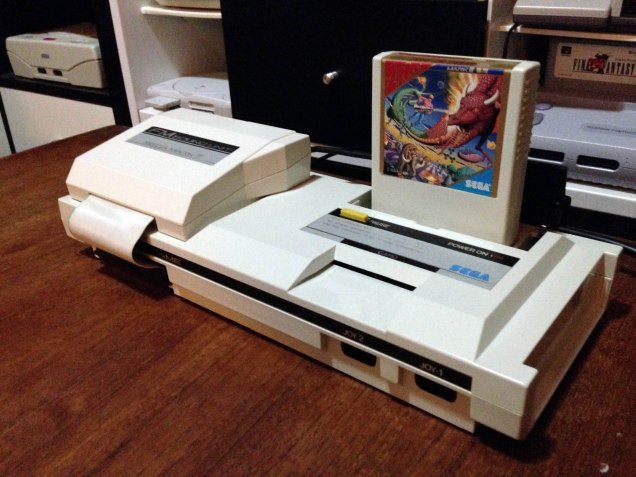
My preferred manner of playing Sega 8-bit games is on the original Sega Mark III. It’s just a great looking system, and with RGB and FM Audio I have a pretty nice set up. I wanted to reduce stress on the cartridge port to prolong its life, so a flash cart would be a good solution. Unfortunately there is no dedicated Mark III or SG1000 flash cartridge.

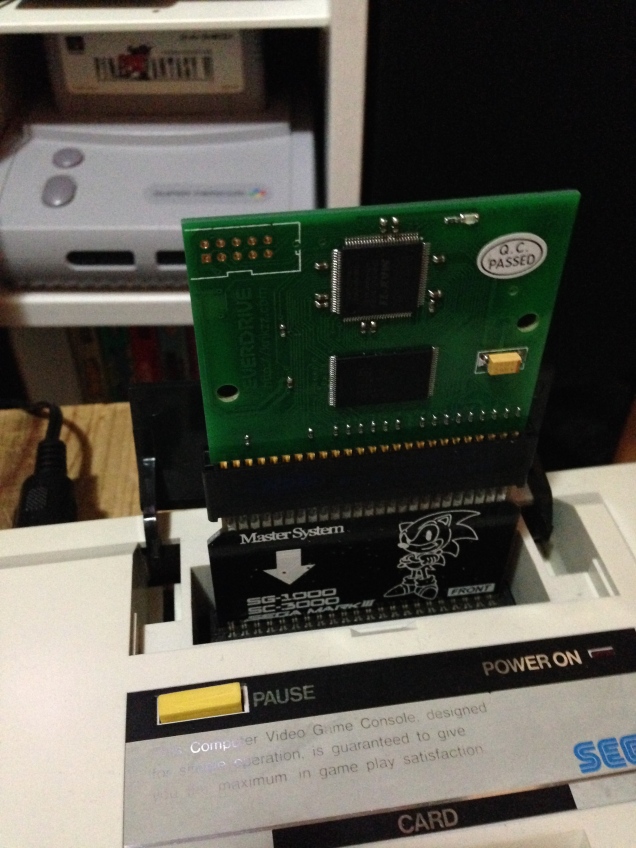
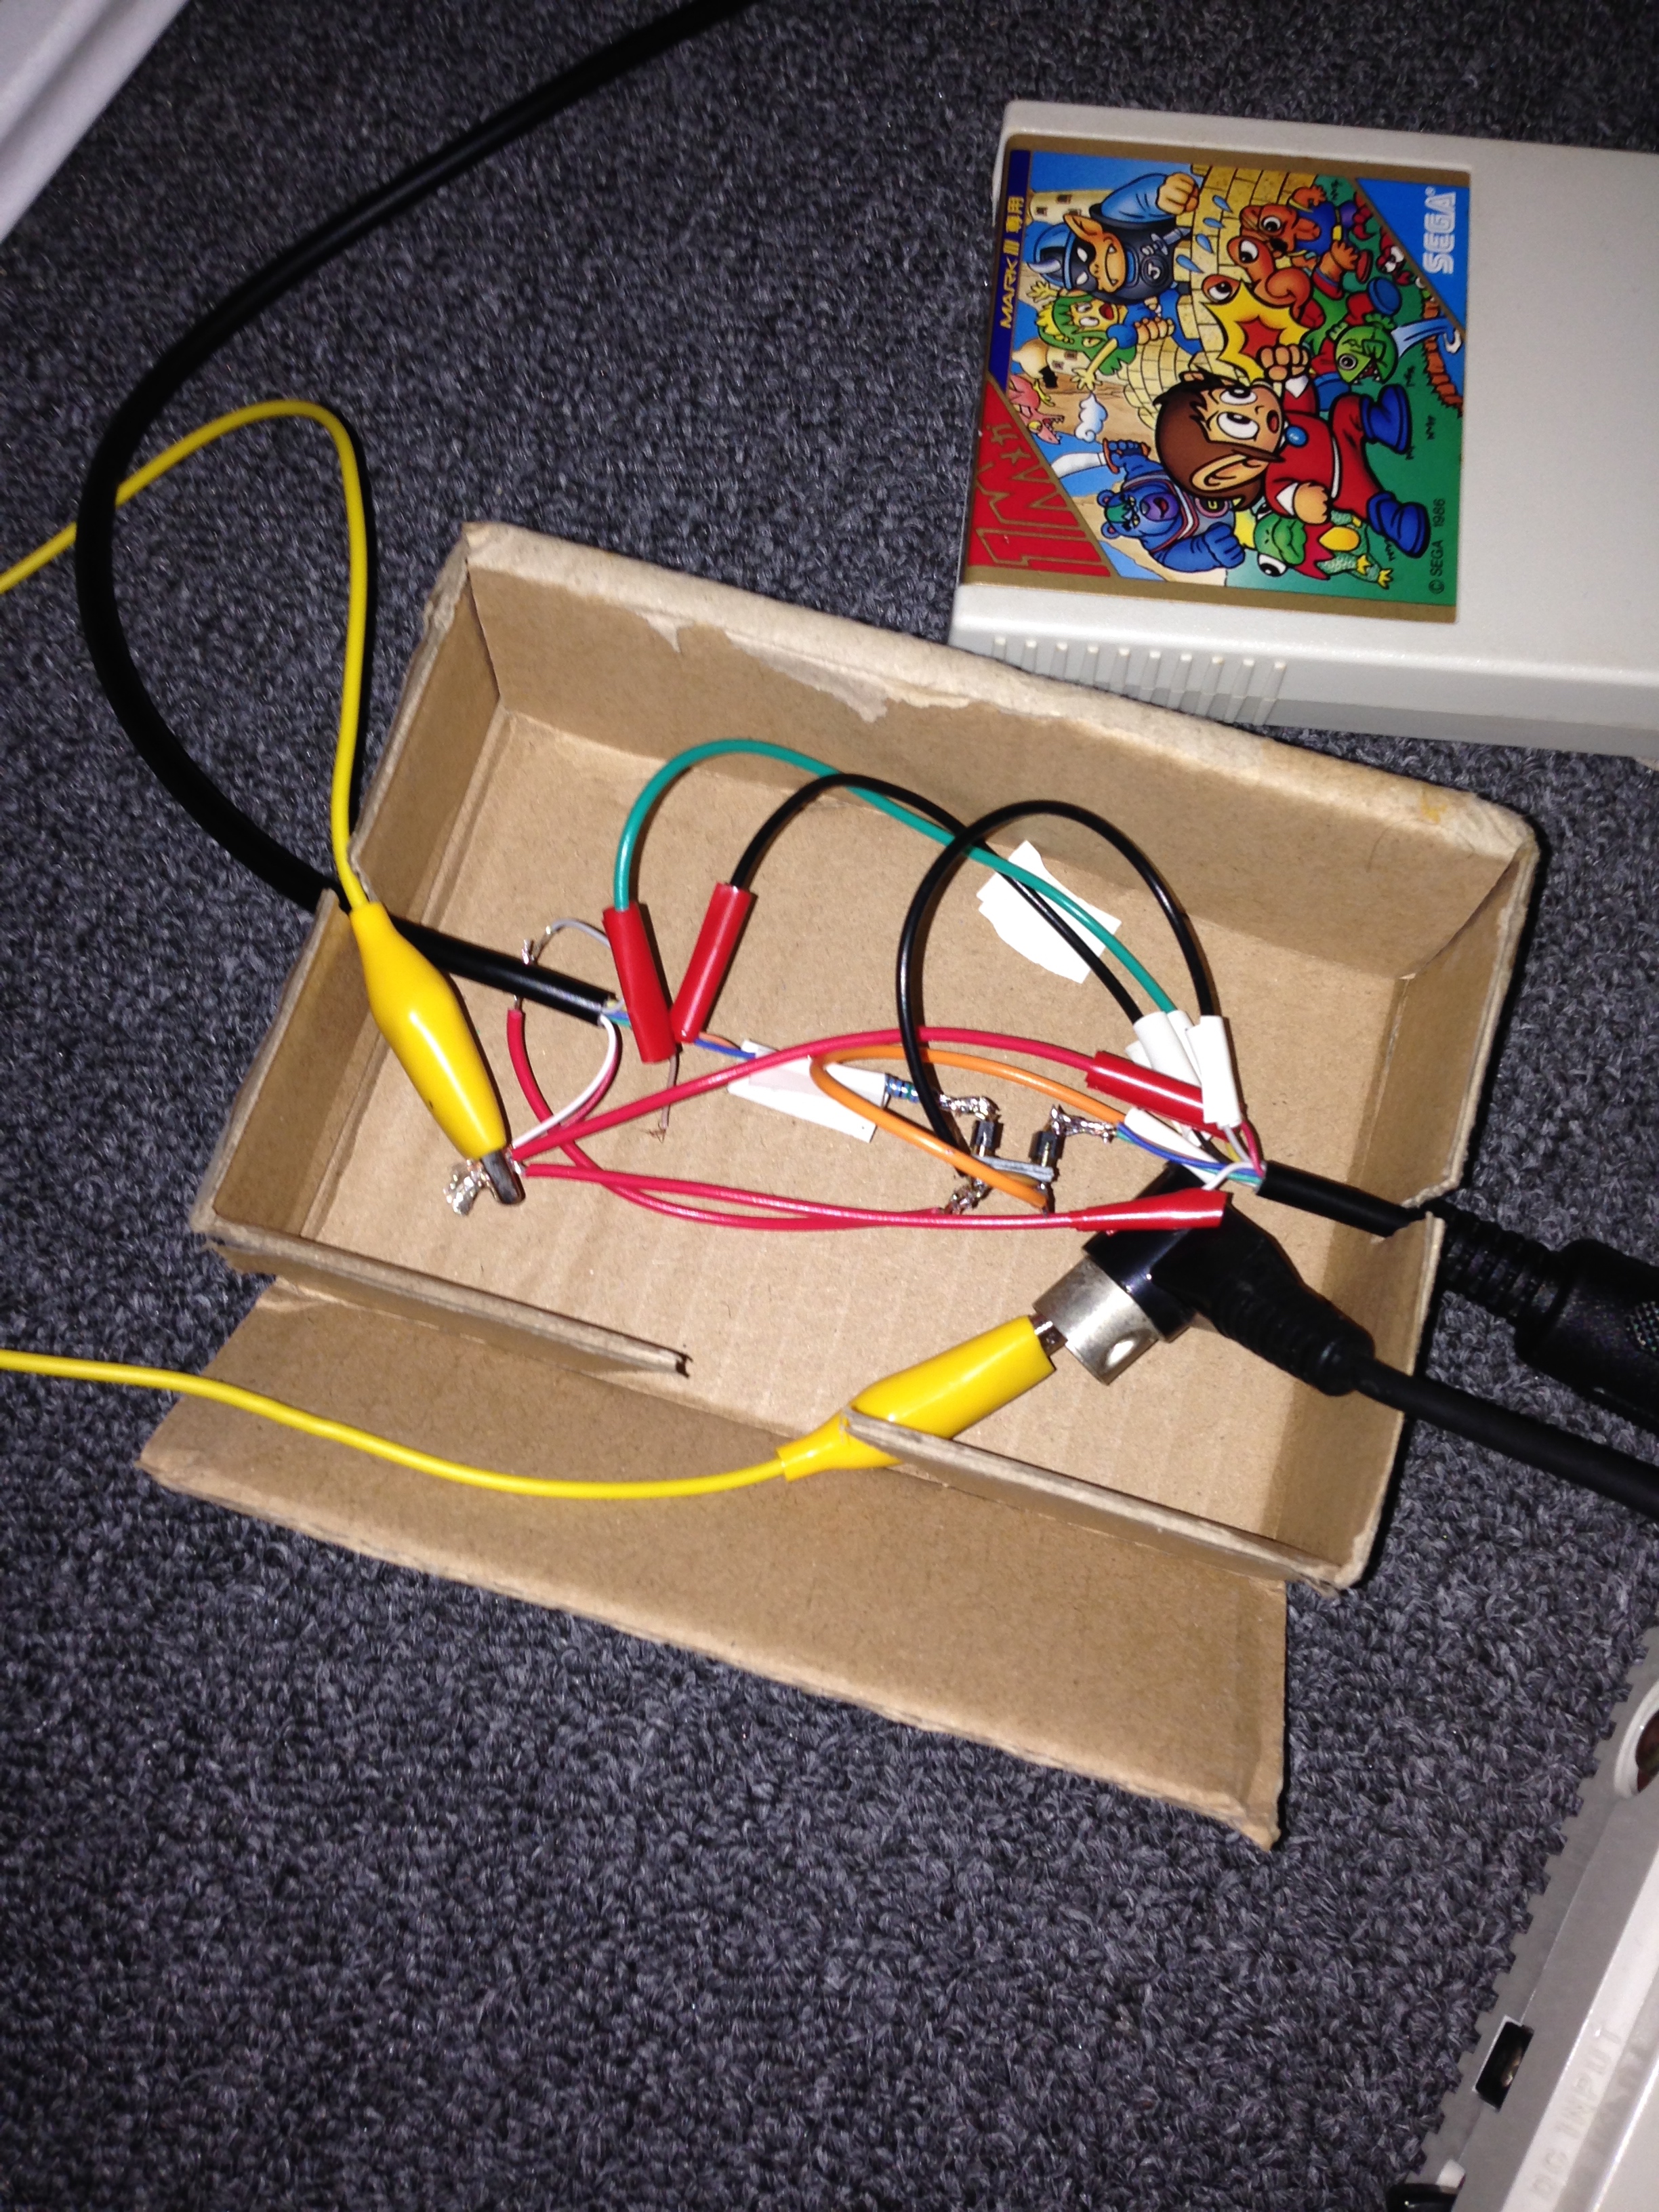
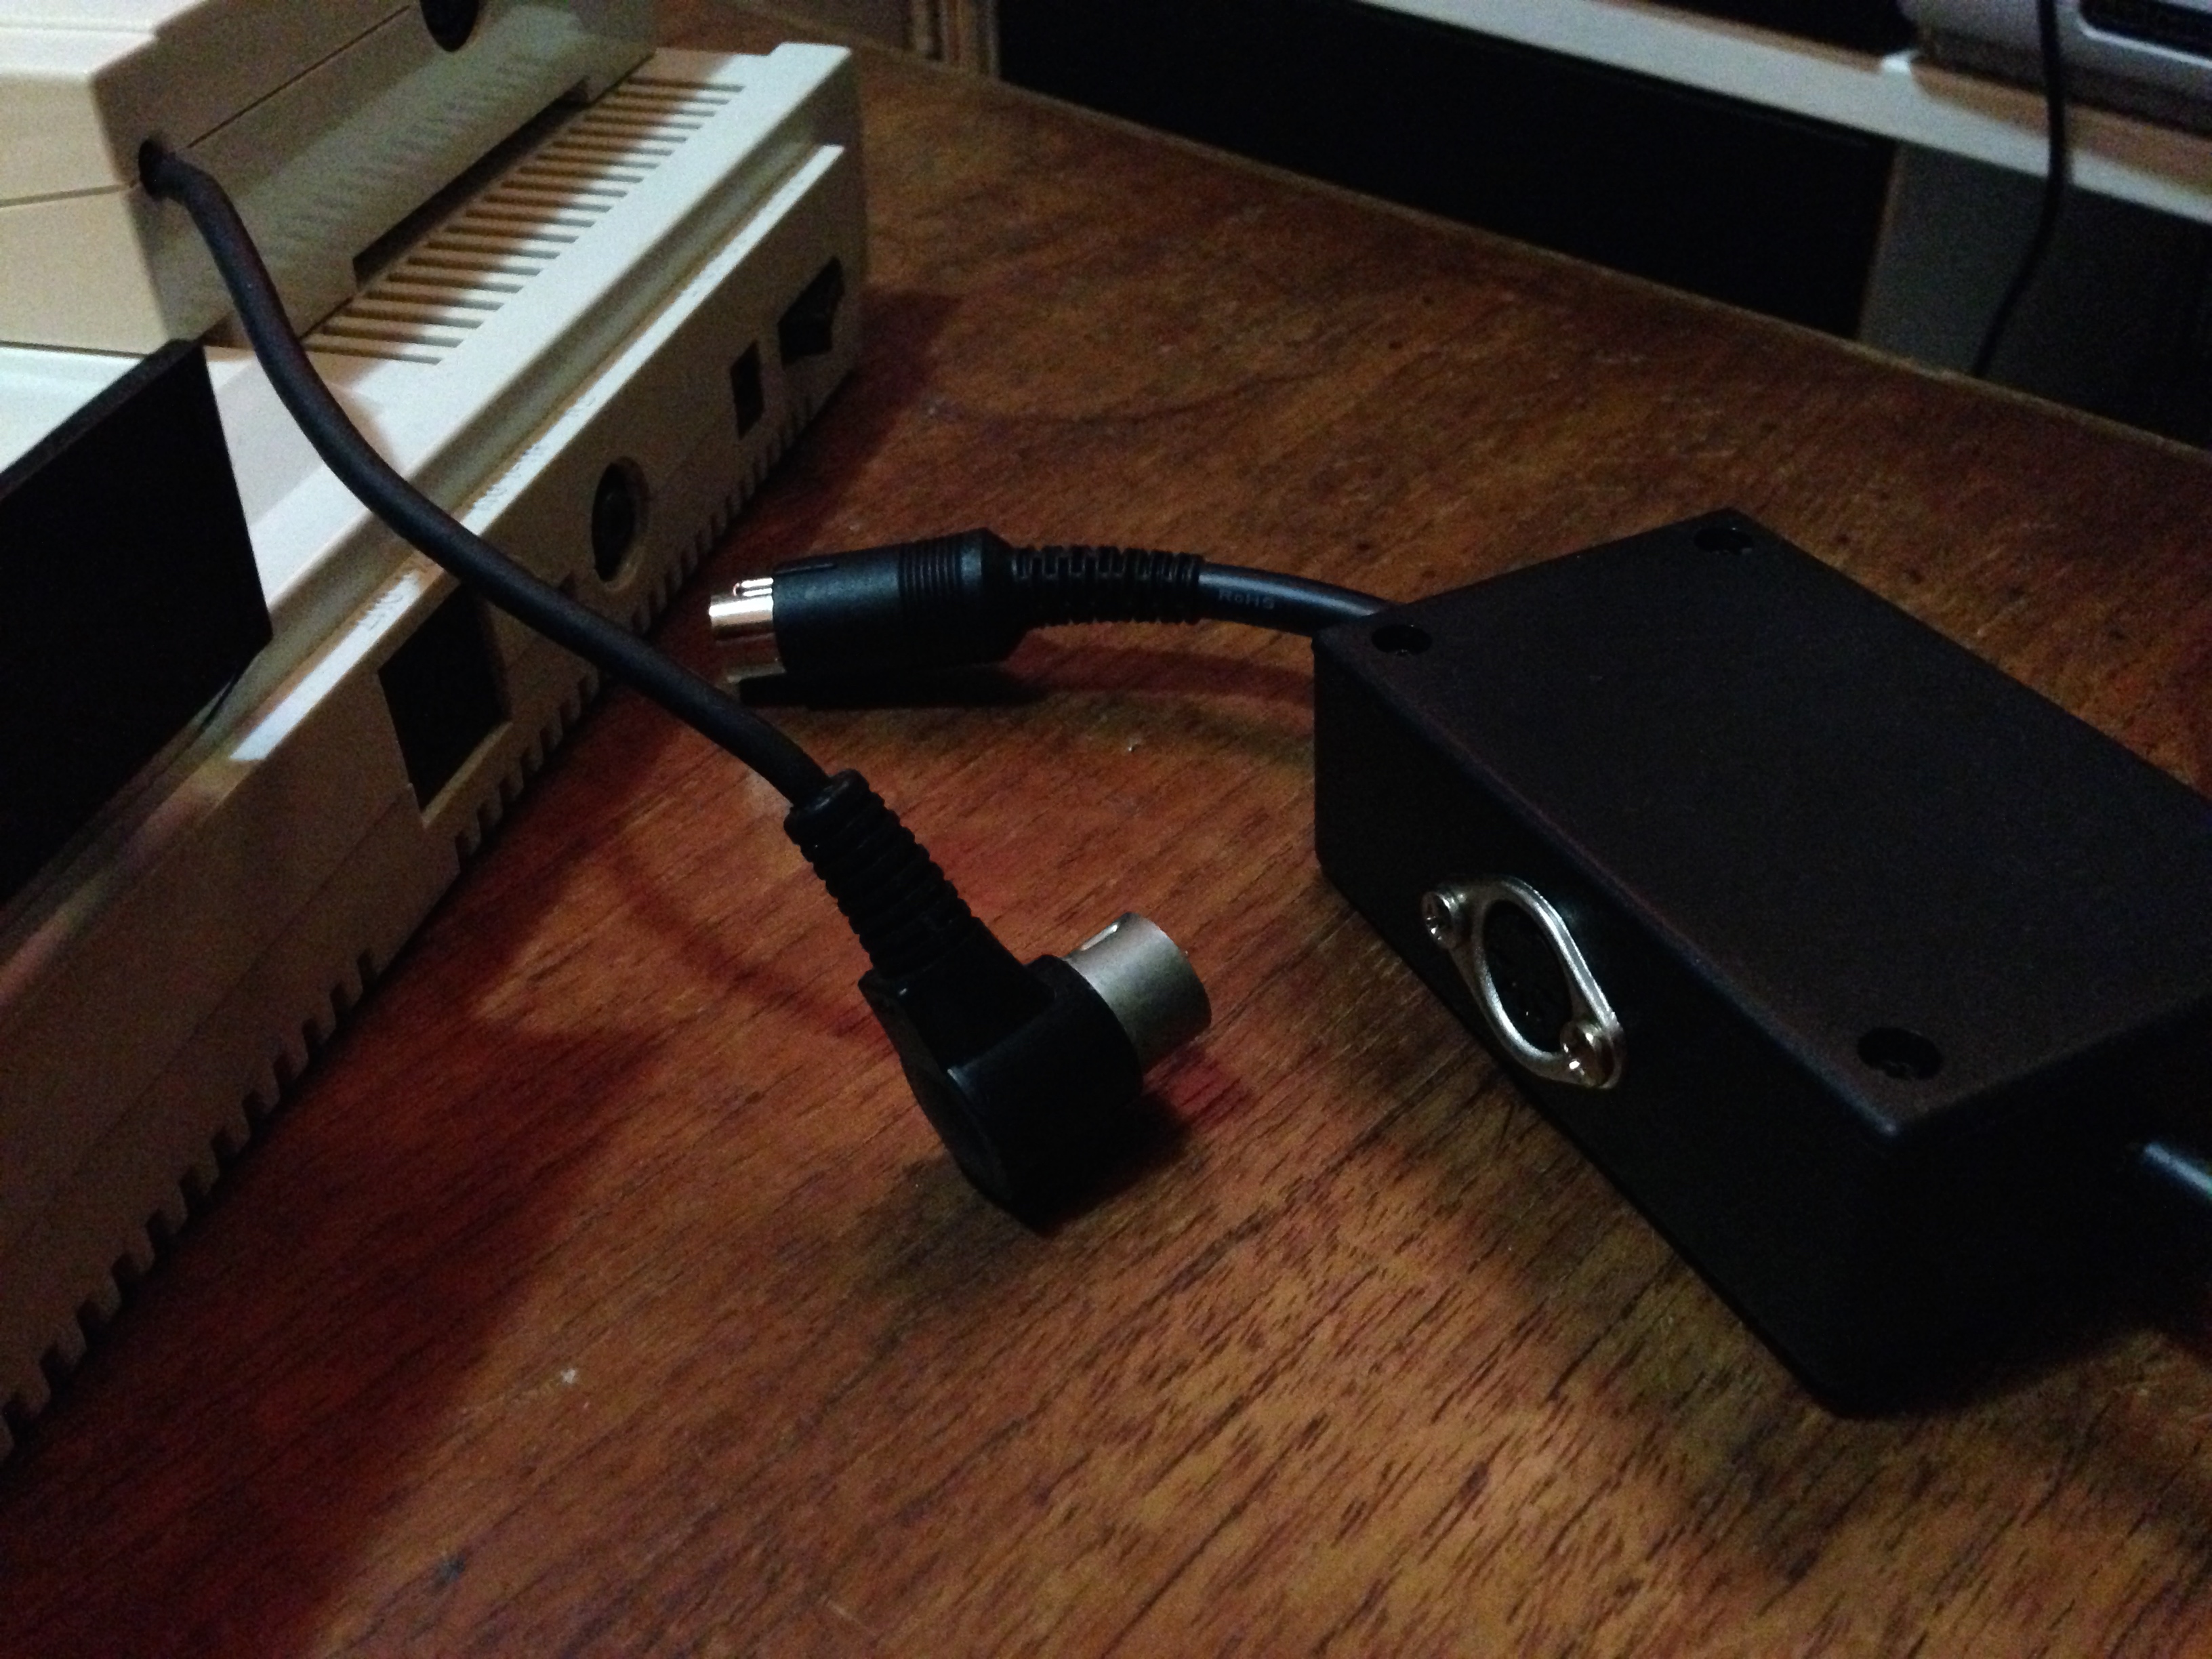
So I theorised I could create a normal looking flash cart for my Mark III, combining a Master Everdrive with a new-style Master System to Mark III converter. They arrived, and worked!

Mark3Everdrive_0001

I needed to downgrade the firmware to version 5. It seems from version 6 and up, developer Krikz changed the video mode slightly, and the game select menu no longer works on a Mark III or other non-Master System hardware (e.g. a Game Gear in Game Gear mode via a modified converter).

Mark3Everdrive_0002

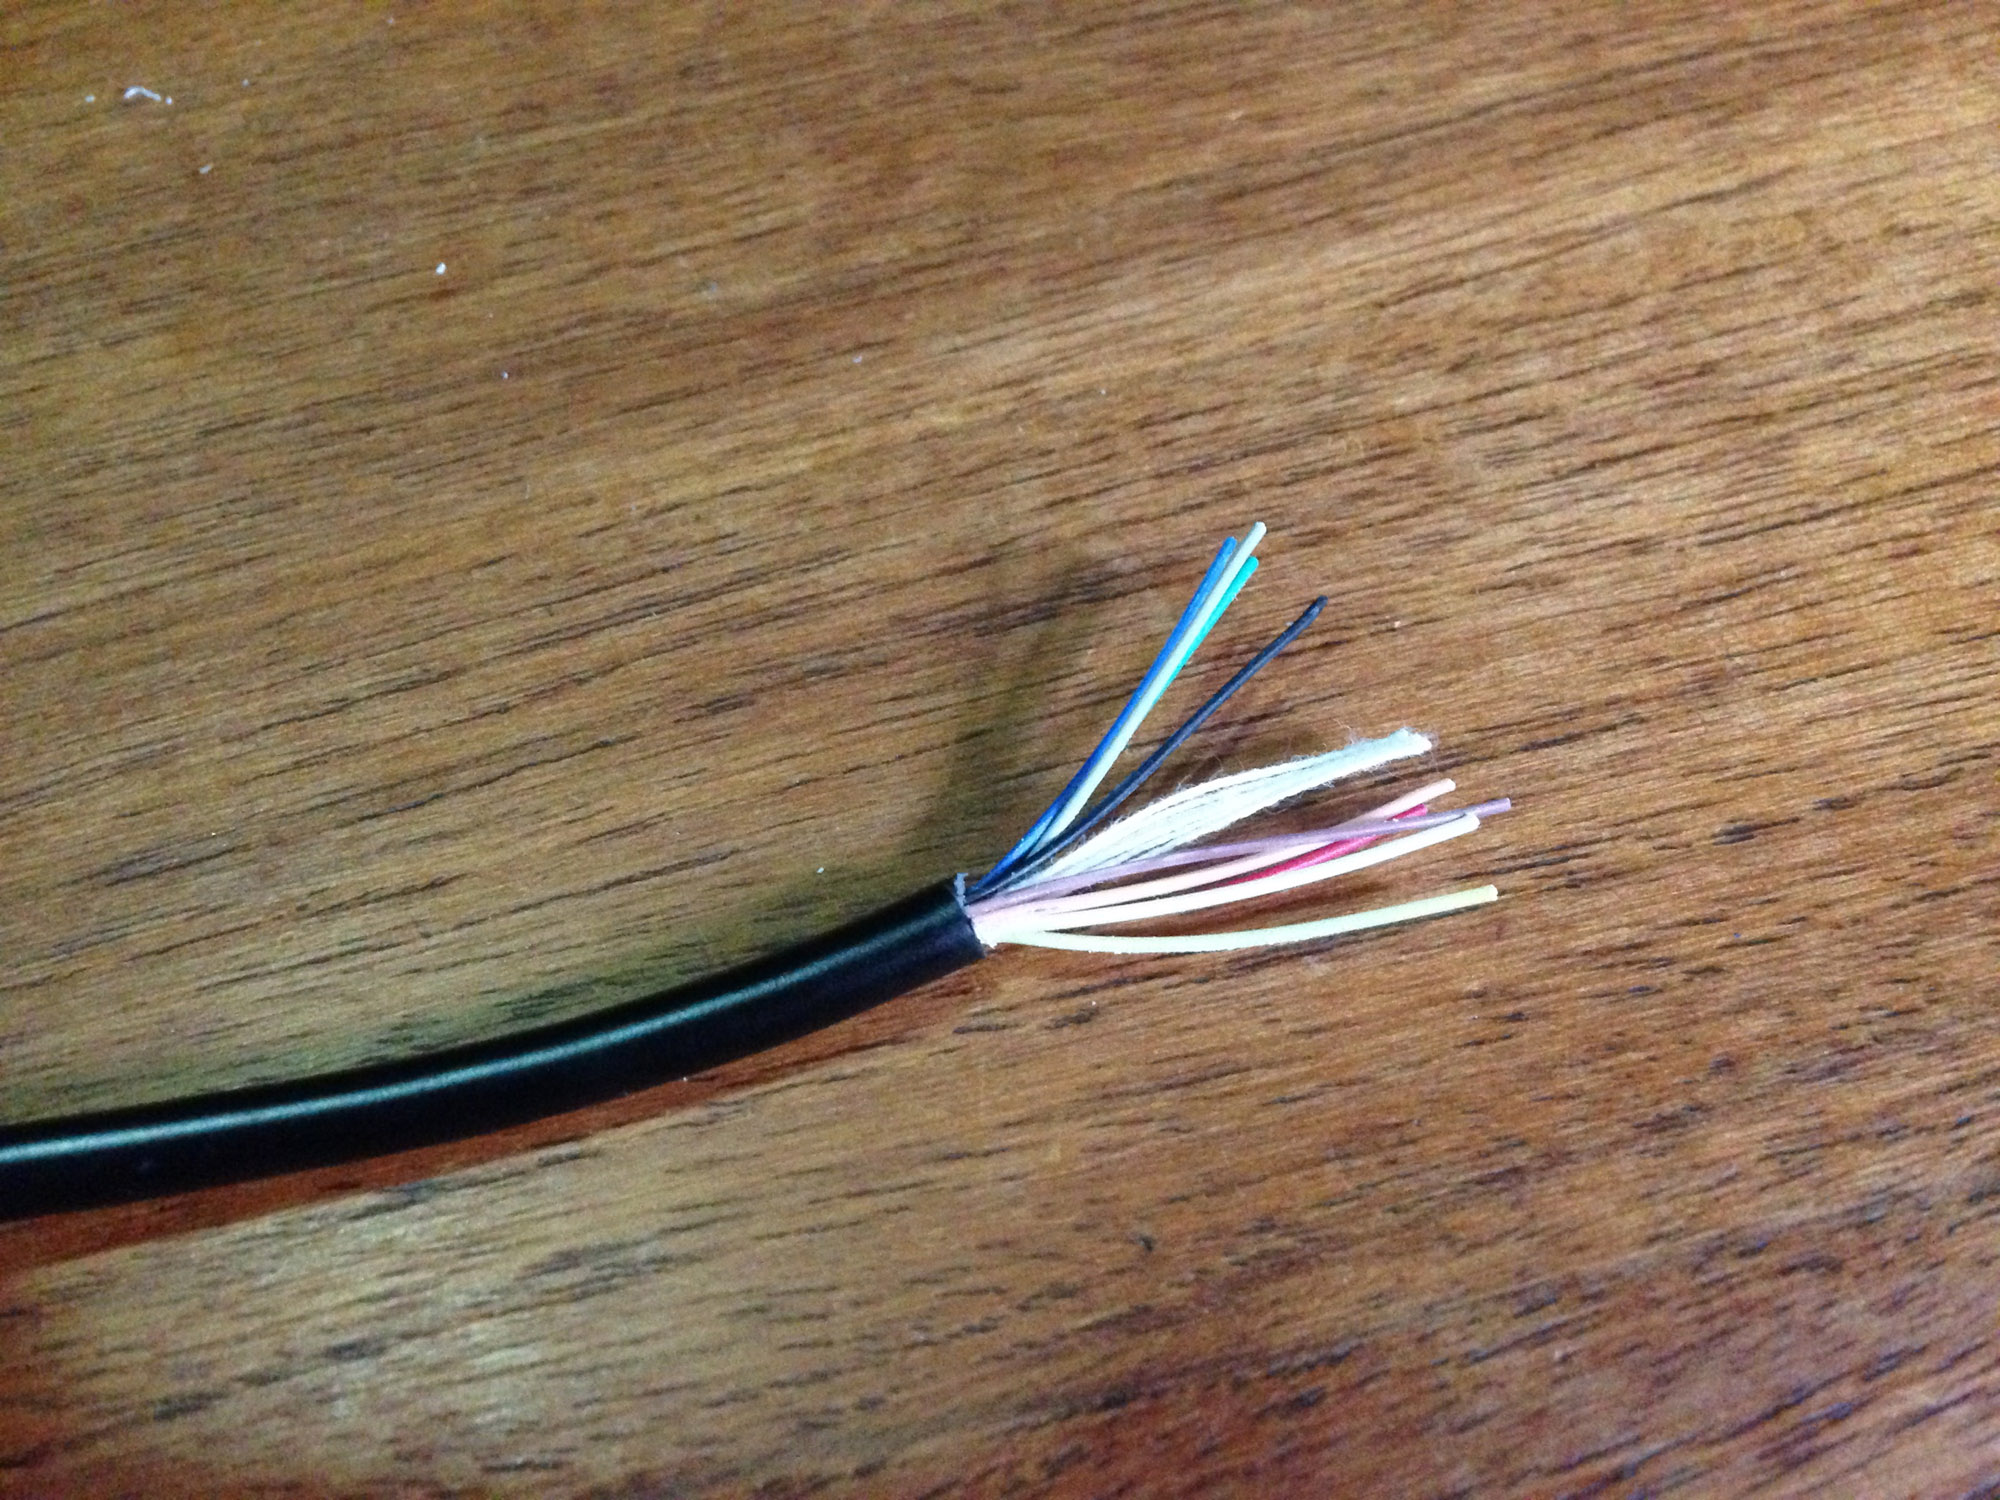
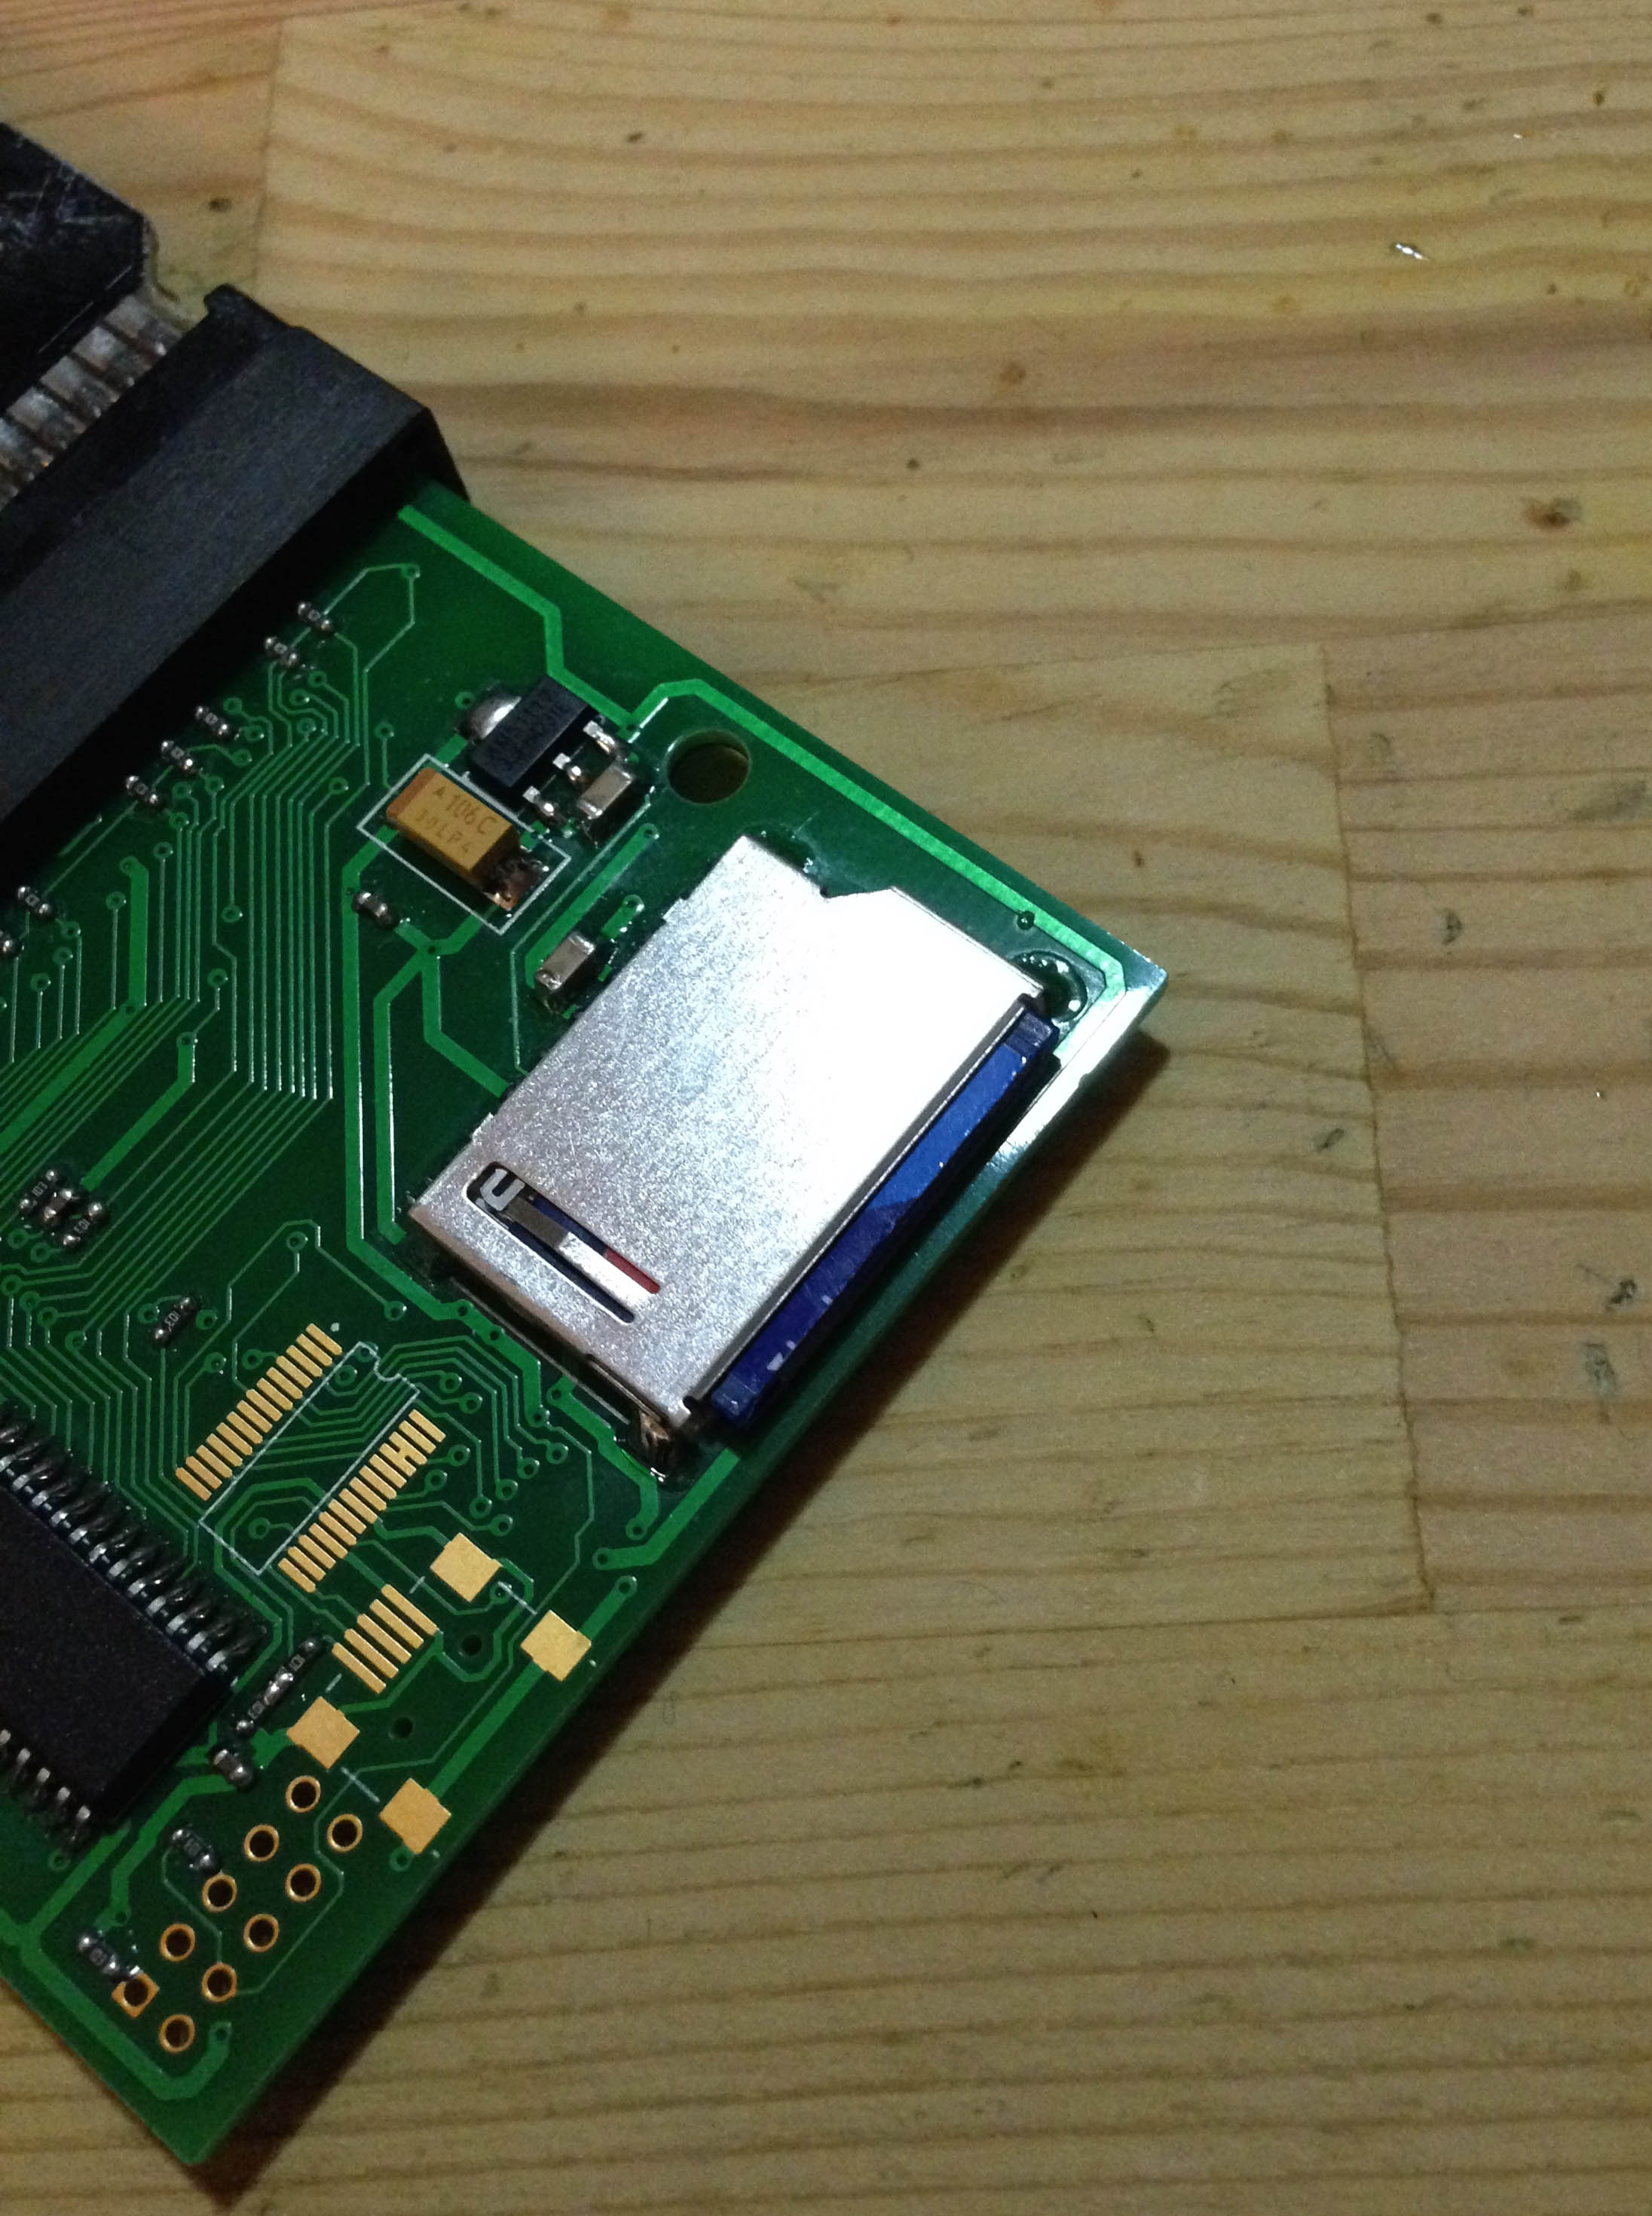
However, the combined cart/converter was a long way from fitting into a regular Mark III cartridge shell. First of all, the SD card sticks out.

Mark3everdrive2_1587

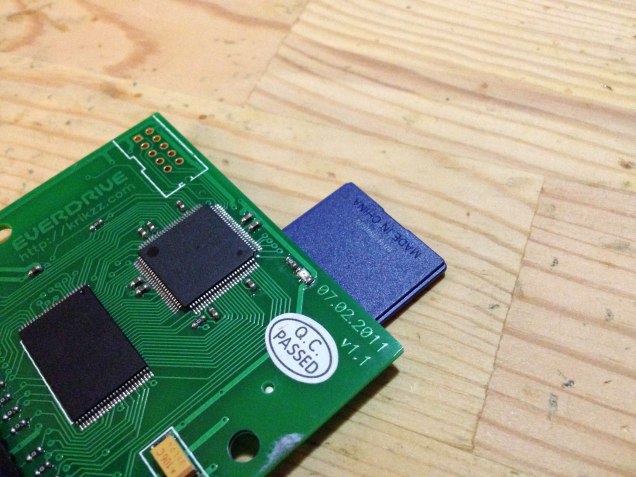
I looked around for a micro sd card adapter that would work, but a couple I got didn’t fit, or were not low profile enough. Then I came across this. Many SD cards can simply be cut in half! Sure enough, the 2GB SD I was using was just empty plastic in the top 2/3, so I sliced off the excess plastic.

Mark3everdrive2_1590

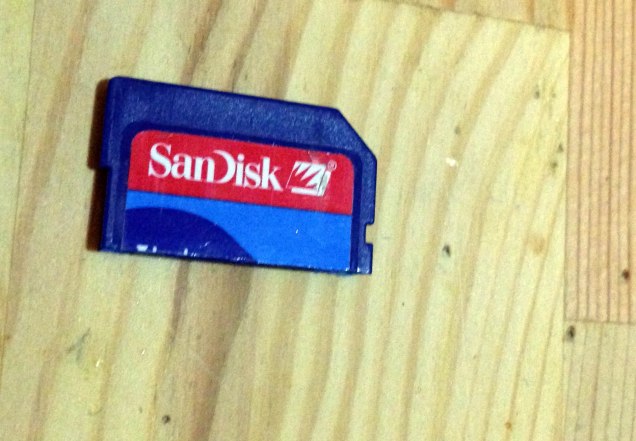
Now it sat well clear of the edge. This extra gap became very important later on, as I needed that extra few millimetres of clearance on the case.

Mark3everdrive2_1591

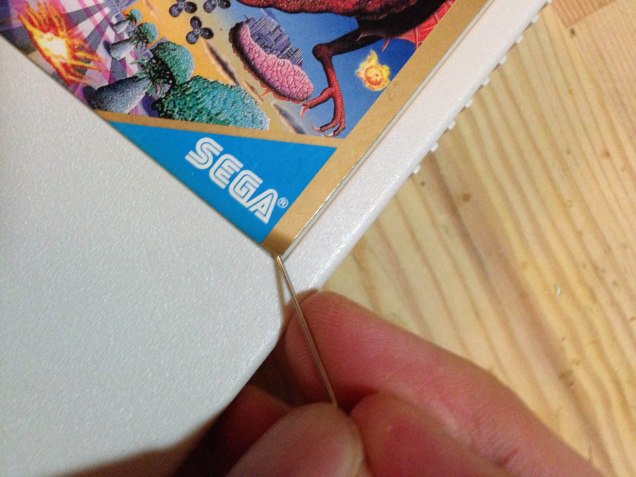
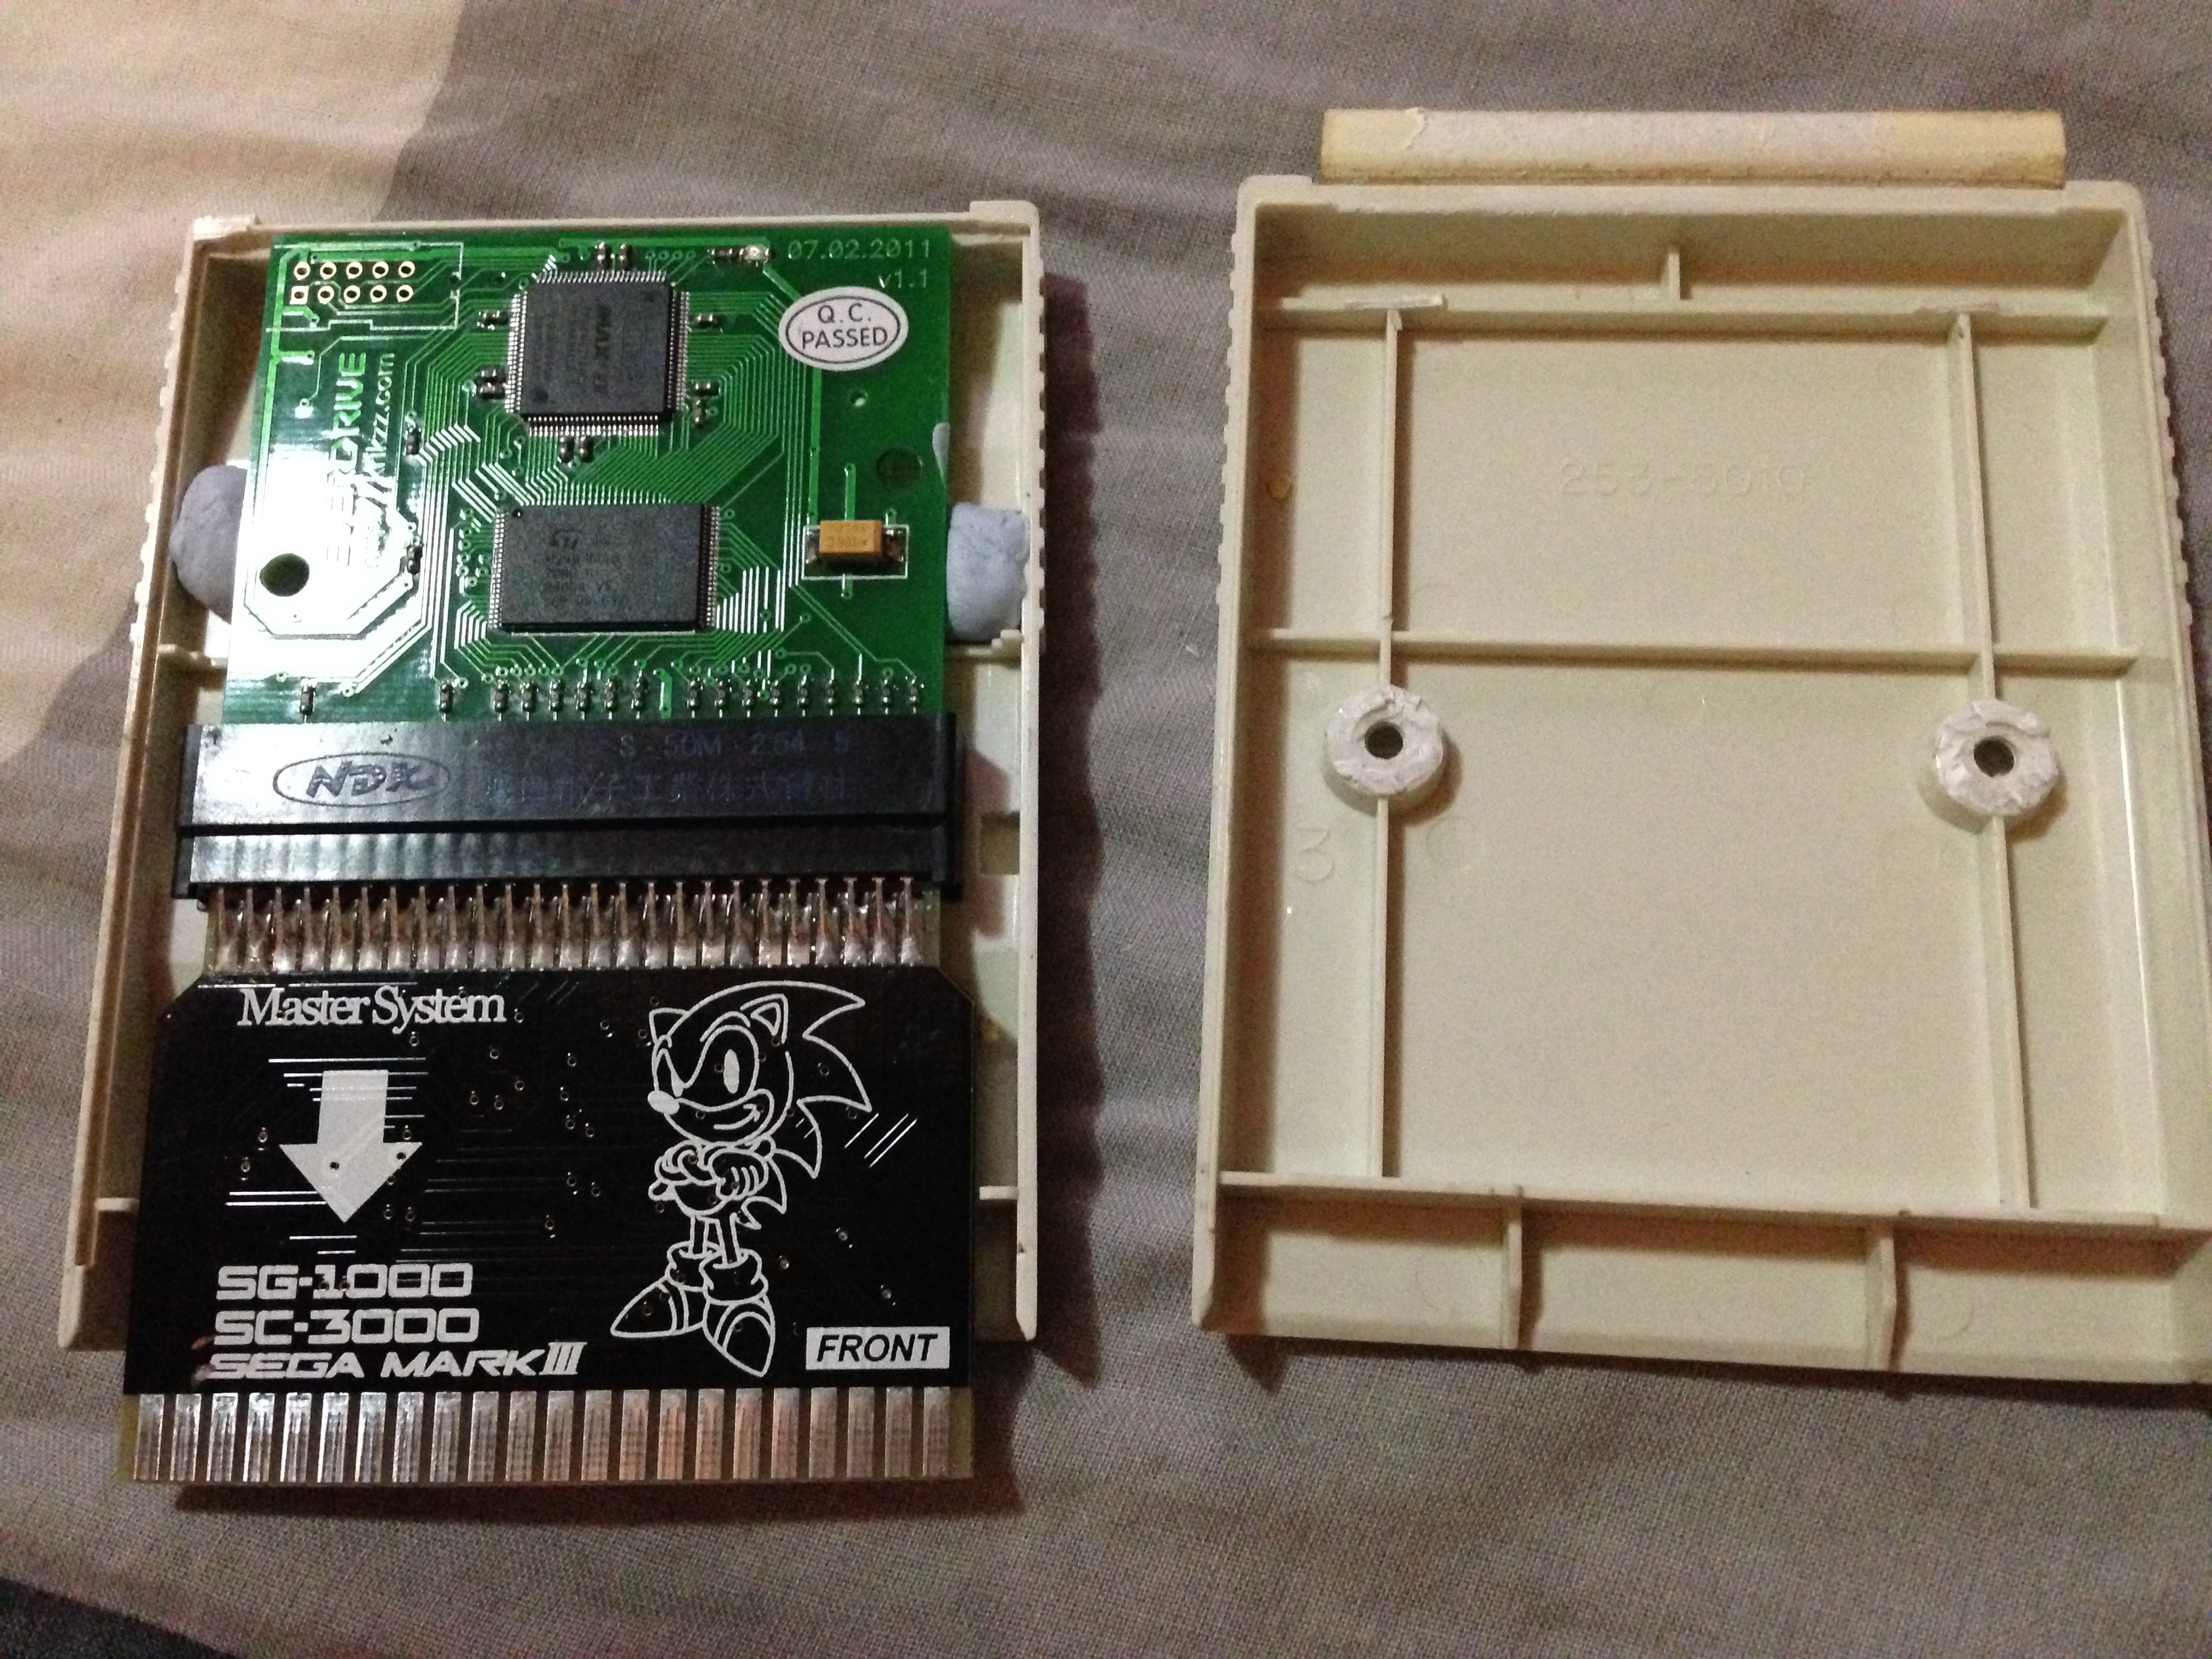
Next I had to open up the shell I was going to use – a cheap copy of Space Harrier was my sacrificial lamb. To open Mark III carts you have to access some screws under the label, so I used a hairdryer to warm up the label glue, then a pin to start peeling the label.Mark3Everdrive_0003

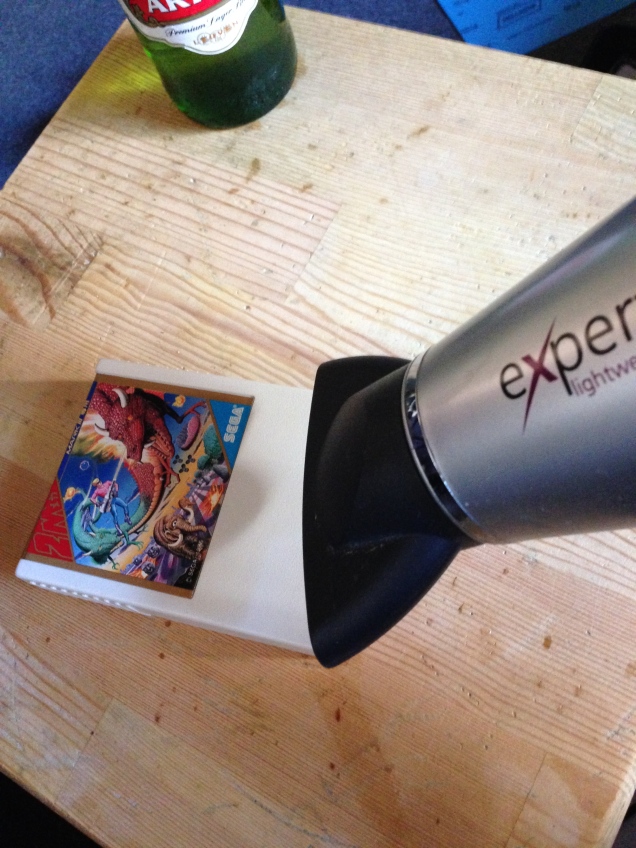
It’s fairly easy this way, with no damage to the label or cart.

Mark3everdrive_1737

Mark3everdrive_1738

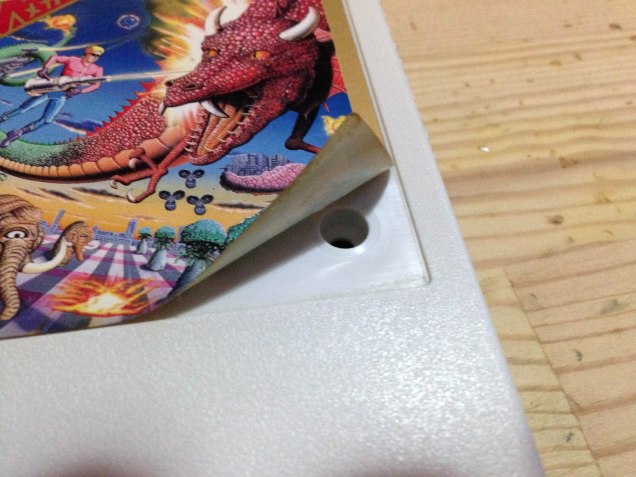
After getting inside, I sliced away all excess plastic, but the combined cart/converter was still sticking out the bottom of the shell quite a lot.

Mark3Everdrive_0005 Mark3Everdrive_0006

I gained a couple of millimetres by shaving down the top plastic rim

Mark3Everdrive_0008 Mark3Everdrive_0020

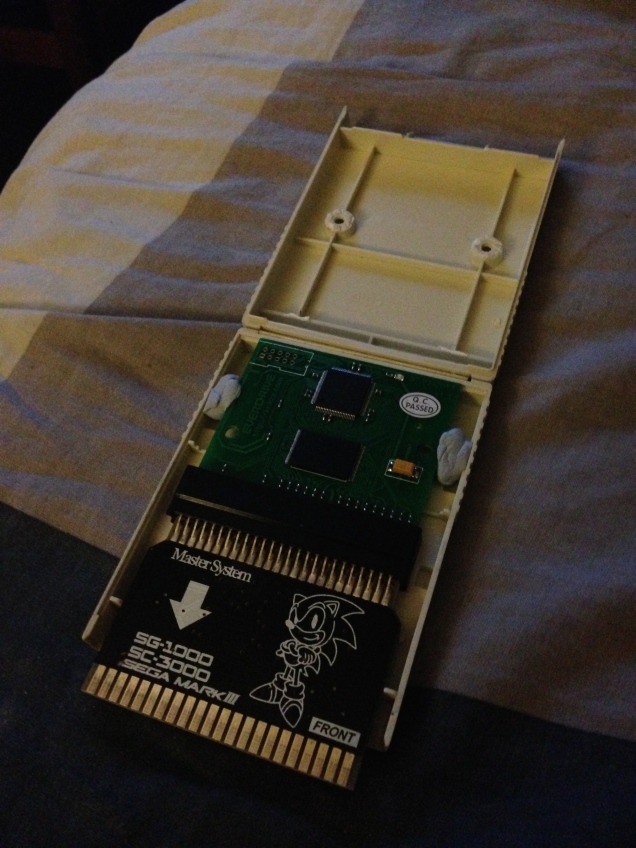
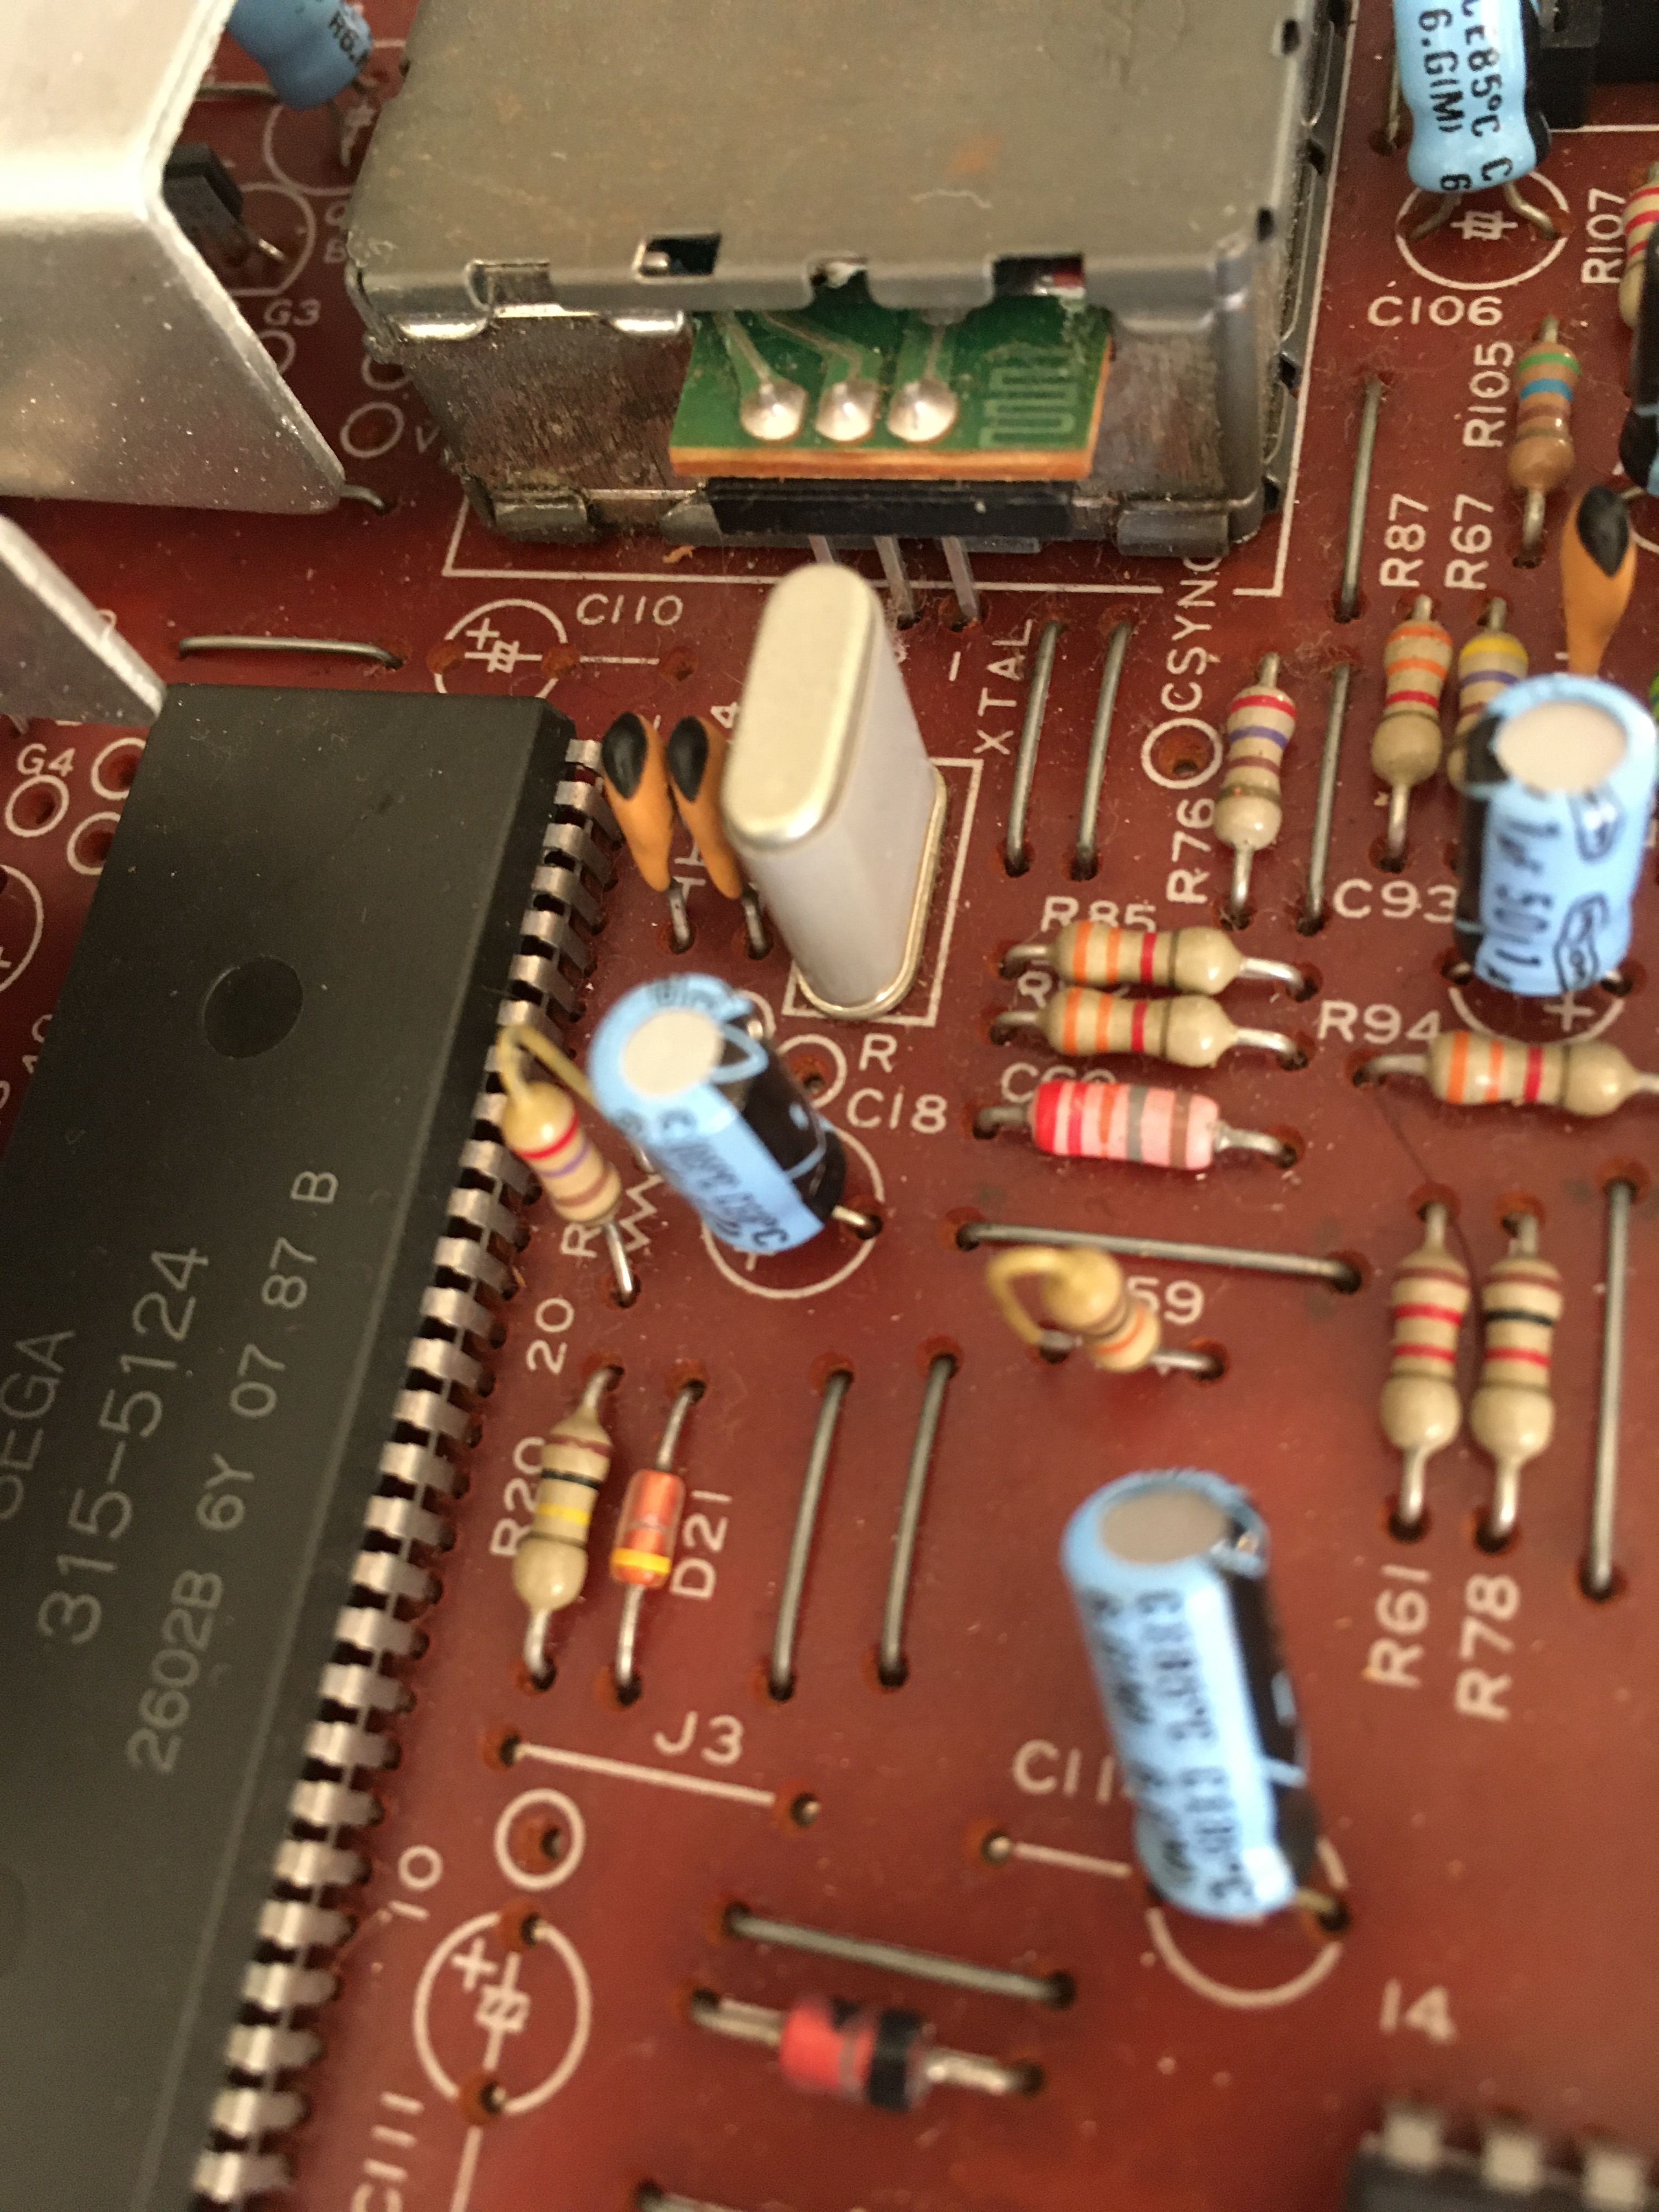
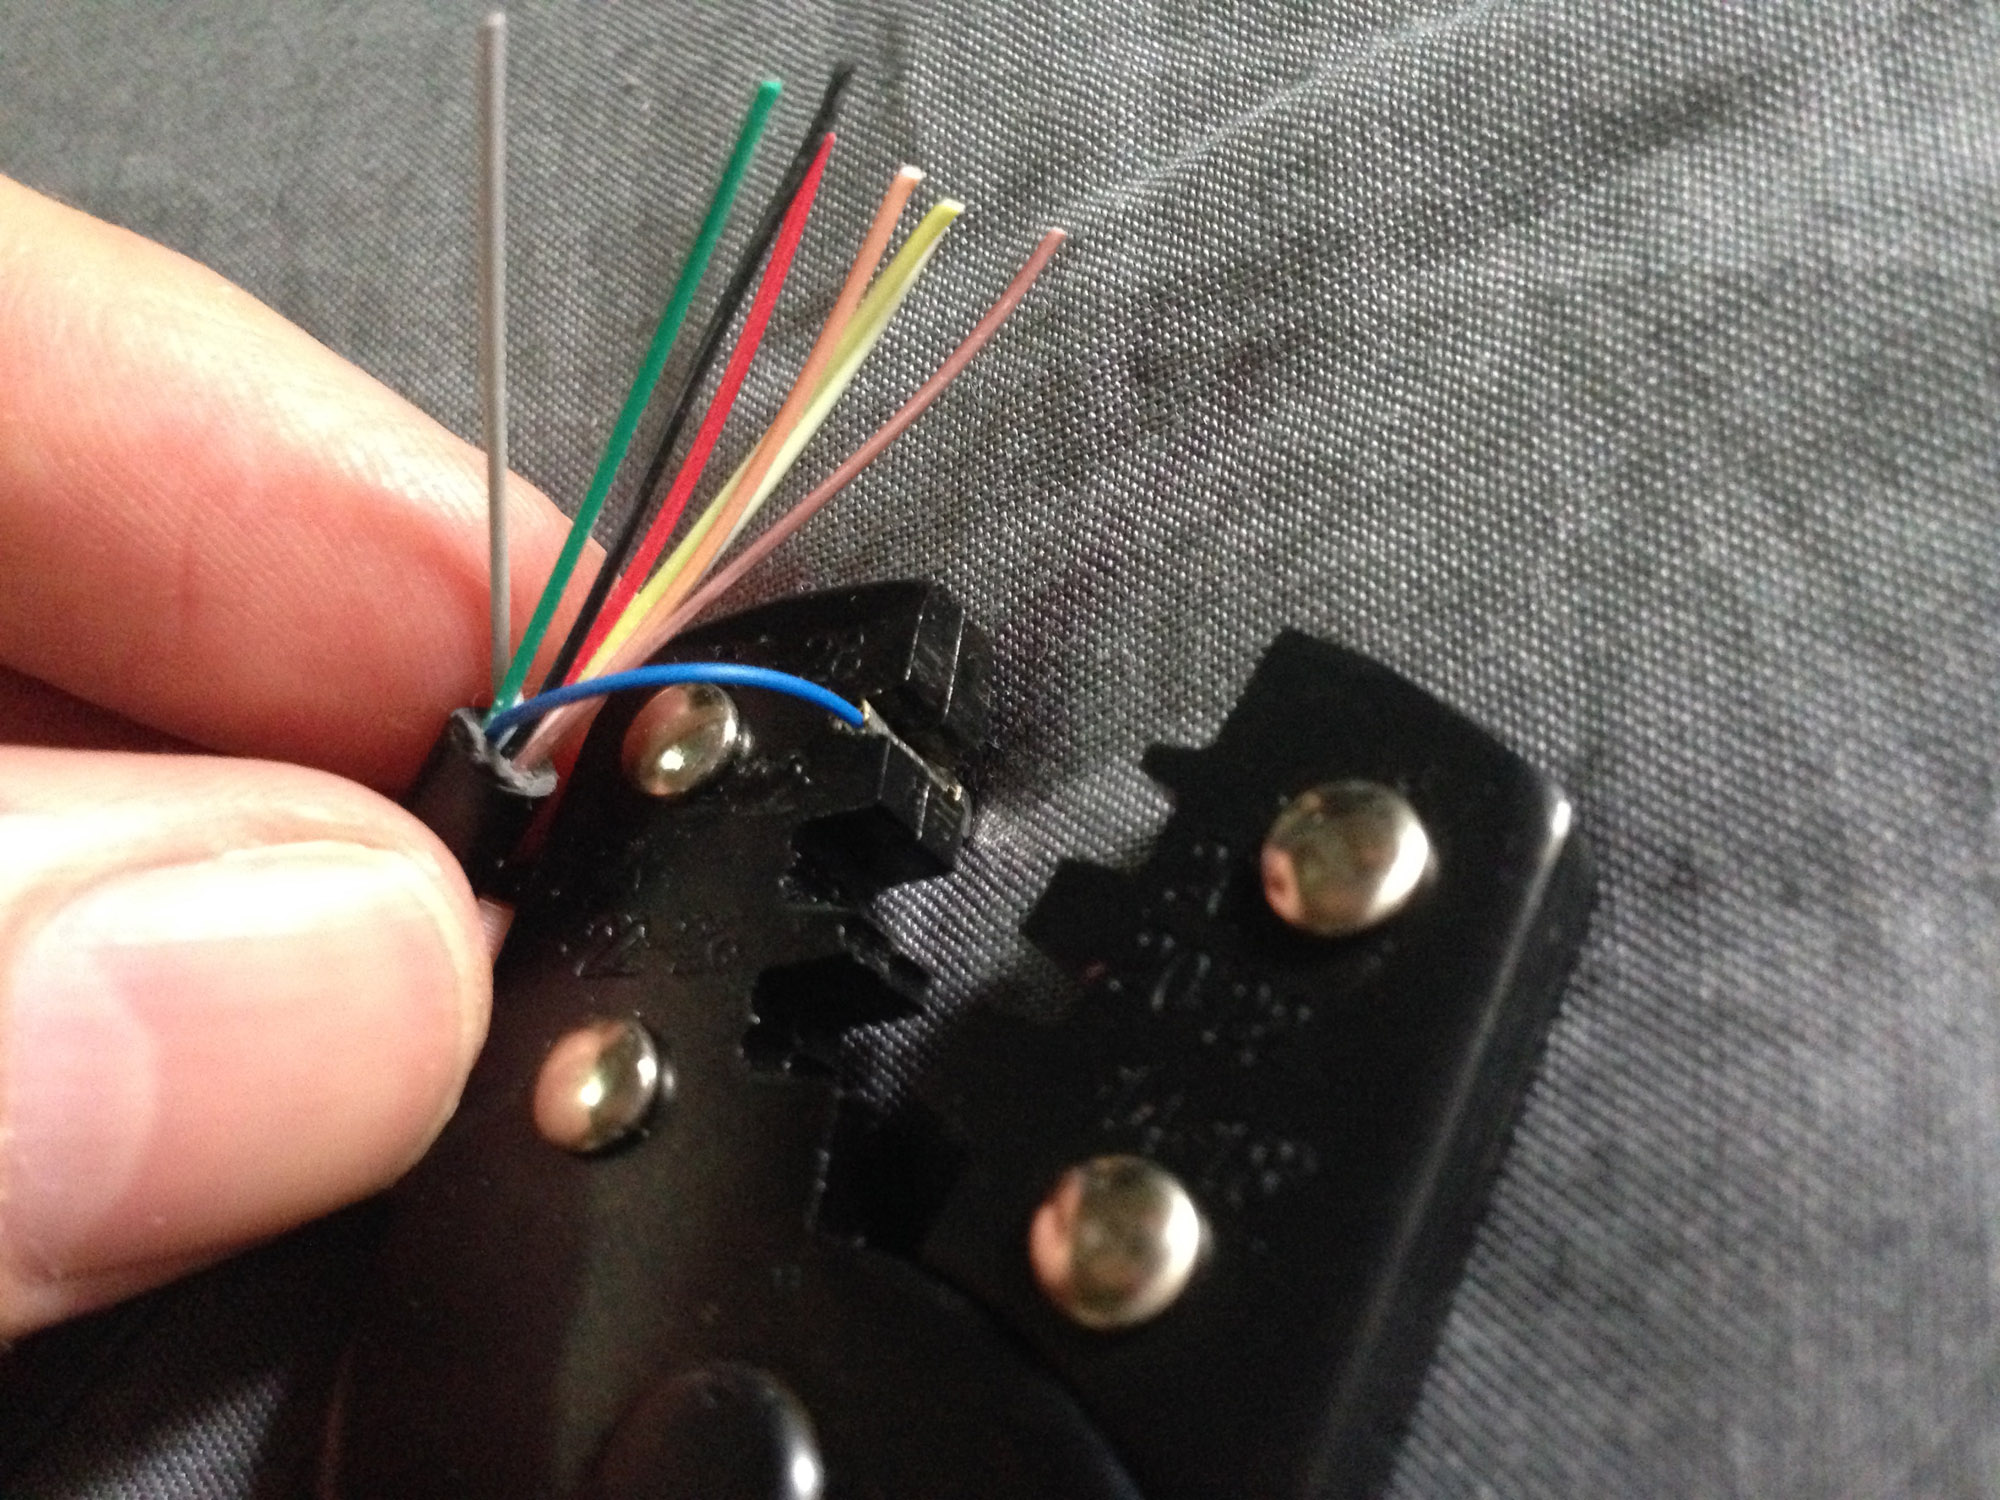
But the real gains would be had by filing/sanding back the contact pins on both the flash cart and the adapter. Contact pins are often far longer than they need to be, they really only need 1-2mm – just enough to make a solid connection. Wear and tear is much less of an issue than back in the day, as I won’t be inserting and removing the flash cart from the adapter ever again, and the cart itself will stay in the console most of the time. So I brought them down to about half their original height.

Mark3Everdrive_0009 Mark3Everdrive_0021

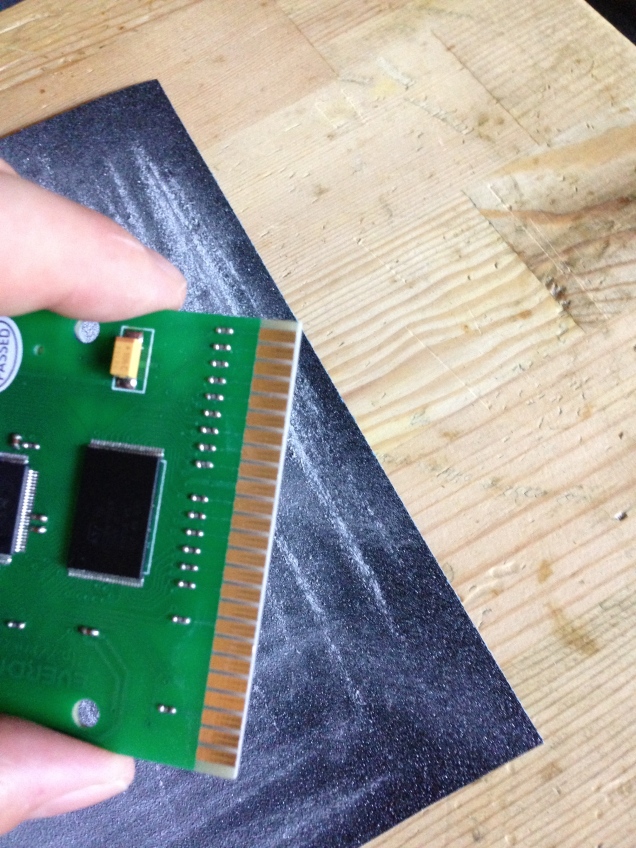
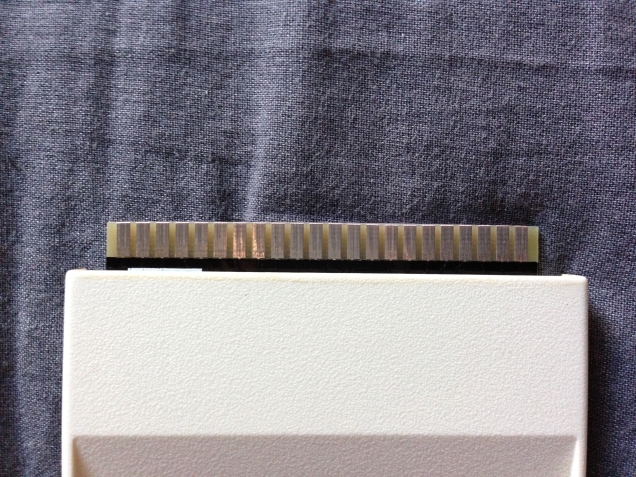
And now it’s going to sit just 3-4mm higher than a regular cart would! I could have gone further, but wasn’t going to push it too far and risk damaging the flash cart or adapter beyond repair.

Mark3Everdrive_0022

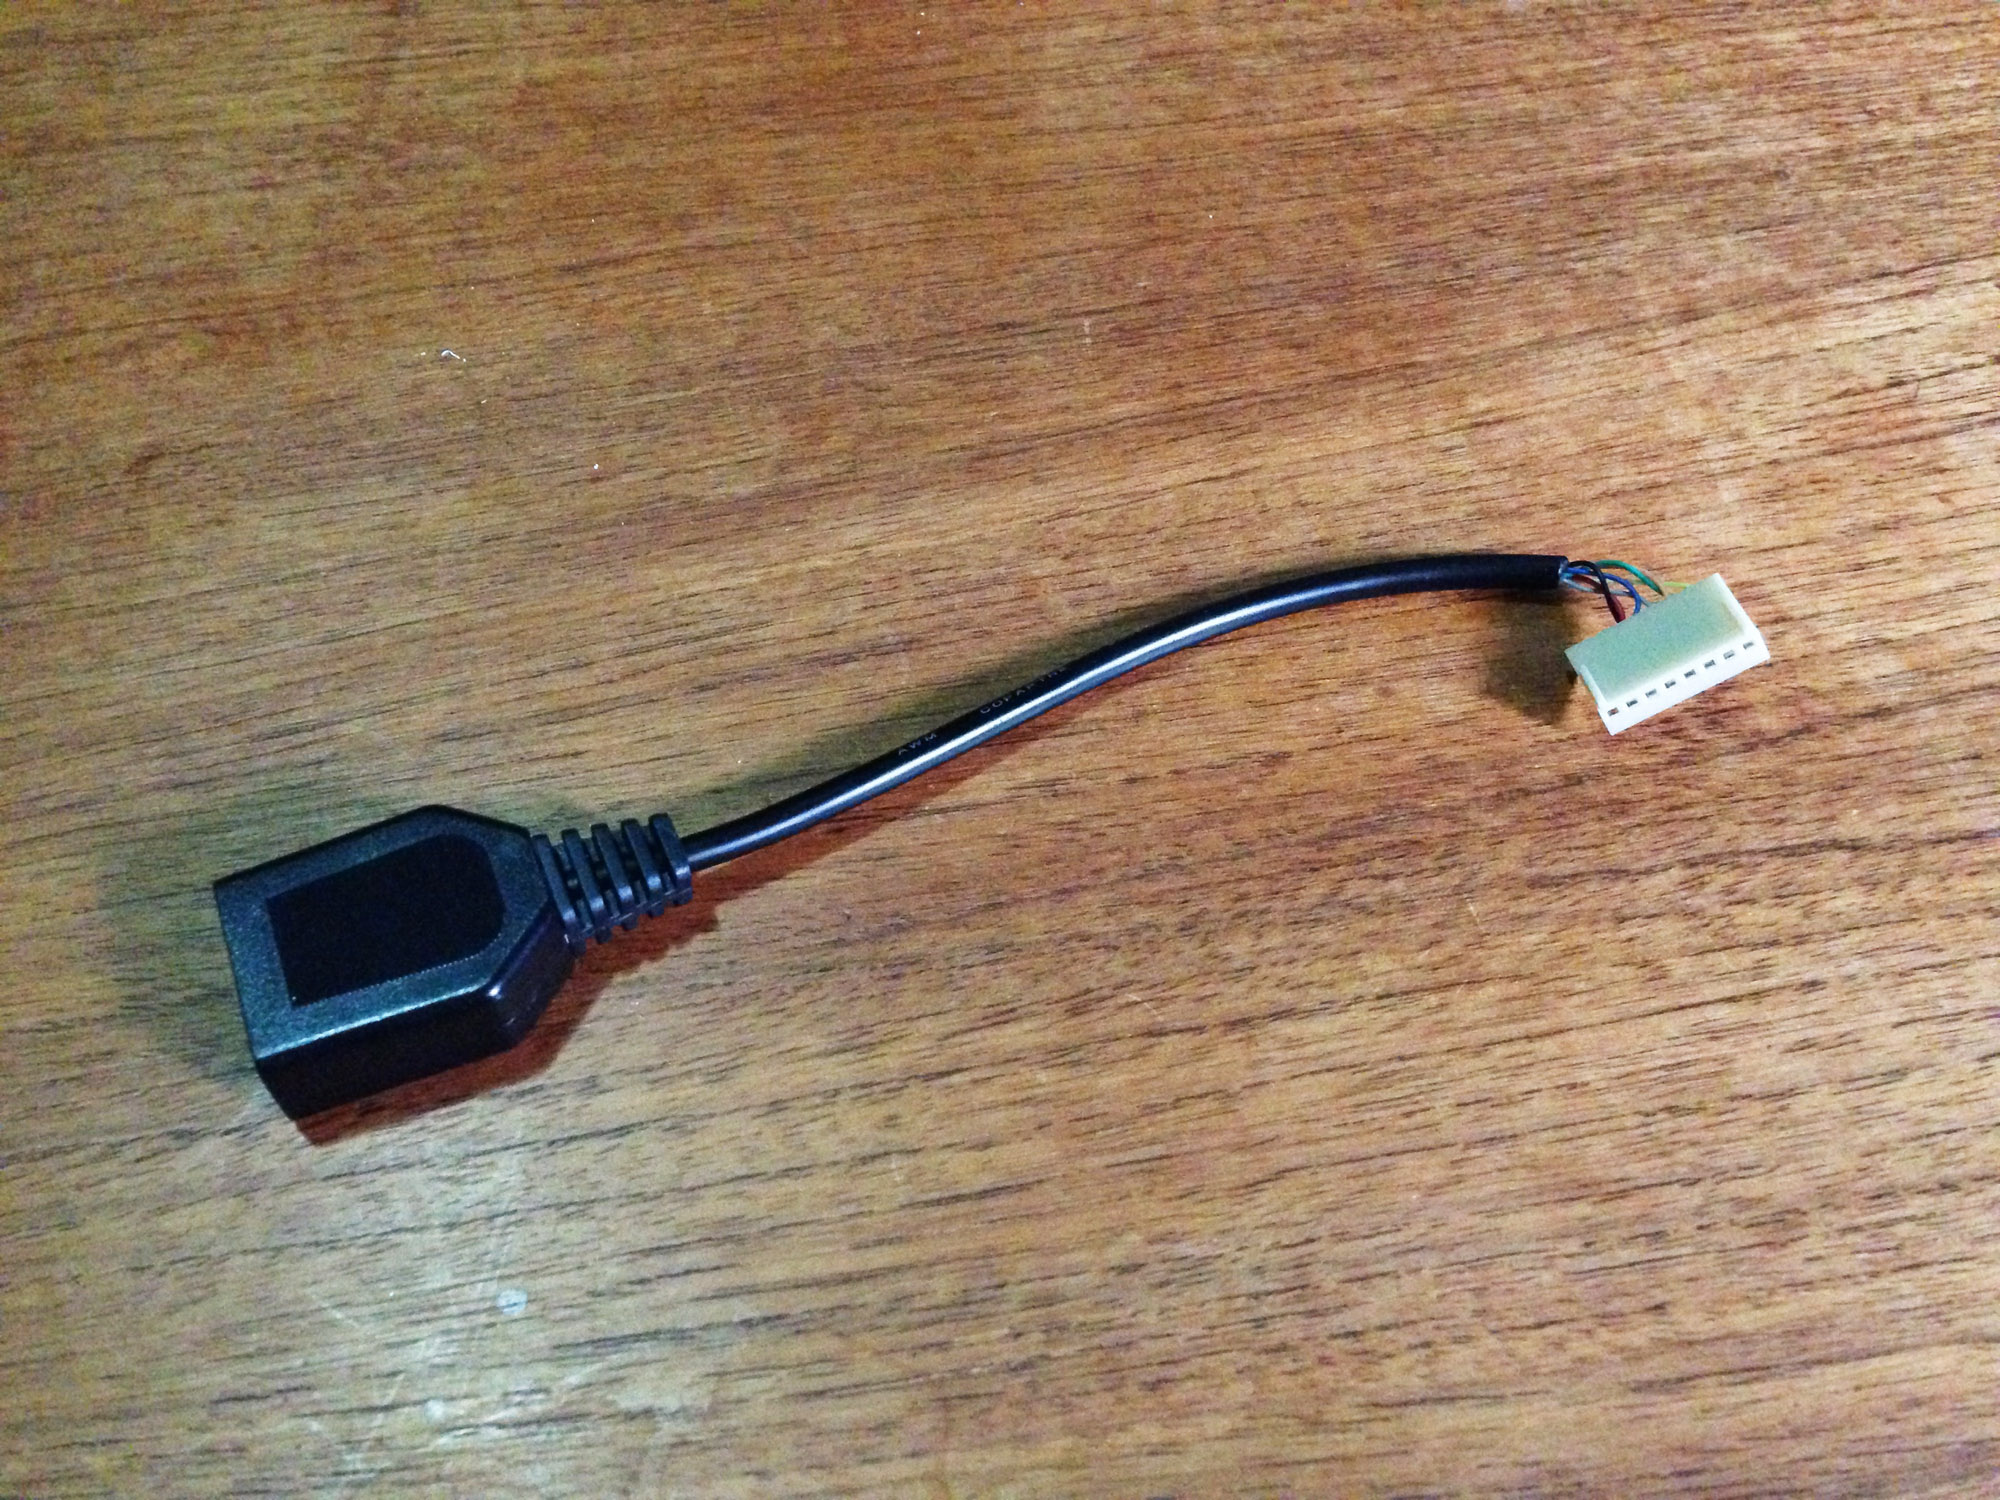
Next up I had to brace the combined cart inside the shell. I superglued some plastic that I cut to a shape that would hold the board well, braced them against the bottom of the cart shell, and backed it with hot glue for support from the sides.

Mark3Everdrive_0023

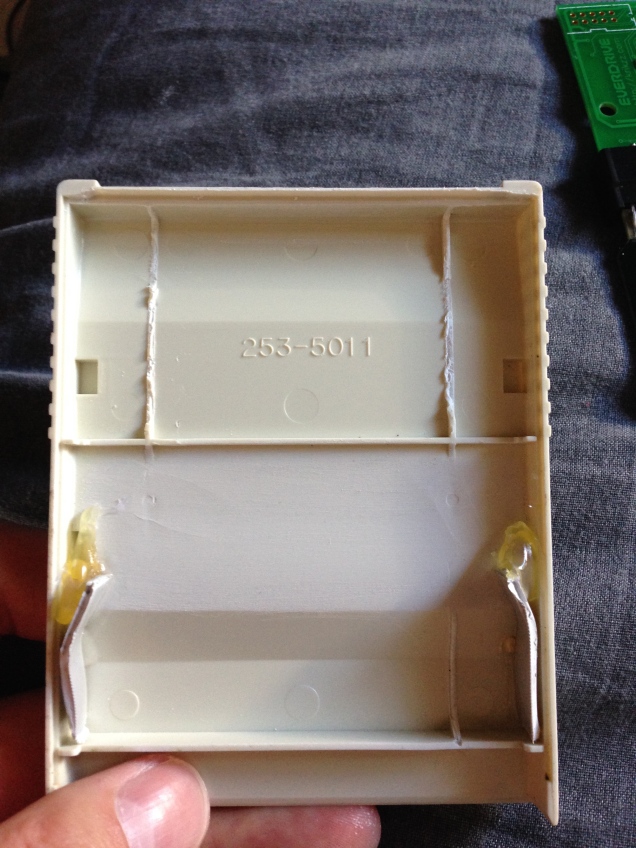
It slots in under the adapter’s slot section, and holds flawlessly, so now I have a snug but secure brace for the board! The braces push slightly outward at the front, and combined with the label over the top, also keep the cart securely closed, so it needs no additional screws or glue with regular handling (it would probably open if dropped however).

Mark3Everdrive_0024

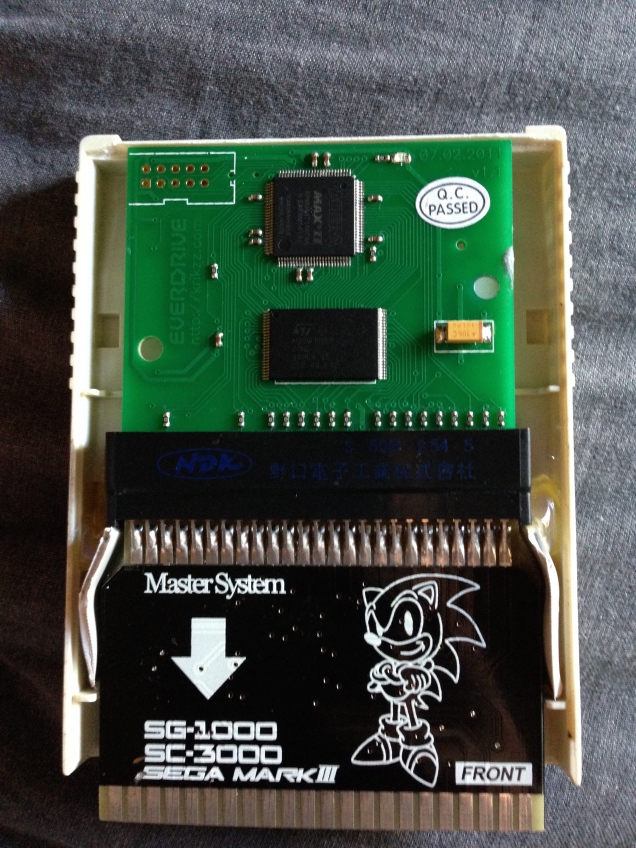
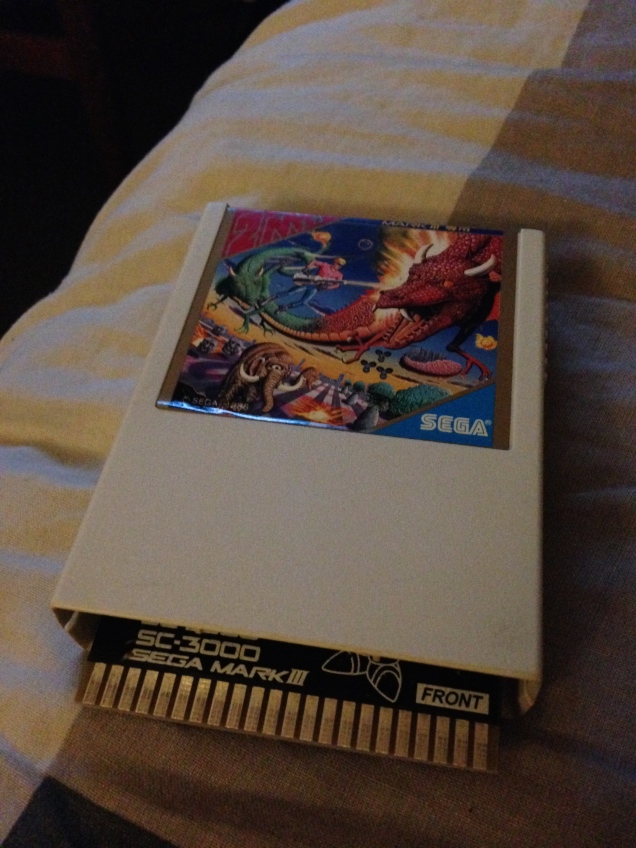
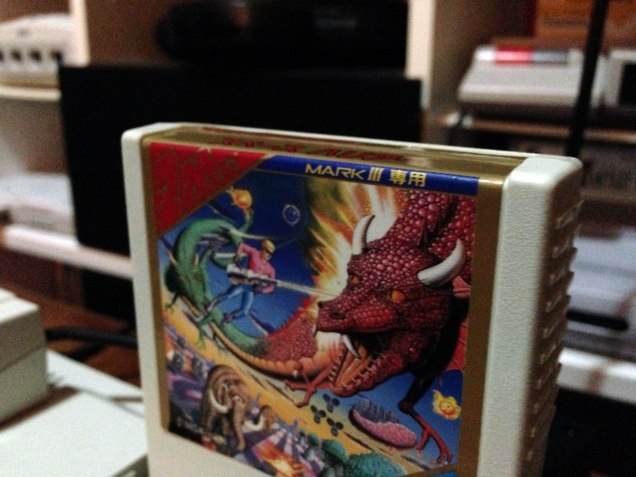
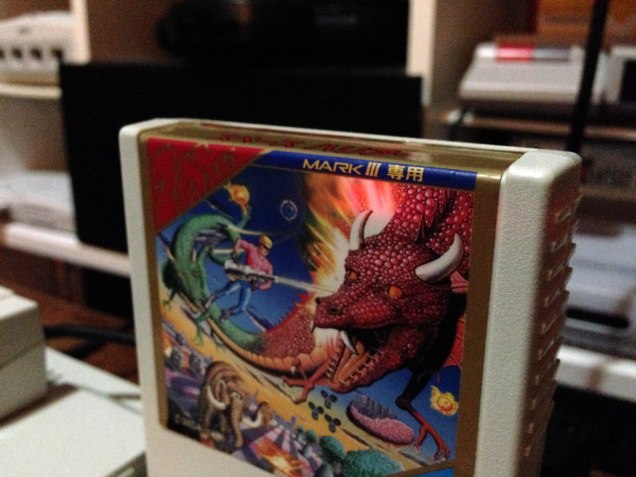
Close up the cart for the finished product! It sits slightly higher than a regular cart, but low enough to be quite stable within the cart slot, as it still sinks into the slot about 10mm. It sits lower than an unplugged cart resting on the cart slot, for example. At a glance you can’t even tell.

Mark3everdrive2_1592

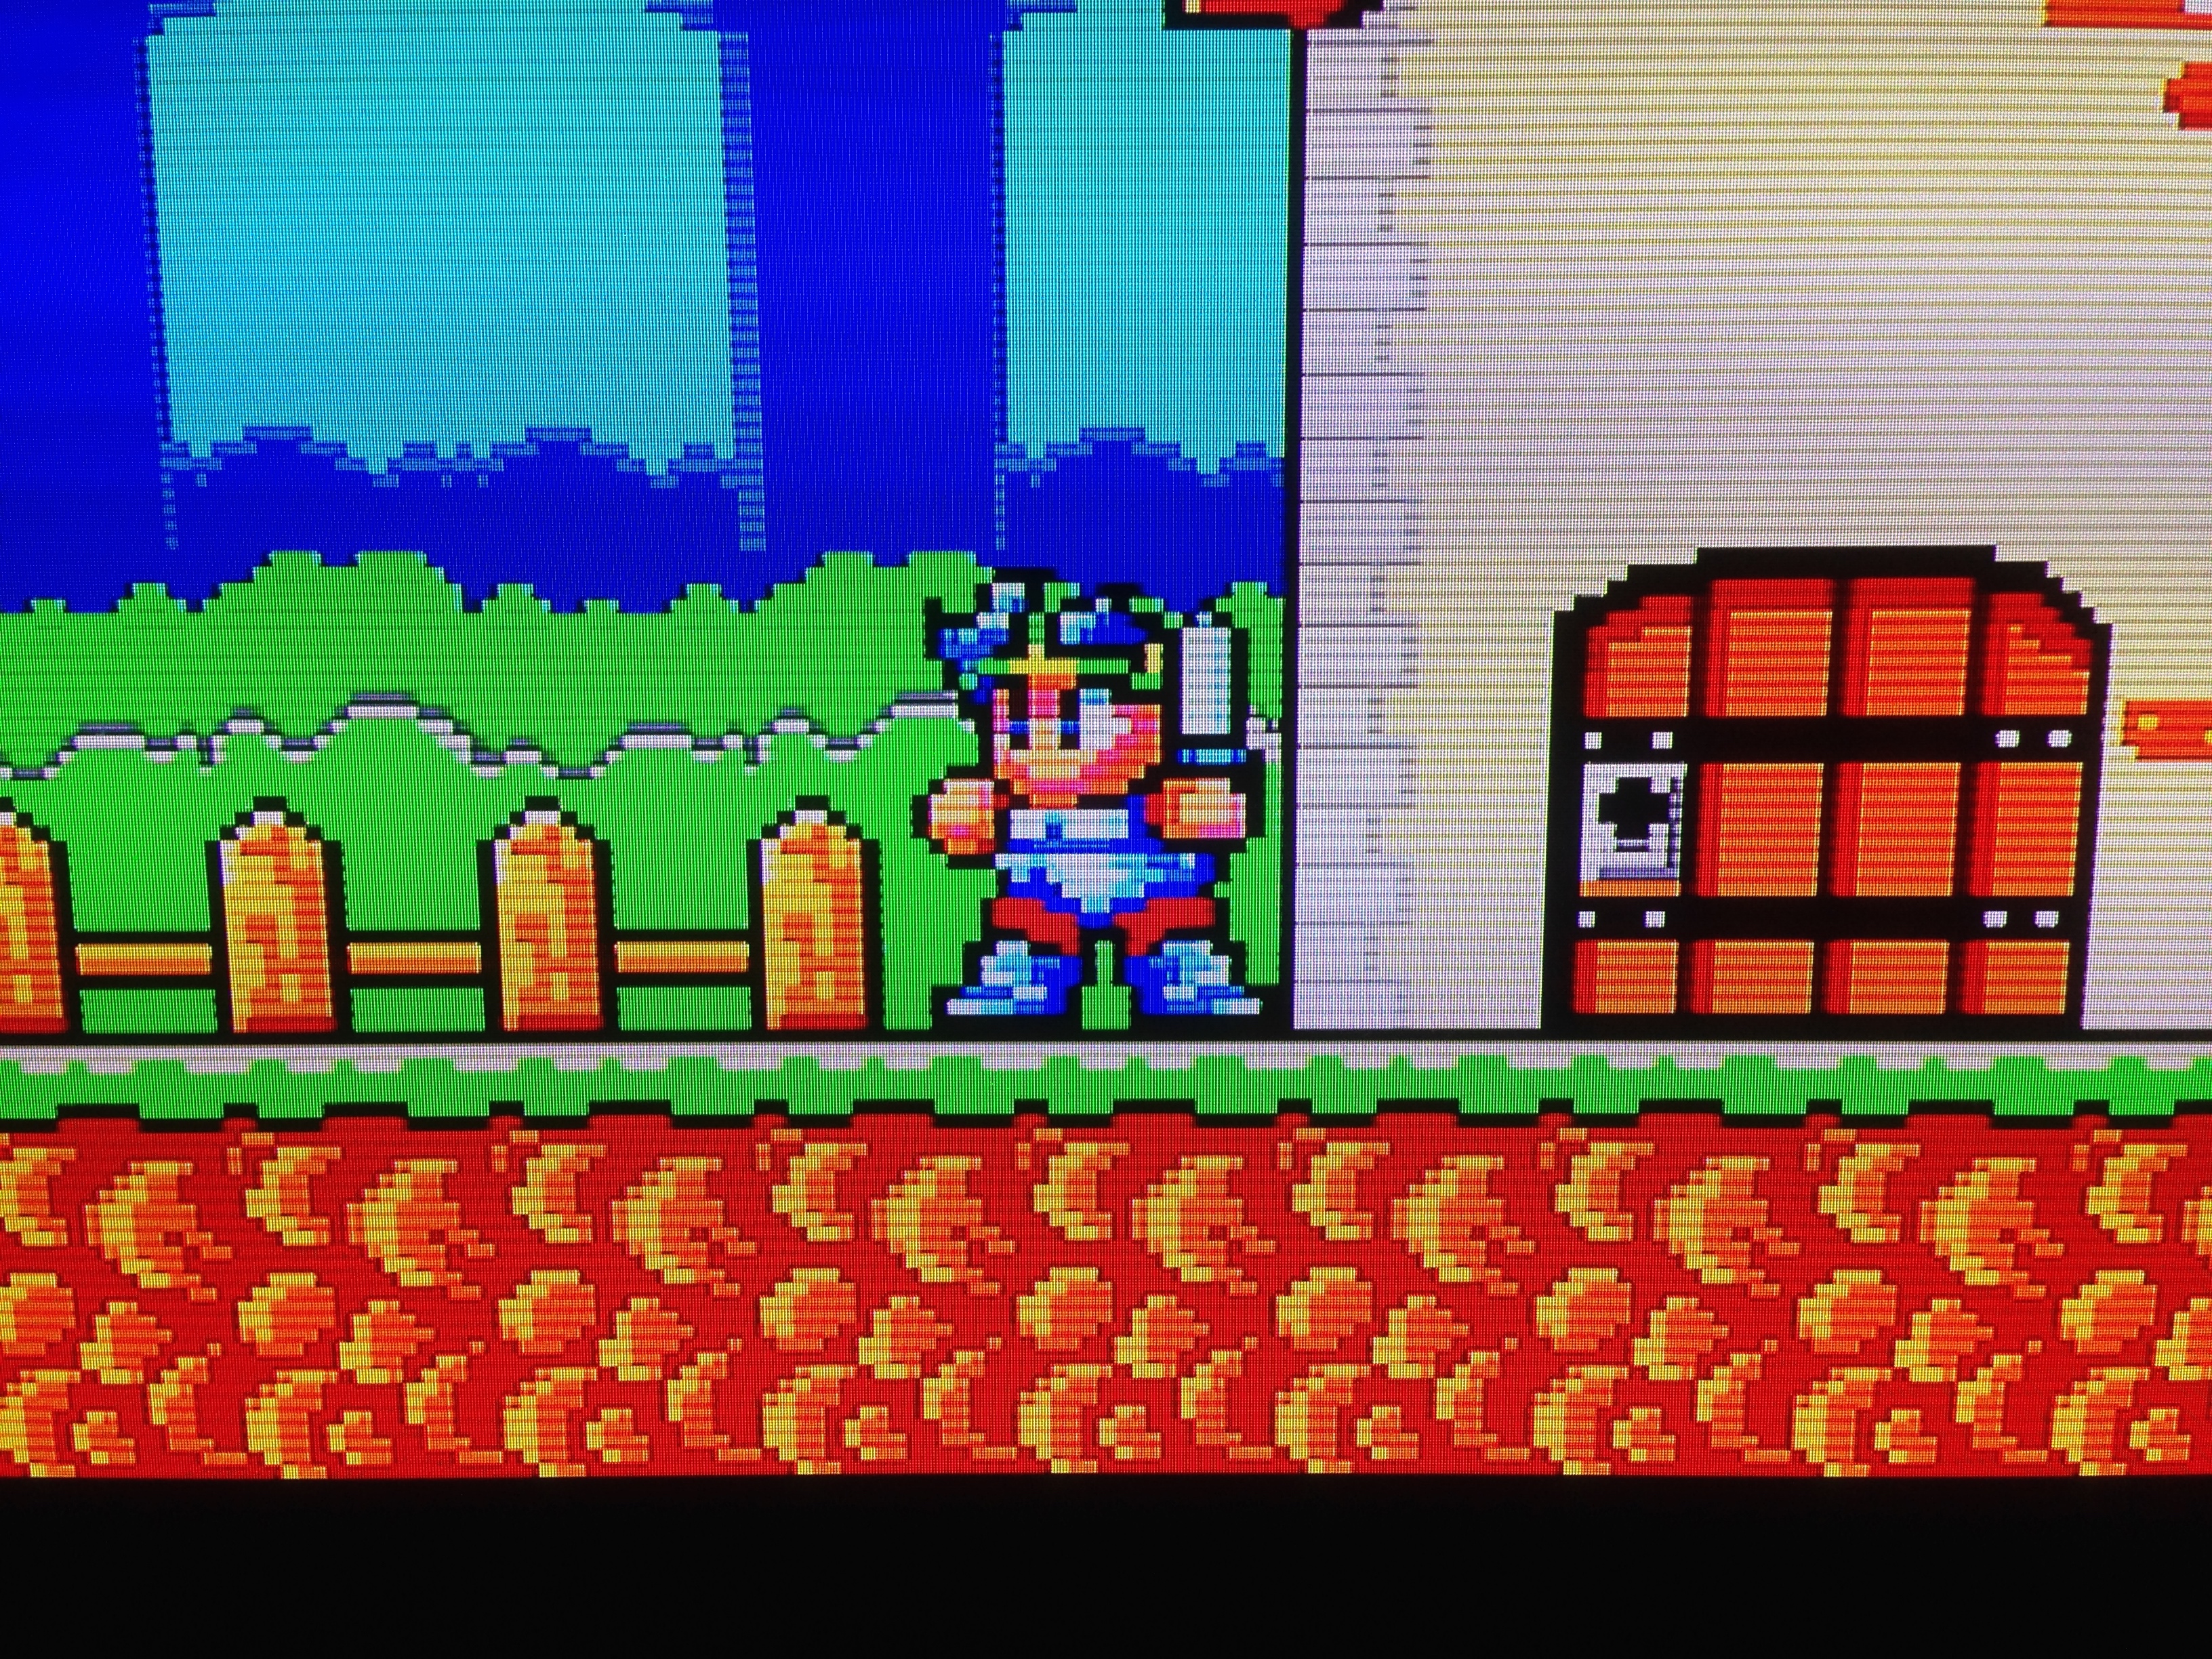
The LED when the everdrive loads shies through the explosion behind the dragon on the label too, which is nice.
Mark3everdrive2_1605 Mark3everdrive2_1604