Quite a few Famicom games, in particular Famicom Disk games, came in very fancy packaging. Many came in large boxes with extra stuff like figurines, cassette tapes, large format manuals, and in some cases even more outrageous things, like Exciting Boxing‘s giant inflatable controller. These are not like modern special editions, as in most cases these were the only release of the game.
For classy packaging, it’s pretty hard to go past Bothtec’s Relics: Ankoku Yōsai.
Inside the huge PC-game style outer slip is a metal case.
And inside the case, you have a large full colour manual, a sticker sheet, a disk-sized full colour monster manual, and the disk itself.
The disk case and monster manual fit inside foam slots, presented as valuable items.
The case allows removal of some of the foam, so if you want you can use the metal case to store 4-6 FDS games in style.
The monster manual gives every character in the game in a two page spread.
And the large manual is even nicer. Beautiful artwork is used throughout the presentation, and it does its job of making you excited to get into the game.
The game itself is almost as ambitious as the packaging. A Metroid-style sprawling action-adventure, it features huge sprites (for the time), large environments and a huge list of enemies and items. Set in a post-apocalytic world where dark forces have enslaved humanity, in the game you play as some kind of robot spirit guy who can possess the bodies of the dead. You must defeat all the enemies in a ‘sun fortress’ to free the good spirits (as well as the ubiquitous princess) to save humanity.
The graphics are pretty good for the time, and the music is catchy. Despite the immediately noticeably clunky controls, it is not hard to be impressed early on, as the world of Relics is intriguing.
Unfortunately the game doesn’t live up to its ambitions. Bothtec’s roots were in PC games (including some predecessors to this game) and it Relics plays very much like a home computer game of this type, it’s quite rough around the edges. Controls are not only clunky but glitchy, and it’s very very difficult to outmanoeuvre many enemies. It gets better as you power up later on, but getting to that point is a huge slog.
Worse than this are the load times. This game is always loading, I have not experienced any other FDS game like it. It does big loads every time you change screen, but there are small loads even within a loaded scrolling area when a new type of enemy appears. It’s really quite horrendous.
Despite these flaws, the adventure and exploring elements work quite decently in the traditional ‘try every direction in every order with every item’ classic 80s kind of way. Finding keys and power-ups in order to progress and remembering paths is always kind of fun when the world looks this mysterious, it’s just that it’s buried under layers of clunk.
It still feels like a somewhat genuine retro experience, playing a game like this with the large manuals and packaging in front of you. But I wouldn’t recommend it for anyone except 80s adventure fetishists.
So you want to play some SG-1000 games old-school style…
…but the original SJ-200 joystick controller is a complete nightmare to use…
Sure, there’s a plug on the right for player 2 which can use any DB9 connector Sega pad, but player 1 is stuck with the SJ-200 tethered to the console.
Sega acknowledged their first controller sucked, and released a small modification/adapter called the JC-100, which allowed original console owners to to use the new pads released alongside the SG-1000 II.
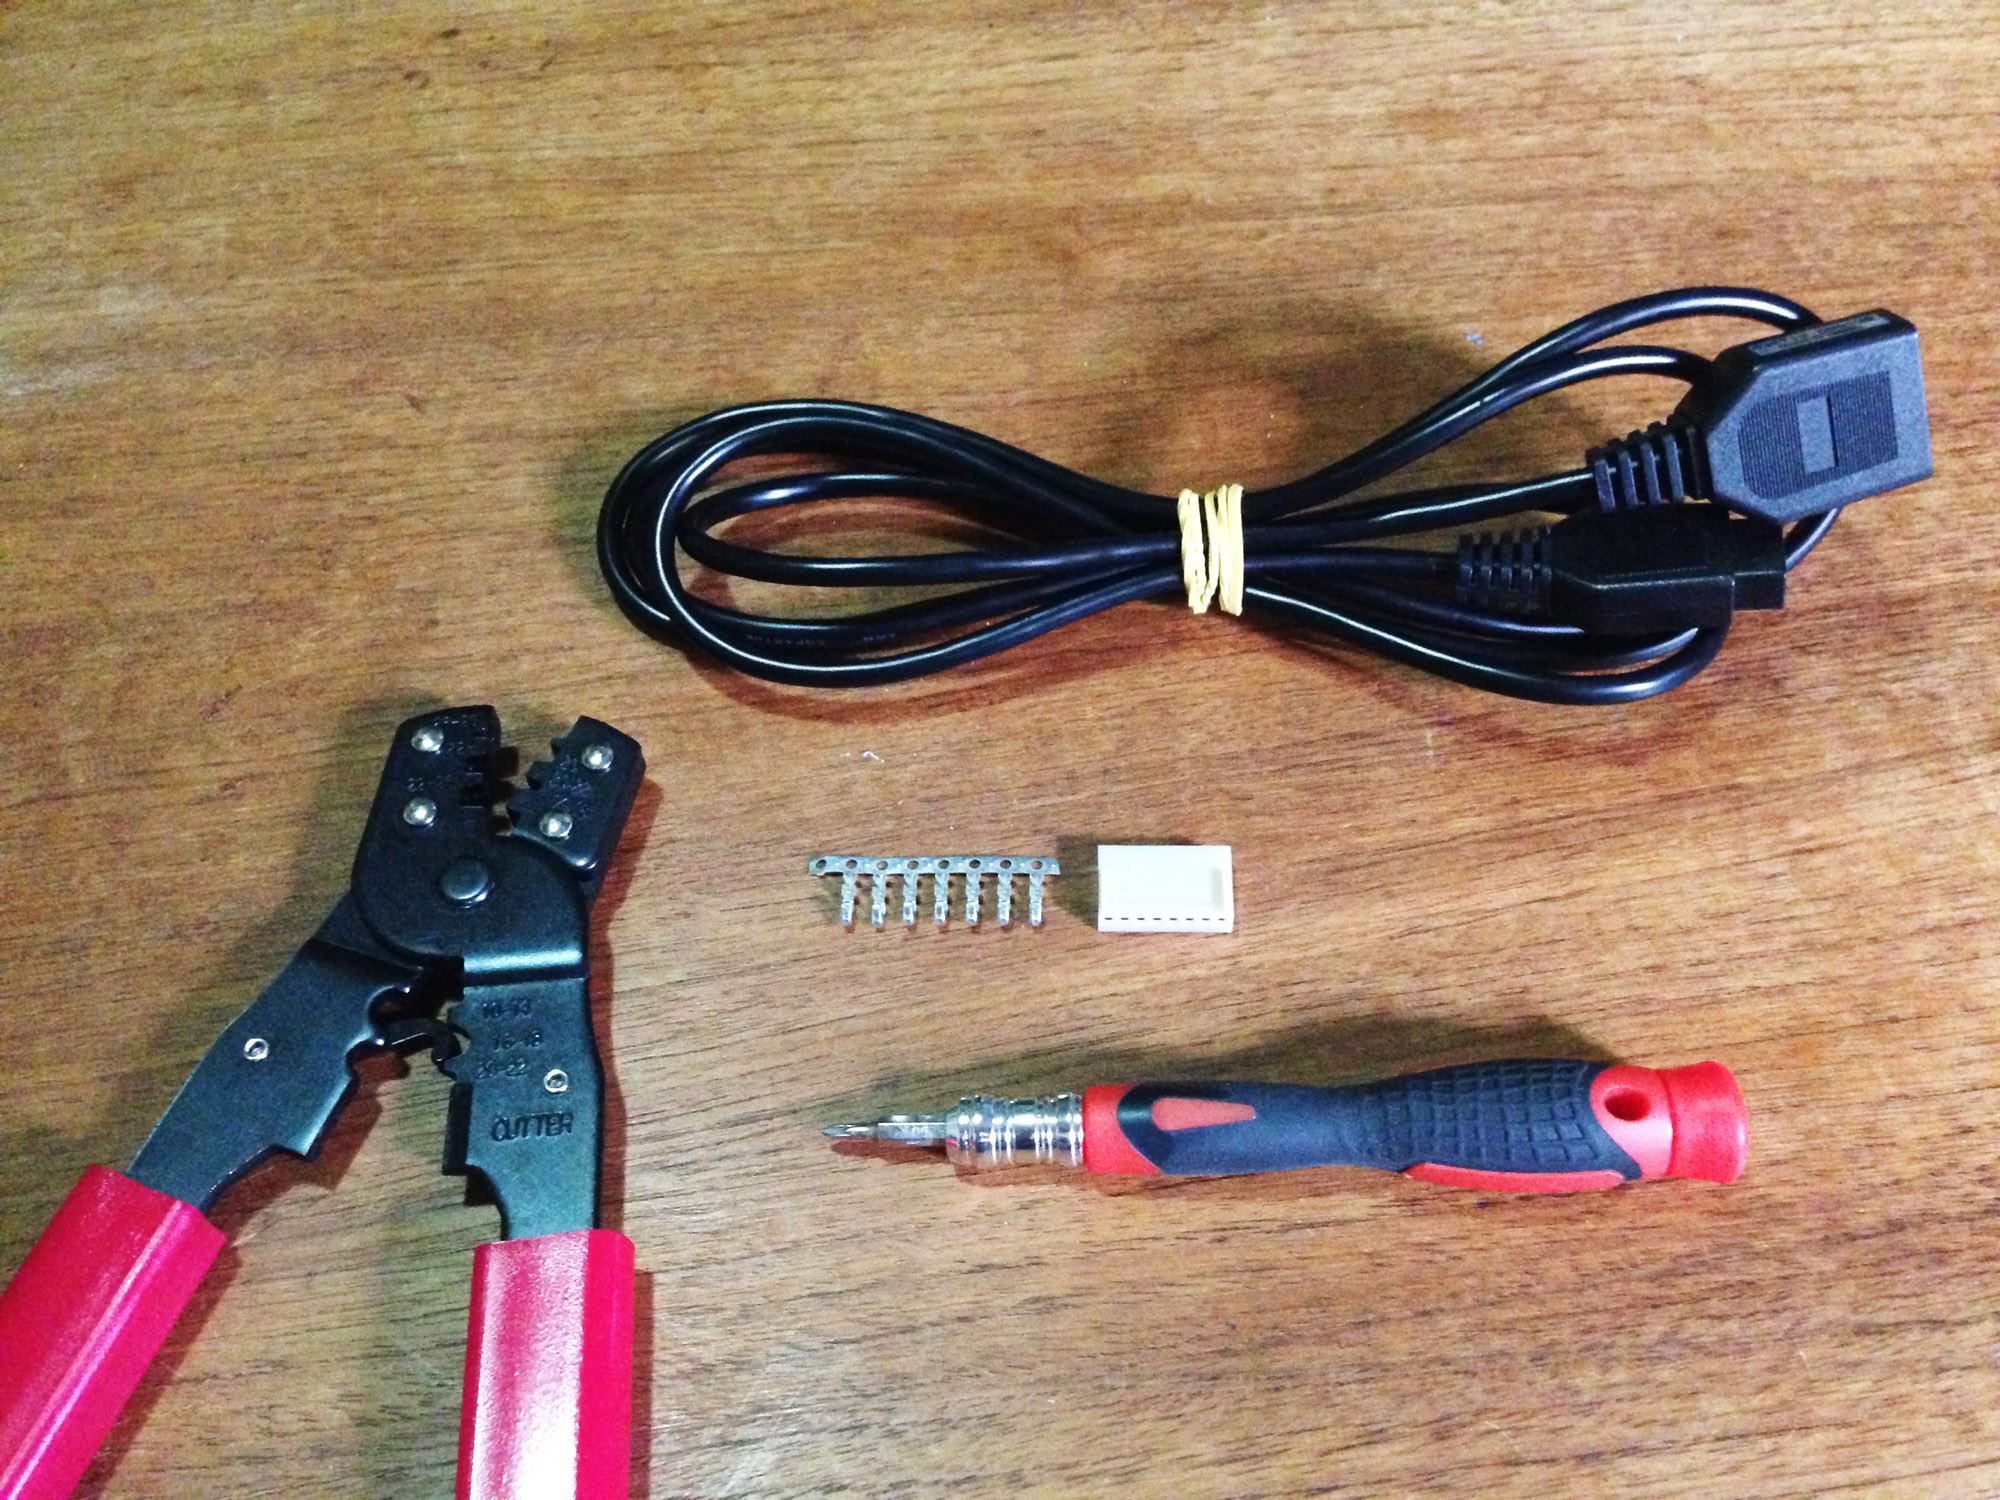
It would be impossible to get hold of a JC-100 now, but you can easily make one yourself. All you need are the following:
Mega Drive/Master System extension cable
Header plug with crimp connectors with correct spacing and at least seven pins – I’m using a pretty standard eight pin
Crimp tool
Phillips head screwdriver
First up open up the console (only four screws) and you can see the controller is removable, plugged in via a PC-like seven pin adapter.
The way DB9 controllers work is to ground a line corresponding to a button when pressed, so there’s a whole line for each button/direction, plus ground. The pins are handily numbered, and align to the following:
Button 1
Button 2
Right
Left
Down
Up
Ground
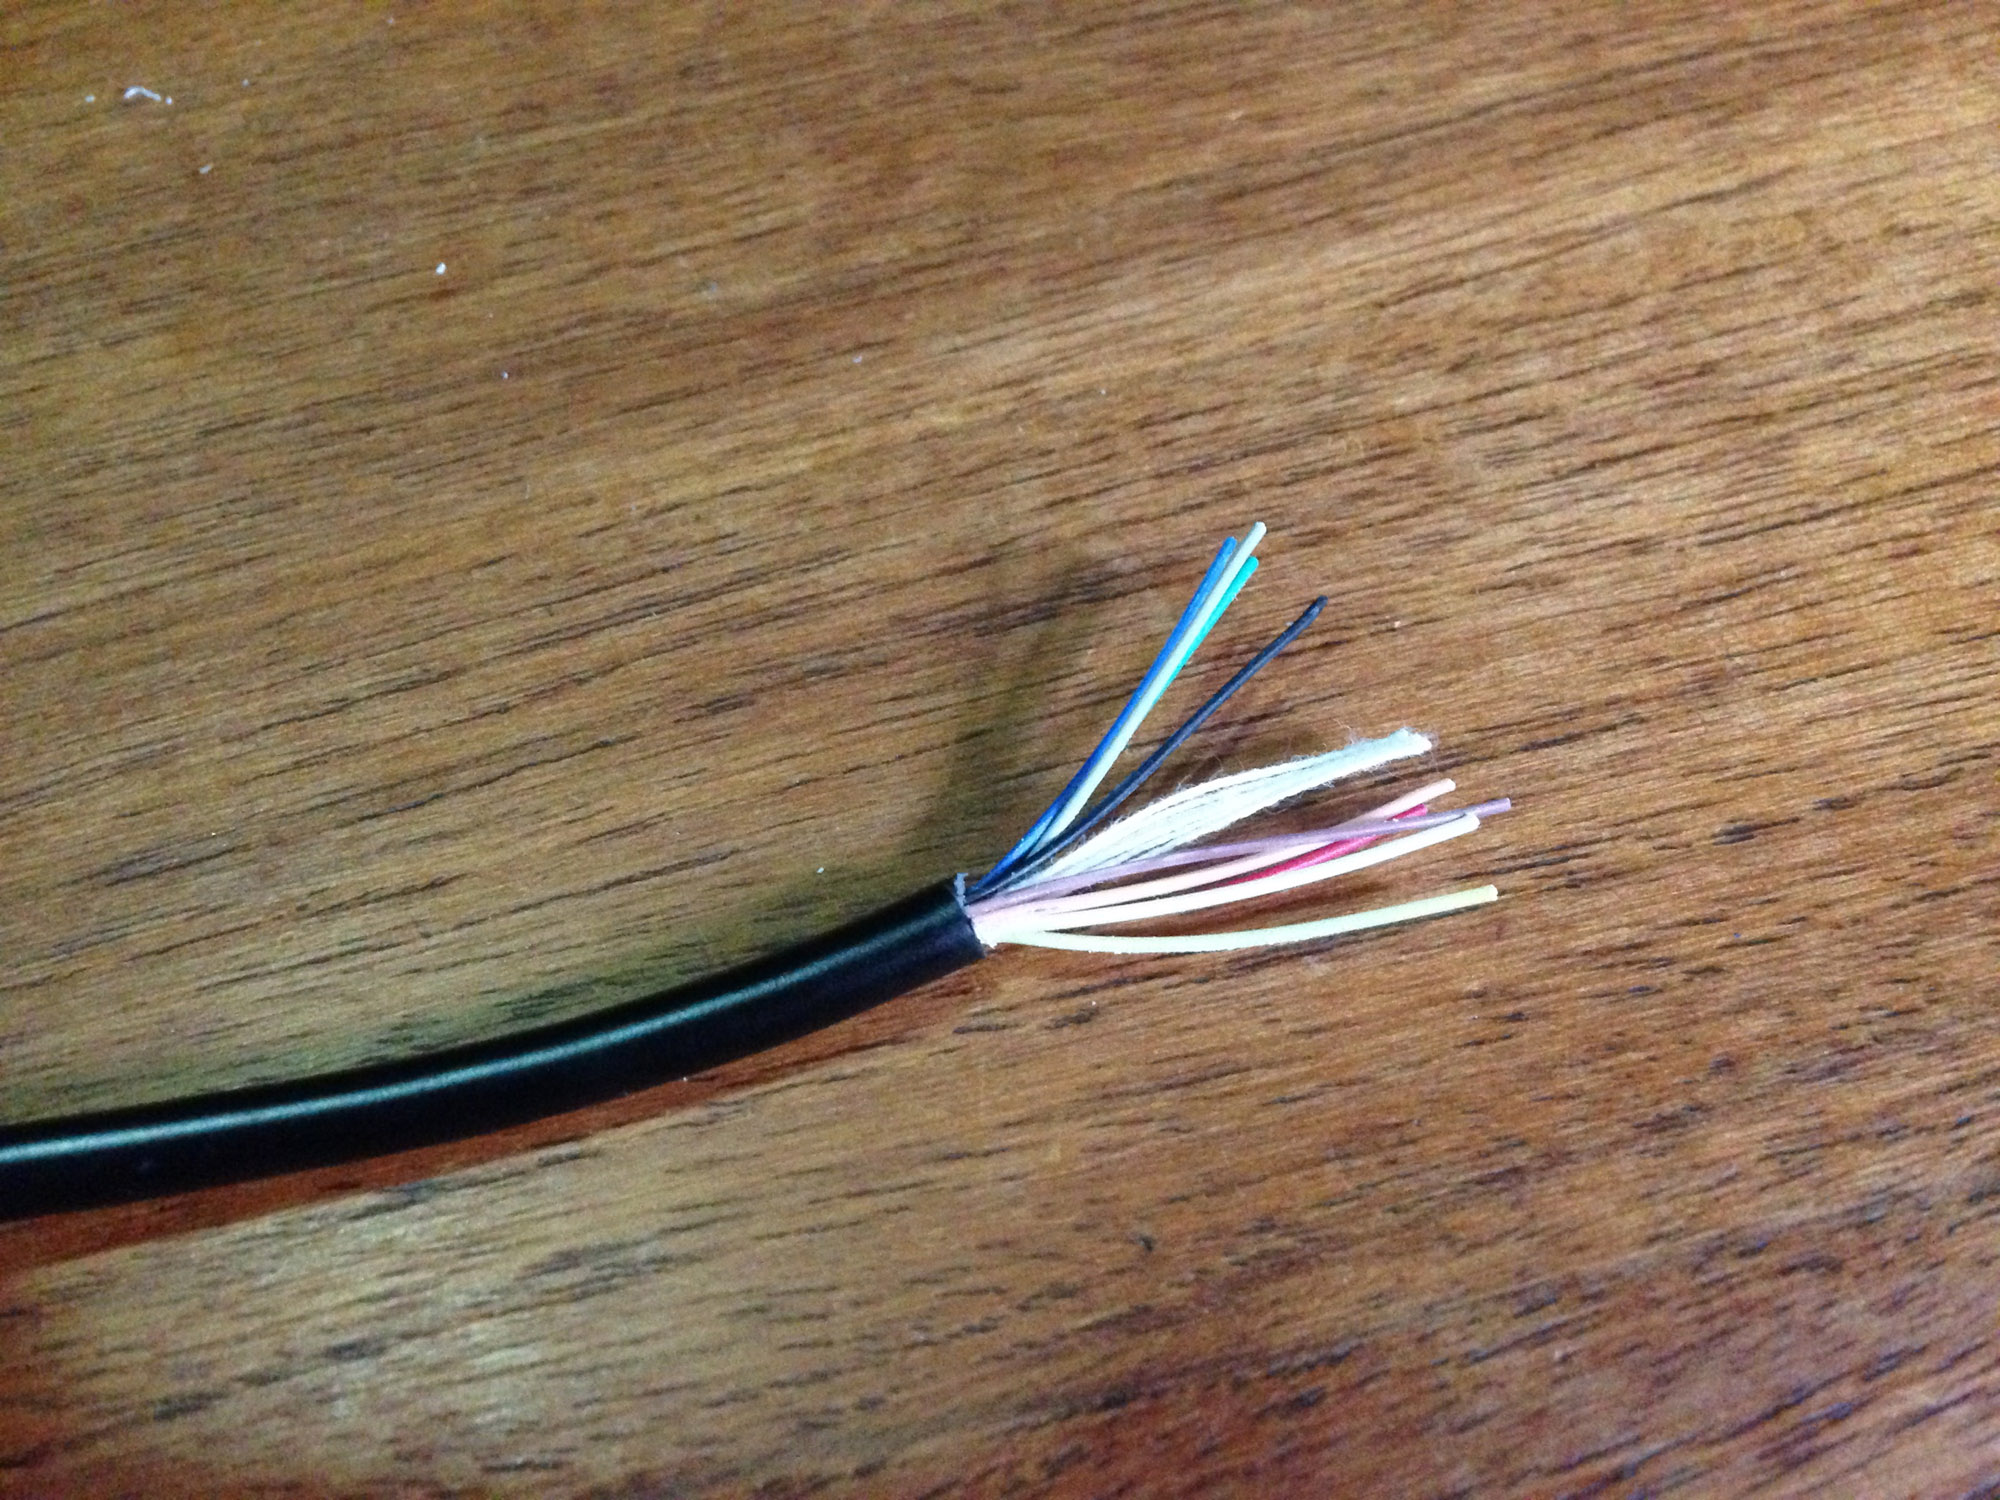
To make the adapter, start by slicing the extension cable at whatever length you like, then stripping the cover and the end of each wire. The internal insulation cotton can also be removed.
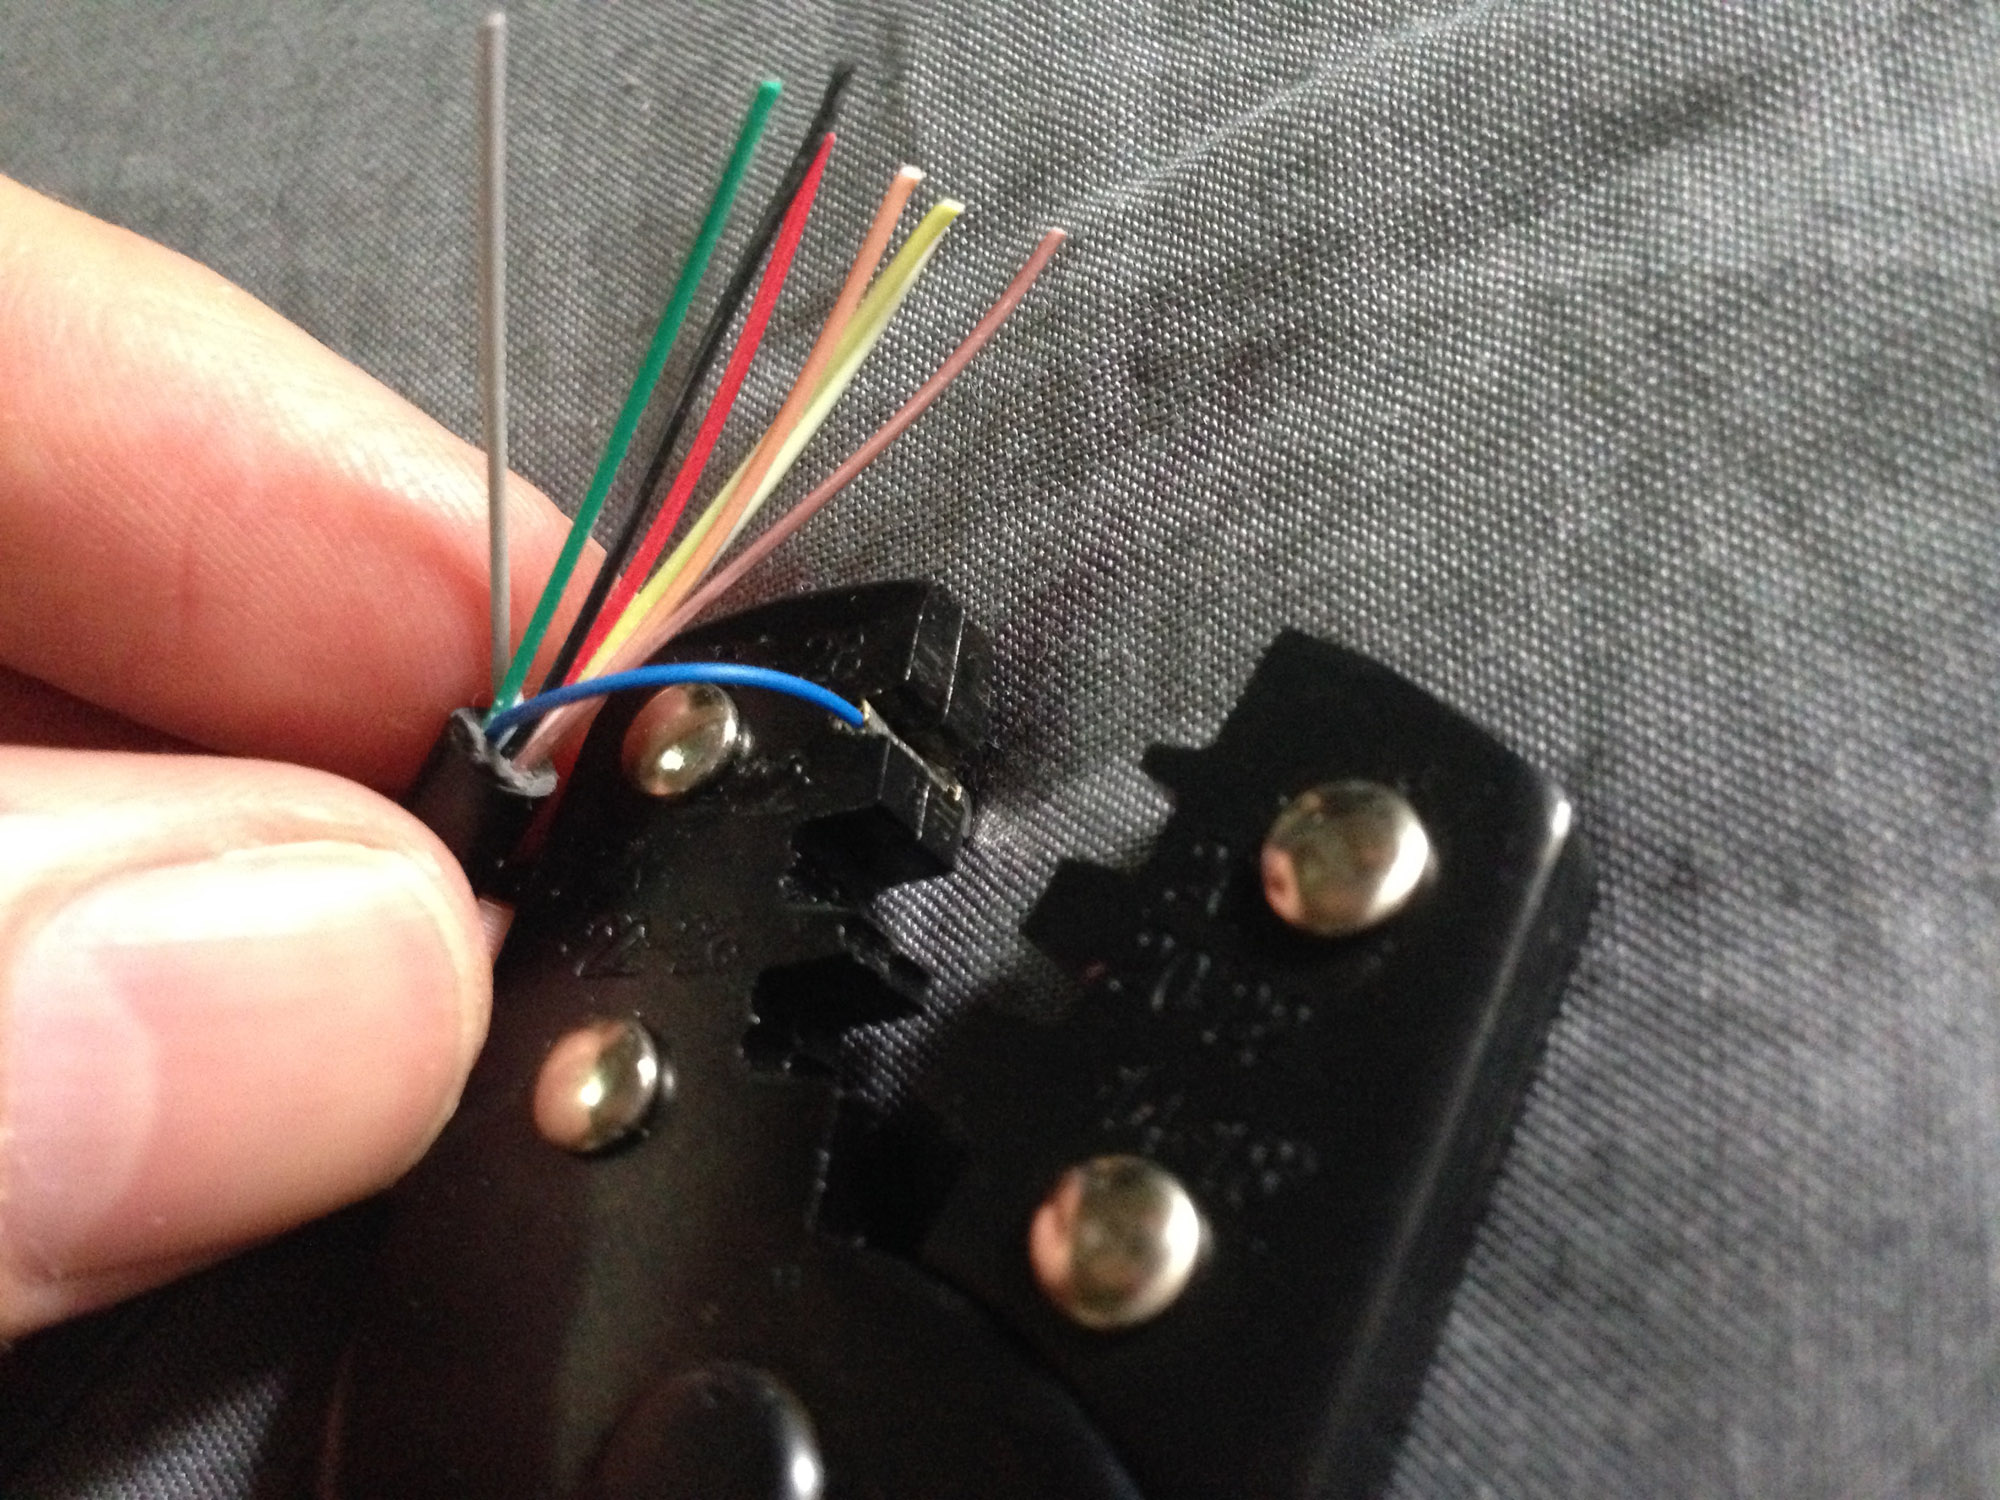
You’ll need to do some tests to see which wire is which, as in my case they wire colours did not line up to the colours of the original controller wires. In mine the colours lined up to:
Blue – Ground
Red – Up
Black – Down
Grey – Left
Pink – Right
Green – Button 1
Yellow – Button 2
White and Brown – Unused
Crimp the relevant wires to the pins using the crimp tool. You can get away with using pliers, but a crimp tool will make a much cleaner and stronger… well… crimp.
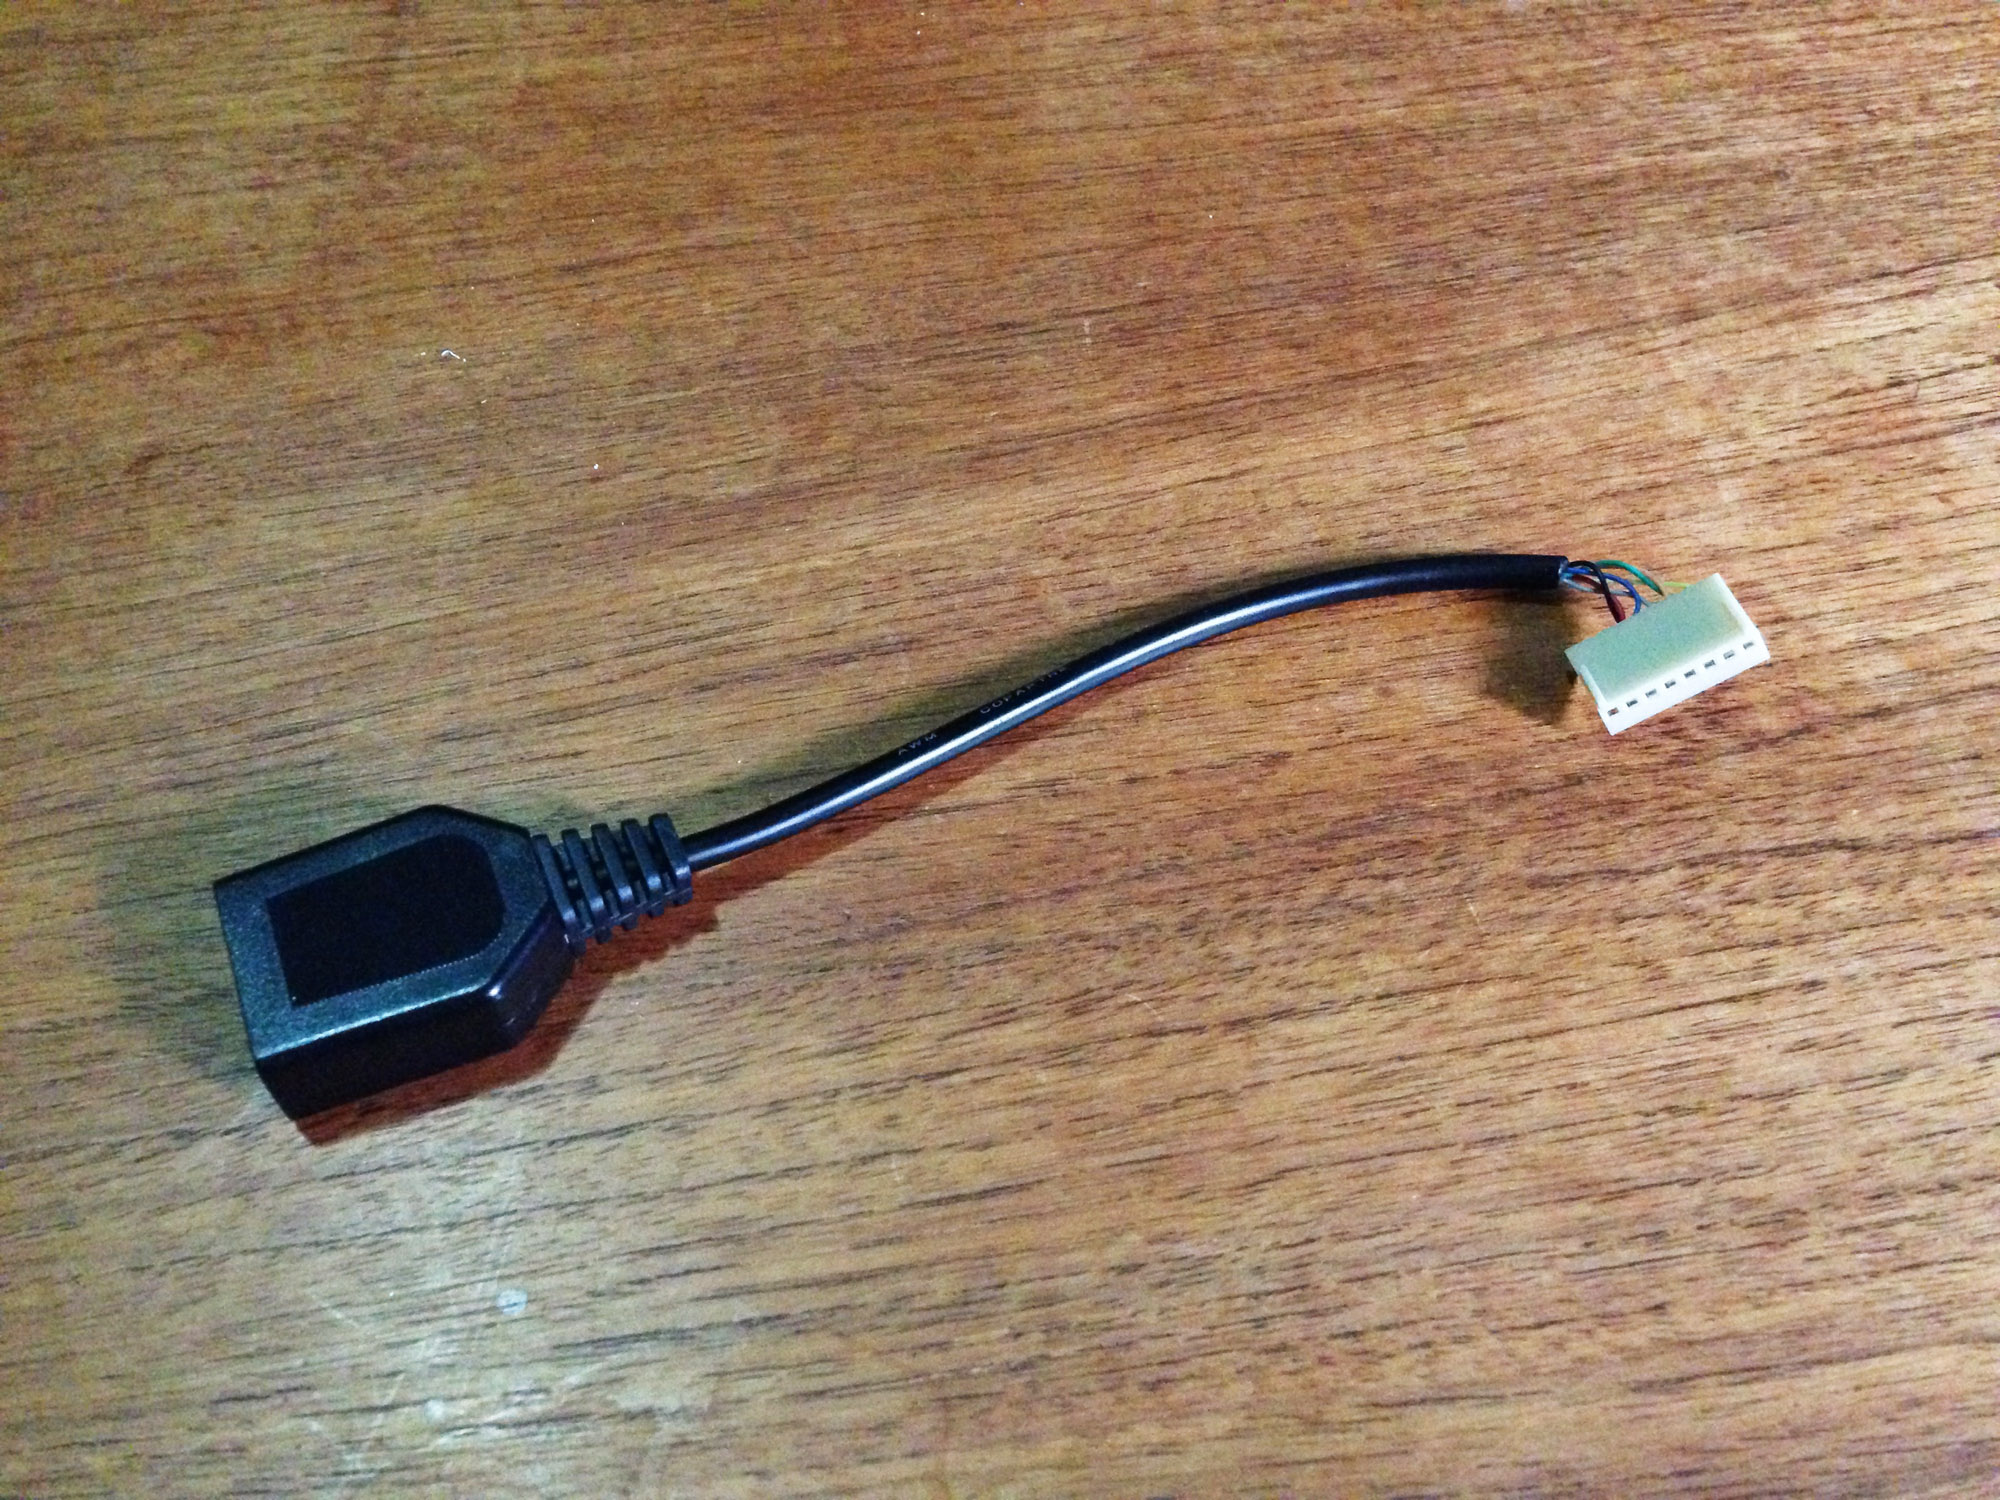
The pins can then be plugged into the header plug in the correct order. Since I’m using an eight pin connector, it will stick out the back a bit, but there’s room and I’m not using position eight.
Slice off the unused two wires and we’re done.
Plug it into the console and close it up.
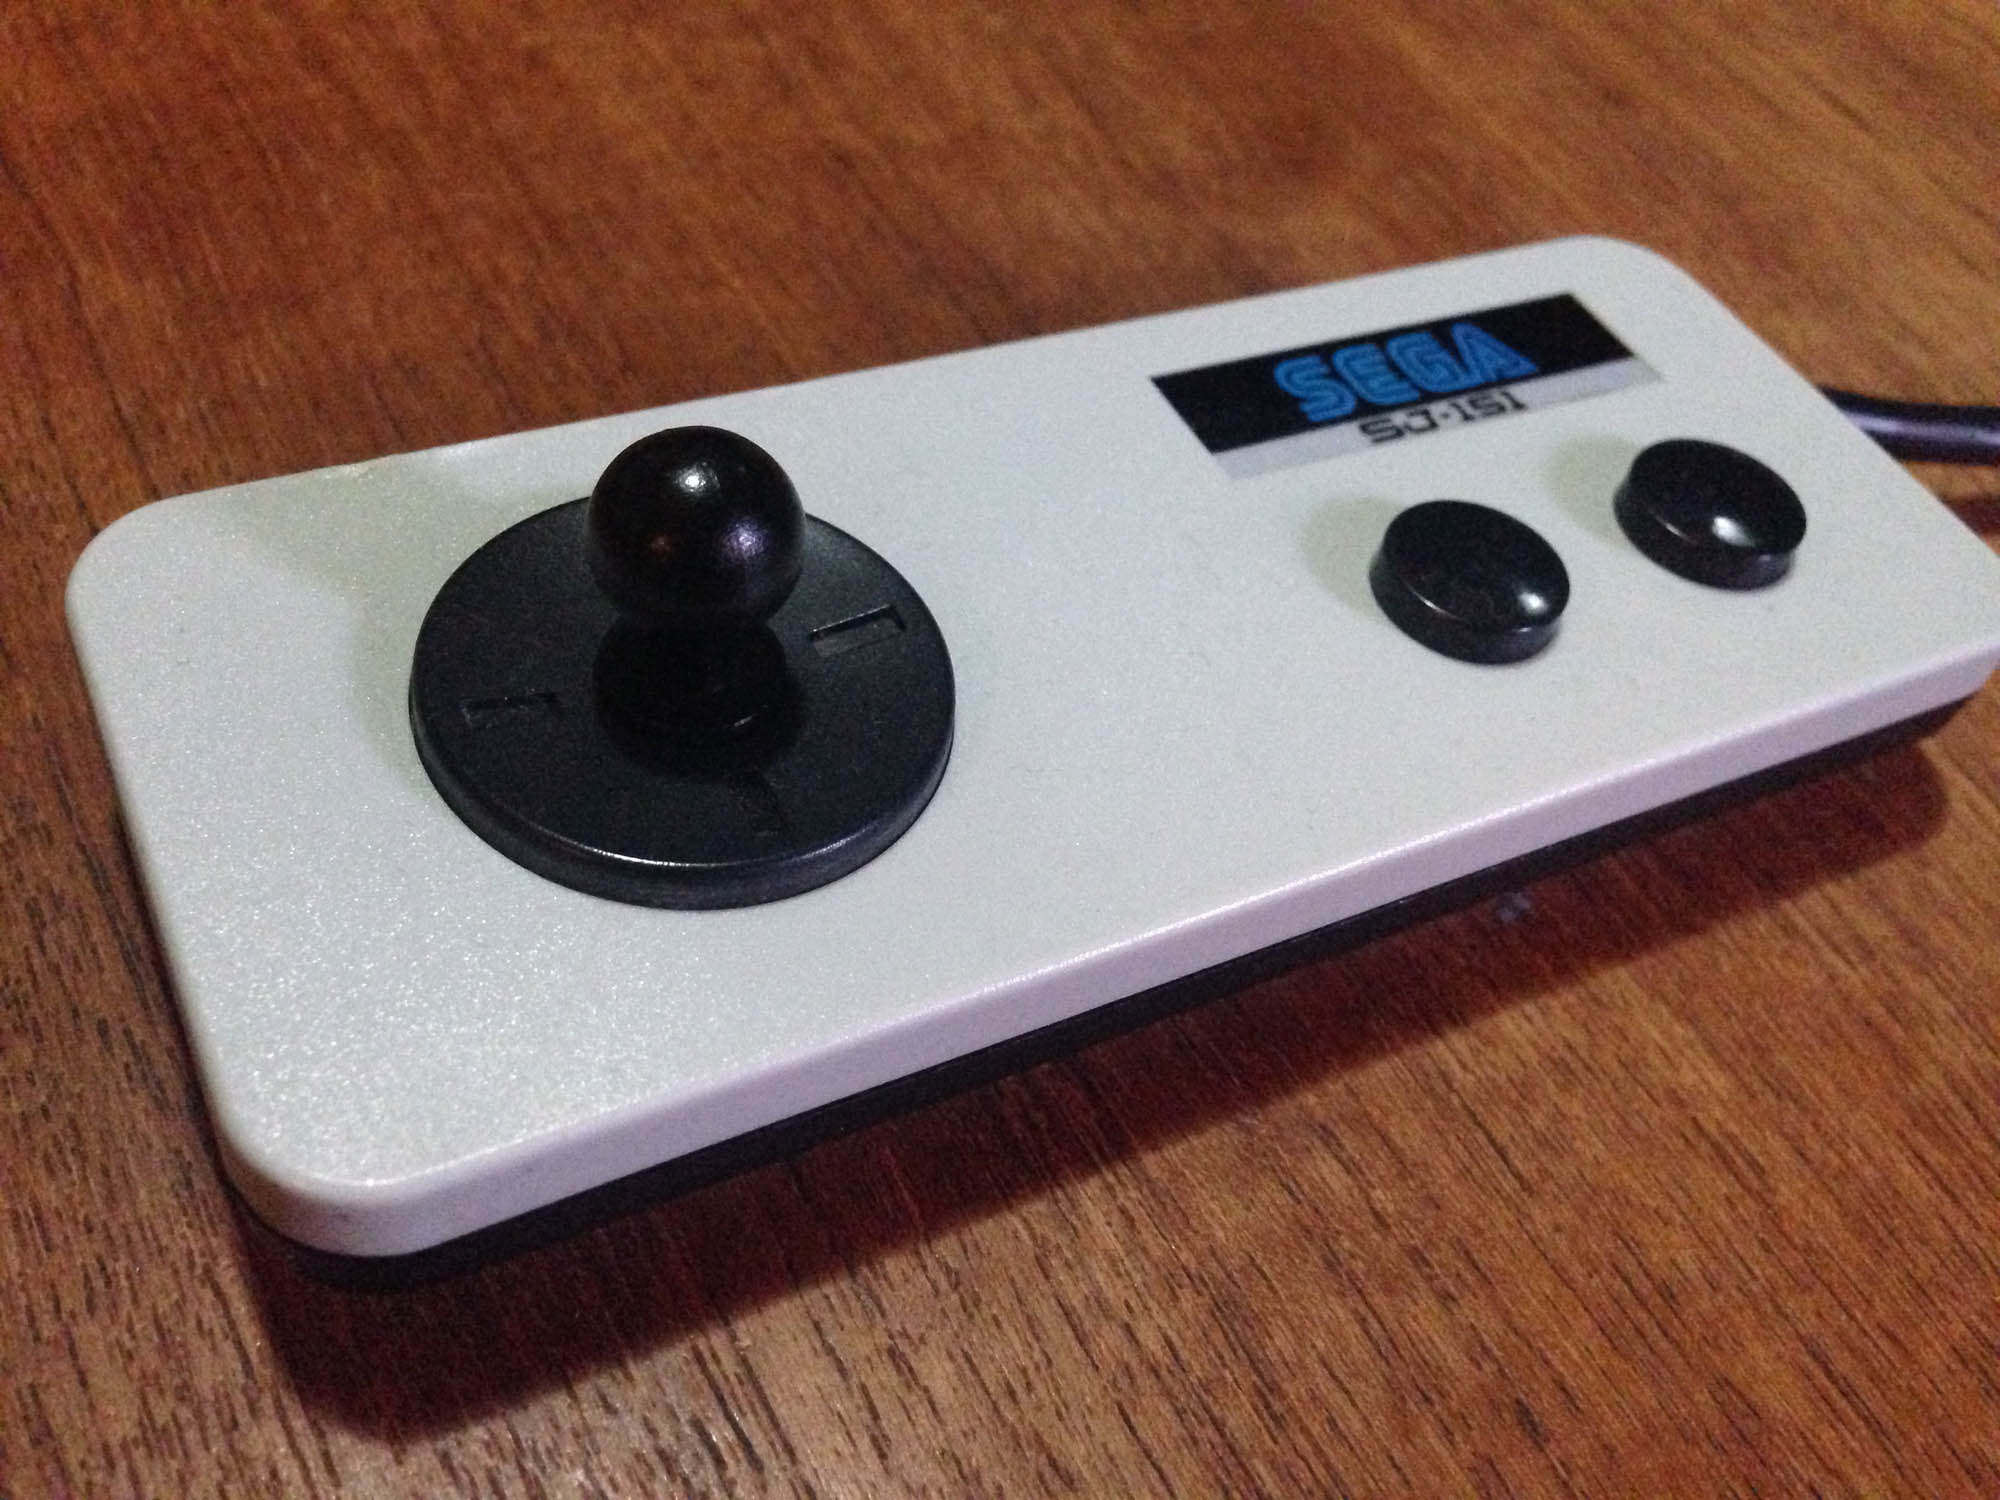
Now you can use pretty much any pre-Saturn Sega pad on your console. You can go period-accurate and use an SJ-150
All the way up to what was possibly the last DB9 Sega controller released – the wireless six button Mega Drive pad (doesn’t actually work but looks crazy)
Or if you’re insane, the standalone DB9 connector SJ-200, completely defeating the purpose of the exercise!
The best part about this ‘mod’ is it is completely reversible. However it would be relatively easy to install a DB9 socket on the side if you wanted something more permanent. Similarly, the rest of the extension cable could be soldered onto the original tethered controller, making it a standalone unit.
Nintendo and Sega had a famous rivalry in the 80s and 90s. In this post I’ll focus on a single element – the first party controllers of their 8-bit consoles.
———-
1981
The story begins before either company has released a cartridge based console. In 1982 Nintendo completely reinvents cheap directional input with the calculator style ‘plastic button above rubber membrane’ design of the directional controller pad (d-pad) in the Donkey Kong Game & Watch.
It’s equal to expensive microswitch arcade joysticks in speed, reliability and precision. It has great tactile feedback thanks to the ‘give’ of the rubber.
1983 Donkey Kong II
It is a vastly superior solution to the standard Atari-style joysticks of the time, whose sticks and buttons use primitive leaf connectors (bending metal) to register button/direction presses.
———-
1983
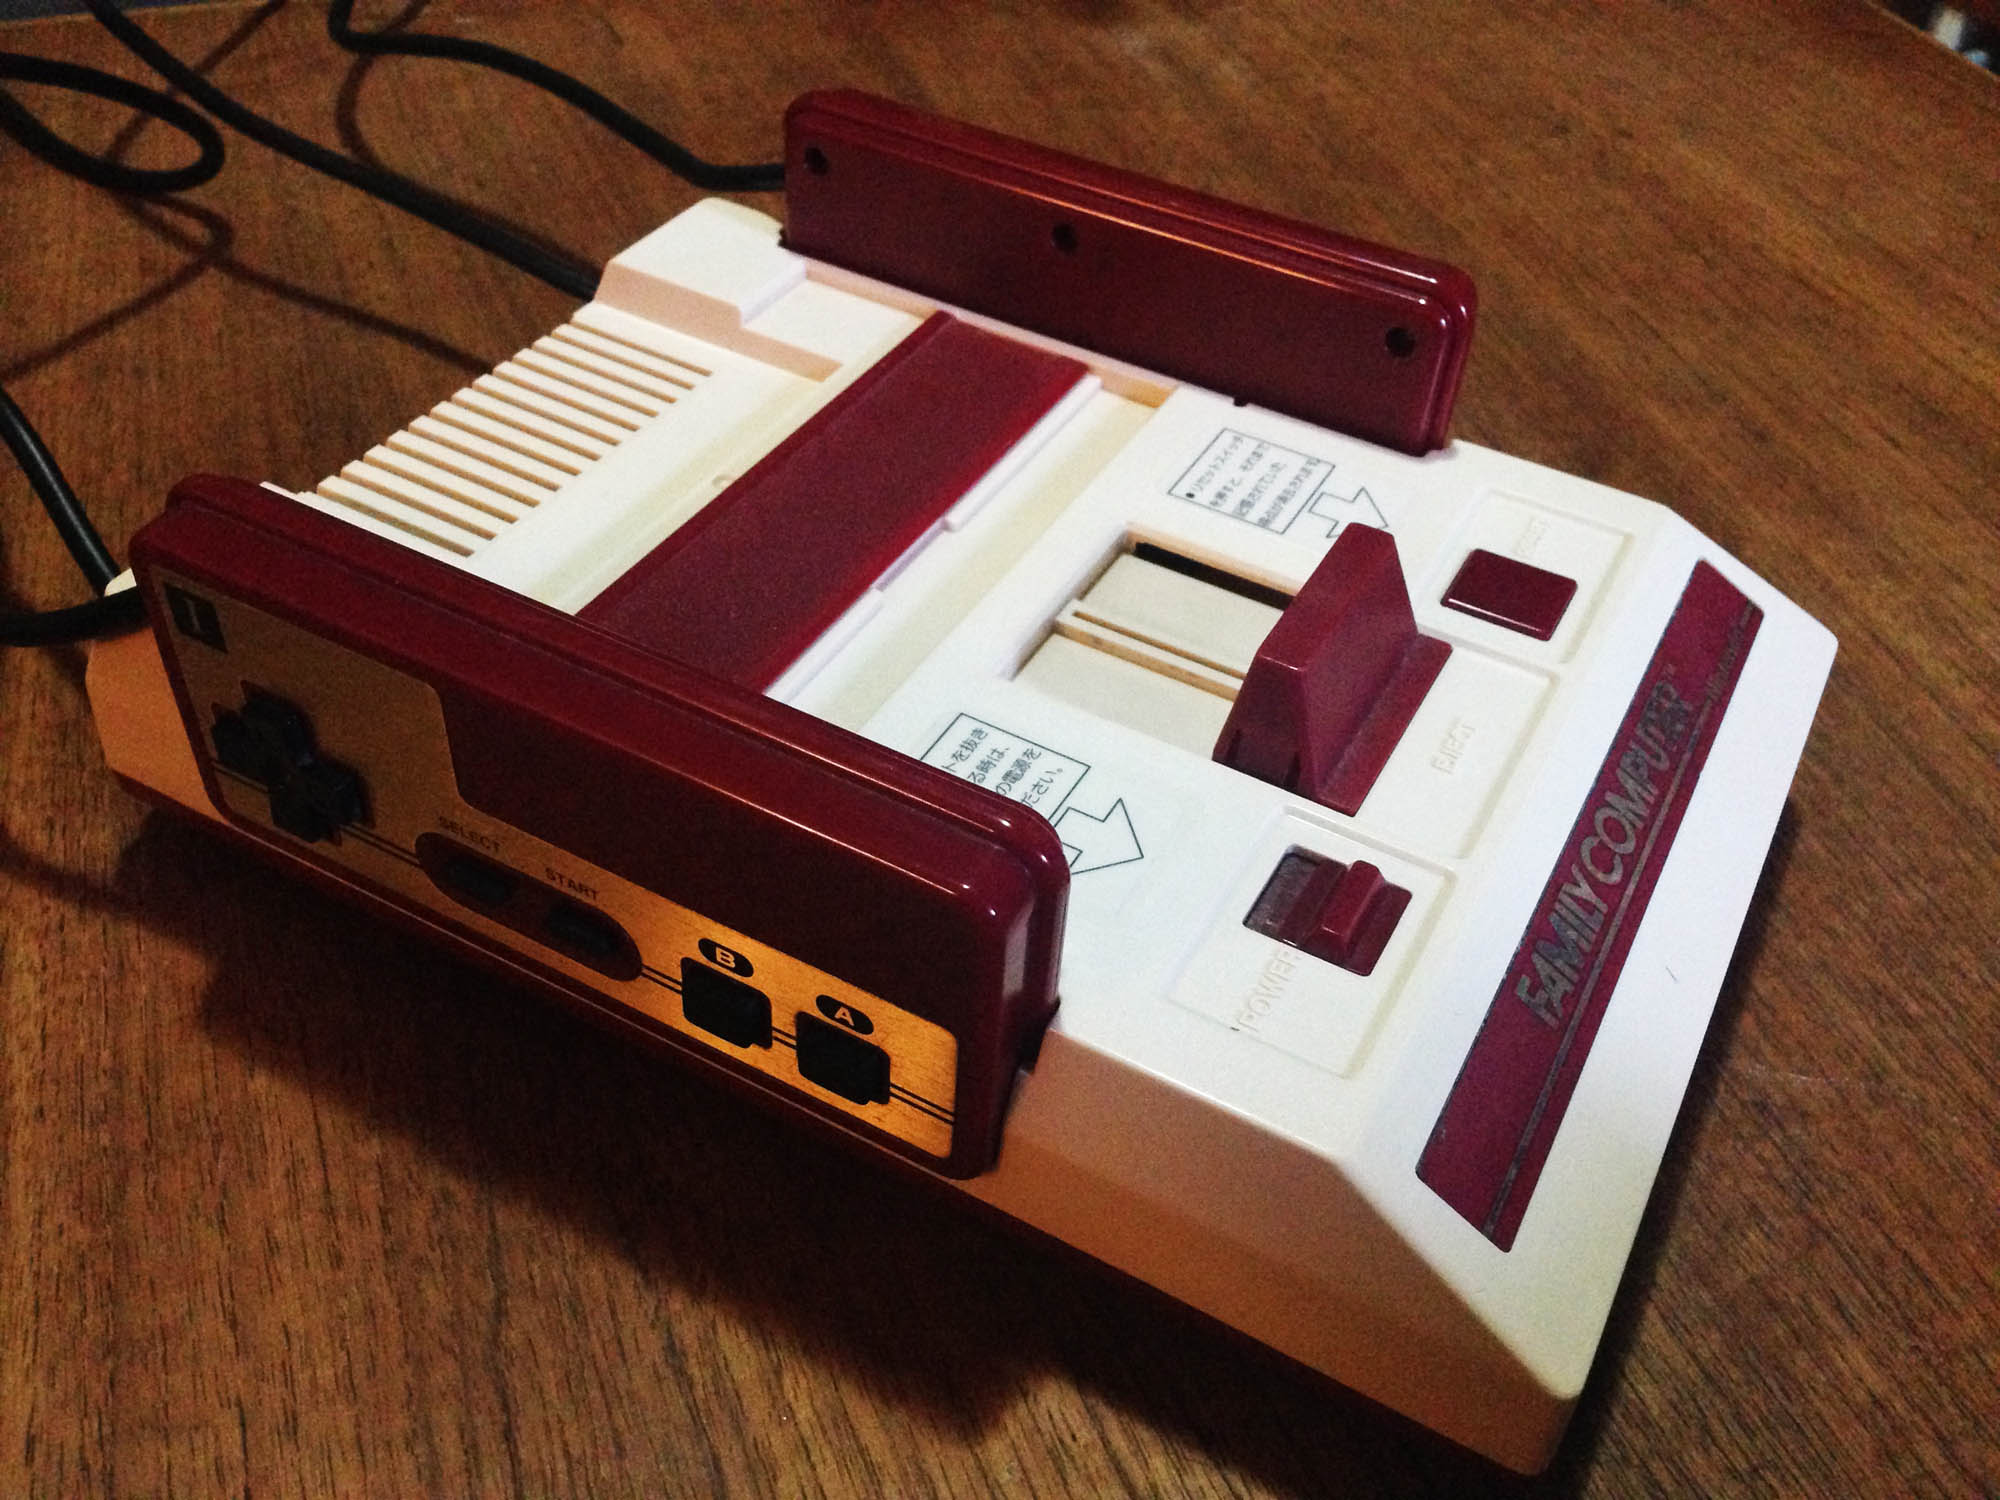
Nintendo releases the first edition of the Famicom. The controllers feature the Game & Watch d-pad, and like Donkey Kong, soft rubber action action (A/B) buttons. Also like Game & Watches, it features soft rubber function buttons (Start and Select).
The rubber buttons are usable, and suitable for simpler games, but are not as responsive as the d-pad is, and on hard presses can get stuck on the corners. For this reason (combined with a rare graphics glitch issue) Nintendo recalls these models in early 1984 and replaces them for customers. As such they’re relatively rare in the wild.
Of note, the Famicom features controller docks on the side of the console, so cords come out the side of the controllers to facilitate this.
Still 1983, Sega releases the SG1000 console. The console itself is a generation behind the Famicom, and the SG1000 controller (SJ-200) is a primitive old-paradigm joystick that uses the unreliable old leaf connectors. It also only has two buttons to the Famicom’s four (the console itself features a ‘Hold’ (pause) button on the main unit).
It’s an absolutely terrible controller. The mini joystick is equally as bad as an Atari VCS joystick, but cannot be as easily wrenched around to ‘force’ it to work like an Atari one, due to the small size and the way you hold it.
———-
1984
Nintendo updates the Famicom controller to have hard plastic over rubber membrane A/B buttons for better responsiveness. They leave the less commonly used function buttons as soft rubber.
A brilliant controller that basically sets a permanent industry standard.
Later in the year, Sega releases the redesigned SG1000 II console, with the Famicom inspired SJ-150 controller.
The SJ-150 has a round variation of the Famicom d-pad, and a copy of the original Famicom soft rubber A/B buttons.
The new console ditches the unique look of the original SG1000, and takes more than a few design cues from the Famicom, including controller docks on the side of the console. Controllers are detachable from the console unlike the Famicom, but they plug in at the back, using an Atari-style DB-9 connector – a legacy of the original SG1000, which had a DB-9 plug for an optional second controller.
Interestingly, the SJ-150 tries to keep one foot in the old ‘joystick’ world, and comes with a little plastic stick which can be screwed into the middle of the d-pad, presumably for players who want some kind of joystick feel.
———-
1985
Sega releases the SJ-151 controller with later SG1000 II consoles, and it is moved up to the latest Famicom design, with hard plastic with rubber membrane A/B buttons.
This is the first all-round good Sega controller. It keeps the weird mini-joystick option.
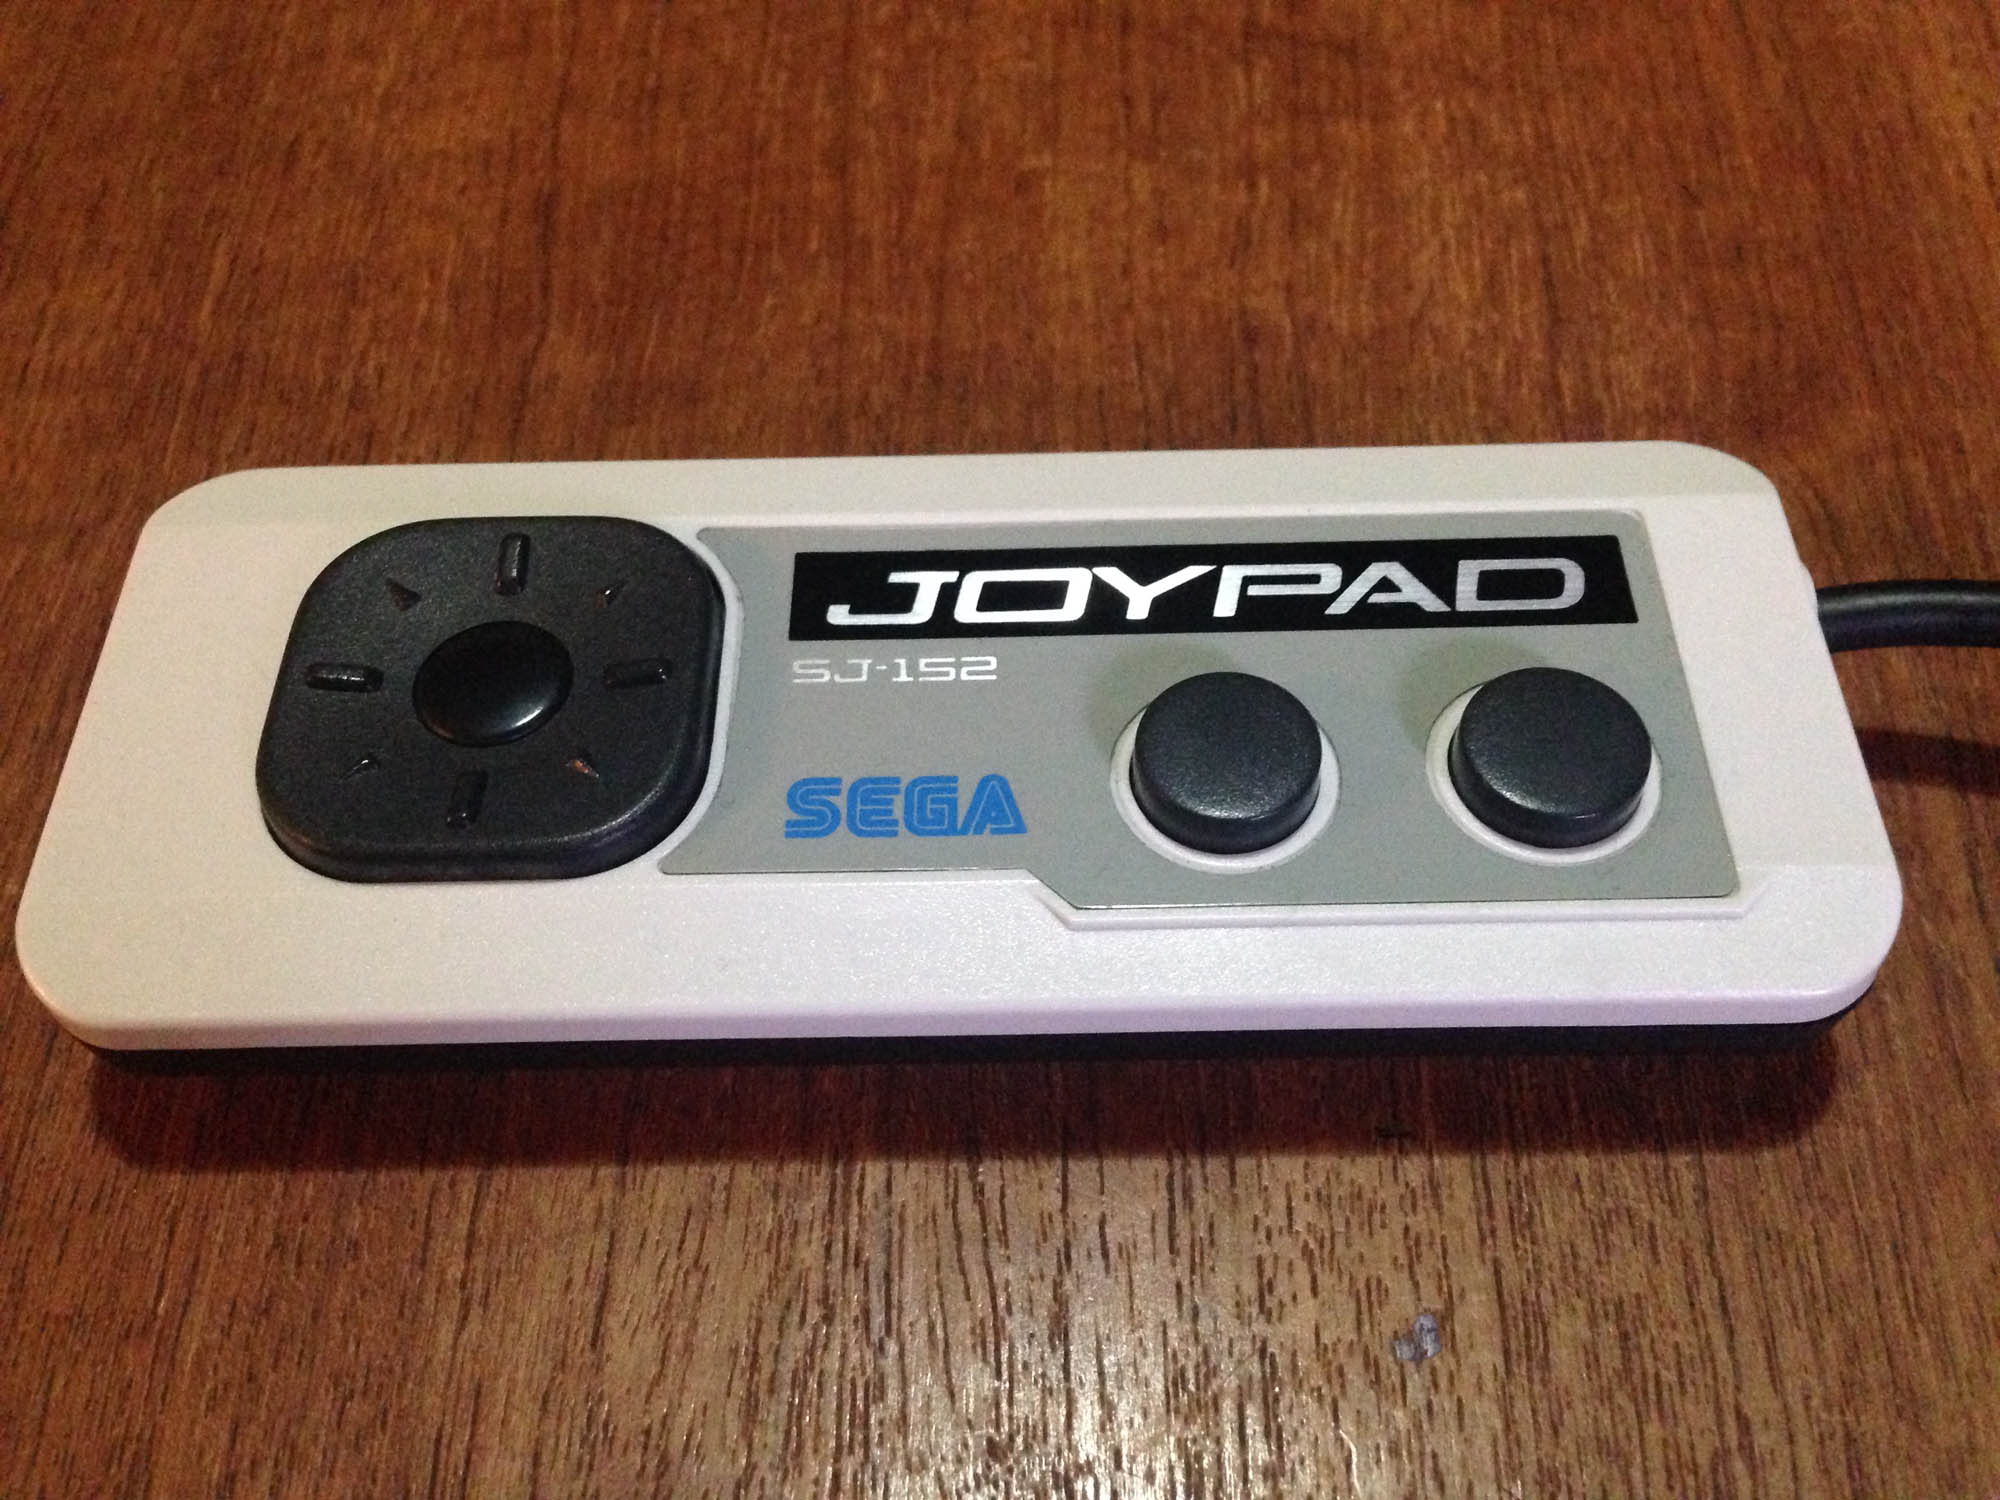
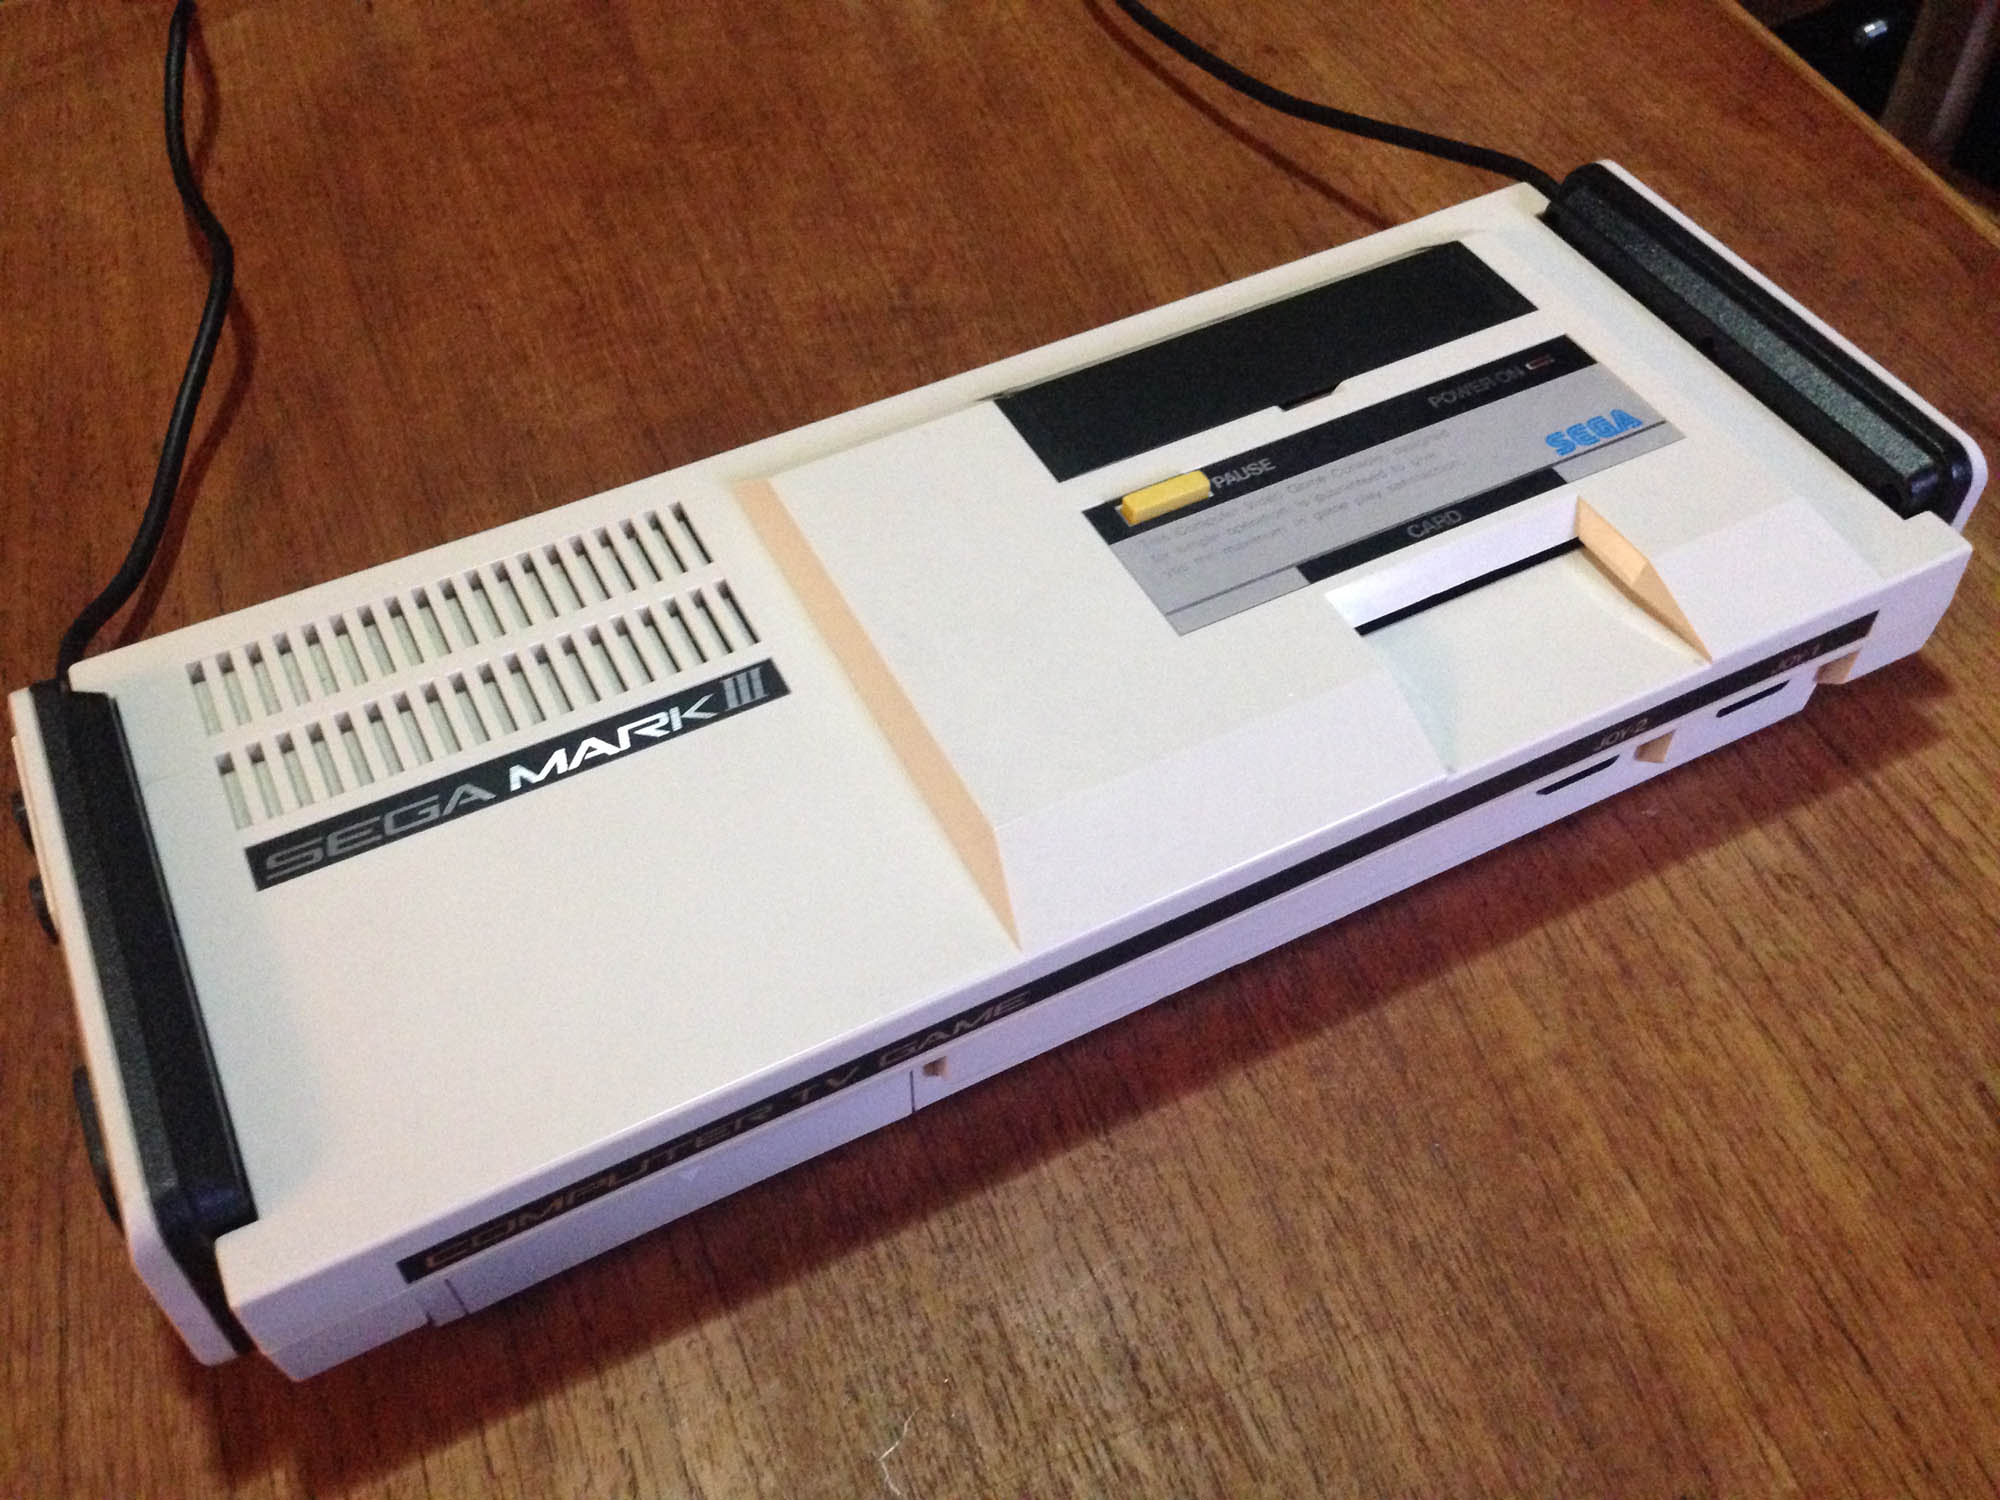
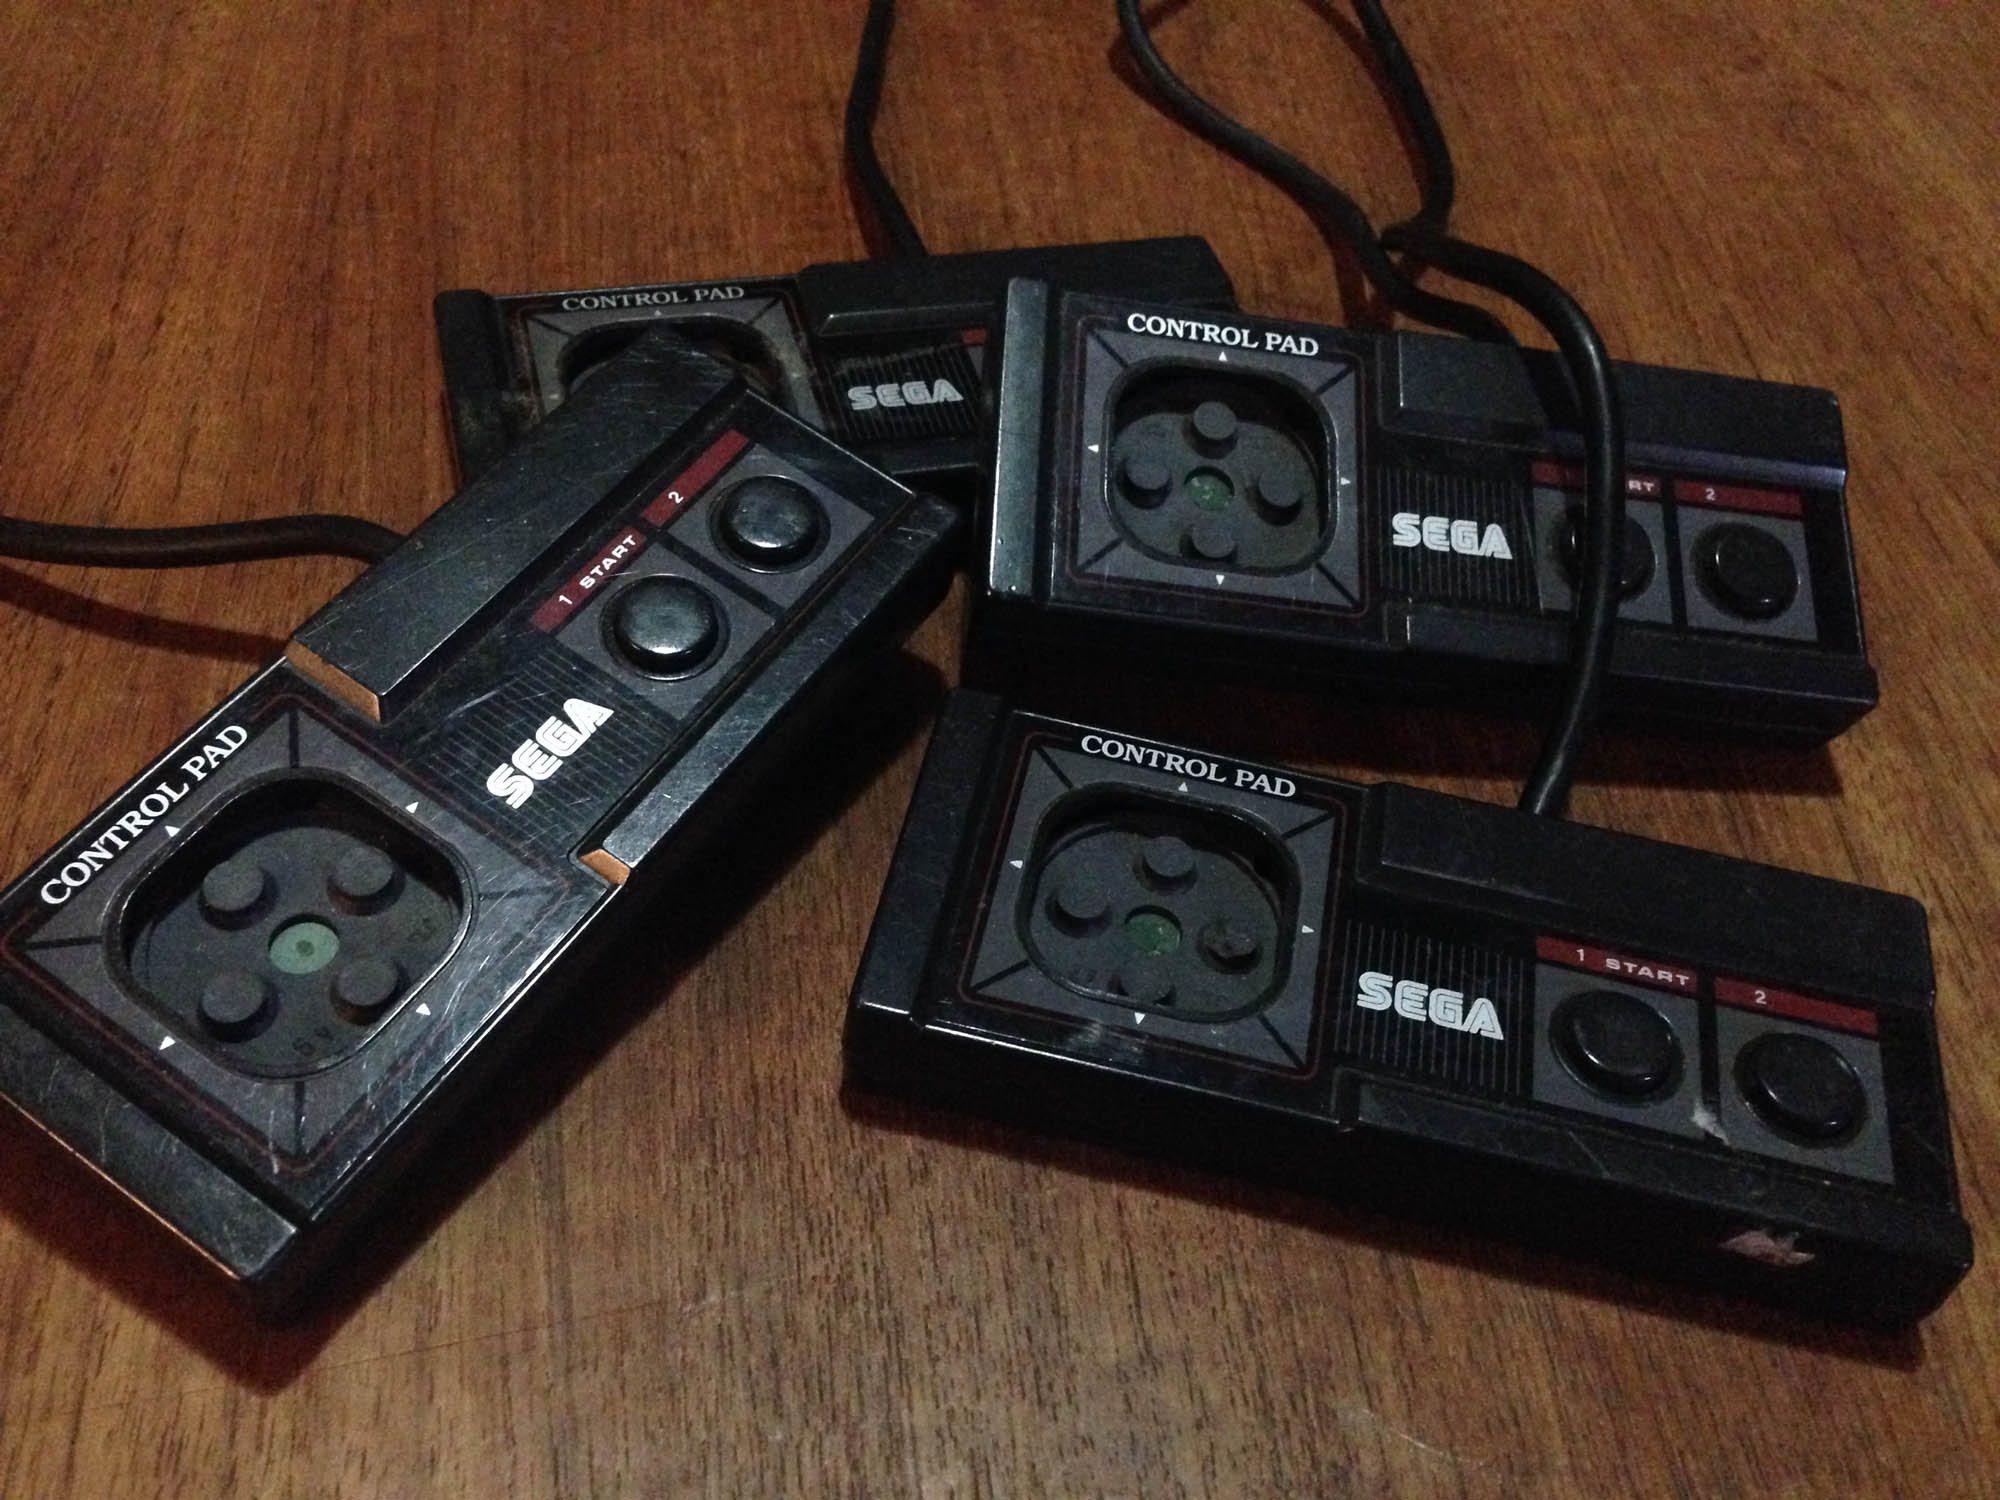
Later in 1985, Sega releases their upgrade to the SG1000 – the Mark III, with the SJ-152 controller, which is basically just a redesign of the SJ-151. It has more Famicom-like styling, with a reflective metallic sticker on the top mimicking the metal faceplate of the Famicom controller. Possibly due to the SG1000 legacy of the Mark III hardware, Sega is stuck with only two buttons for each controller.
The console continues to feature controller docks like the Famicom, though the controllers now plug into the front of the console.
It also retains the mini-joystick option. Someone must have liked it.
Later in 1985, Nintendo brings the Famicom west as the NES, with an externally redesigned (more squared off) controller that keeps all internals of the hard button Famicom pad as-is – it even uses the same board.
Due to the NES having no controller docks, Nintendo improves on the Famicom pad design slightly by having the cord come out the top instead of the side of the controller. It is however slightly less comfortable to hold due to the harder edges; the Famicom controller was nicely rounded.
———-
1986
Sega brings the Mark III west as the Master System, with an externally redesigned (more squared off) controller that keeps all the internals of the Mark III pad as-is – it even uses the same board.
It has some weird raised sections making hitting the buttons and d-pad less comfortable, though the d-pad is still the half decent one from the SJ-152. It is also less comfortable to hold due to the harder edges. Unfortunately, despite the Master System having no controller docks to necessitate it, the cord still comes out the side. It still has the mini-joystick option.
———-
1989ish?
After the release of Sega’s next system the Mega Drive, Sega begins positioning the Master System as a budget system in some of their more successful territories (mostly Europe and Australia/New Zealand). They revise the Master System pad to have the cord come out the top like the NES, and finally drop the mini joystick attachment.
At some point along the way Sega farm out all Master System production to China, and the non-Japanese controllers (and consoles) were much lower quality, and broke incredibly easily. Especially the d-pad, which had a cost-cutting redesign, making it less responsive as well as more prone to breaking.
No first party controller breaks as easily as the ‘top cord’ Master System pad.
———-
1993
After the release of the Super Famicom/Super NES, Nintendo repositions their older Famicom console as a budget machine – in Japan as the ‘AV Famicom’ and as a Top loading NES model in the USA/Europe.
The new Famicom/NES comes with a new Game Boy/Super Famicom inspired controller, affectionately known as the ‘dogbone’.
It’s a great controller, a very high quality build, and easily the most comfortable controller of the generation. Some players prefer the ‘flat’ AB button orientation over the Game Boy/SNES-style angled orientation. I prefer the angle.
———-
And that’s where that battle ended. Poor Sega were 1-3 years behind at every single step.
Here’s the whole lot in one shot.
My favourite Nintendo controller is either the beautiful round button Famicom pad (or my hybrid Famicom/NES controller), or the dogbone.
My favourite Sega controller is probably the SJ-151. It has the better buttons, and the round d-pad works just a little better – the square one has a bit too much face surface. The SJ-152 is also quite decent, and it looks less plain.
You don’t have to look too far into 80s Japanese gaming to see that the biggest competitor to the Famicom was not the Sega SG1000 or Mark III – but a console-like home computer platform – the MSX. Invented by Microsoft Japan, MSX was designed to be a standard platform for computer manufacturers, for which Microsoft could provide the operating environment and sell their other software. In effect an early version of the racket they later managed worldwide with Windows.
I became aware of the MSX in the late 80s, when many of the catalogues and promos that came with my imported Famicom games featured ads for MSX games.
Panasonic FS-A1 Mark II with matching controller
What got many Japanese gaming enthusiasts’ attention early on were the big Konami franchises like Akumajou Dracula (Castlevania) and Metal Gear that got early entries on the platform. Many Hudson Soft game series started on MSX as well.
Akumajou Dracula MSX
What’s nice about MSX computers is that they bear much more resemblance to consoles than lots of other 80s PCs. Most are standalone, single piece units with the keyboard built in. This model is one of the most compact models – so even with the built-in keyboard it’s smaller in size than many consoles.
They were designed to be plugged into a TV, so there’s no looking around for specific retro monitors or video converters. Most MSX computers have standard composite AV out, and many have RGB out, allowing for a great quality picture via any RGB capable TV (or modern scalers like Micomsoft XRGB units).
Probably best of all, MSX computers feature a cartridge slot, and while this design feature was present in many 8-bit and 16-bit computers, unlike most of the others a good deal of the best software for the platform was released on cart. This means plug and play simplicity, and less fiddling around trying to get old floppy disks to work.
Power wise, there are two main generations of machine, the MSX and the MSX2. The MSX was first announced in June 1983, and features similar graphical and processing power to the Sega SG1000 and several other platforms that used the same basic design, including the Colecovision and the ZX Spectrum. While there are some good games (including the first ever Parodius game) MSX1 games are fairly primitive, mostly featuring 1/2 colour sprites, and little scrolling. The lack of hardware scrolling makes the many shooter games on the platform very choppy, as they ‘scroll’ 10+ pixels at a time. Ultimately, just like the SG1000 it is dramatically outclassed by the Famicom in terms of gaming, despite the Famciom being released earlier.
My Mitsubishi MSX1
The MSX2 was introduced in 1986, and is much closer to the Famicom. It can produce more detailed graphics and features more colours, but usually at a lower framerate, so games feel more choppy. In a pretty huge design oversight for a post Super Mario Bros platform, the MSX2 hardware is still not capable of horizontal scrolling. As such, a huge number of games for the system utilise Legend of Zelda or Montezuma’s Revenge ‘flip screen’ style progression. This heavily influenced the way many games were designed for the system, and Metal Gear as we know it today was created around these limitations.
Is the MSX worth it as a pseudo-console retro gaming machine? Absolutely. There are heaps of great games, and the hardware is easy to get and easy to use. It can be confusing because there are a lot of different MSX models, but really any MSX2 model will cover 95% of games. The biggest downside is the price of games. The software typically sold less so is in much shorter supply than the main console platforms, and it has a very dedicated fan base, so prices for top titles these days are sky-high.
Akumajou Dracula for MSX2
I originally got an MSX2 just to play the alternate version of the original Akumajou Dracula. The MSX2 versionwas released mere weeks after the Famicom Disk game, so they were clearly developed in tandem. The typical MSX flip screen design element is present, and realising the limitaions of the platform for action games, the designers instead focused on other things, and turned it into a Goonies style puzzle adventure. Instead of just fighting enemies and passing platforming challenges, you also have to collect hidden keys to open doors and progress to the next part of the level. It’s really a lot of fun, and a completely different take on the same basic levels. It’s more rough around the edges, but also more interesting.
The big question is – which Akumajou Dracula reigns supreme? Famicom Disk, or MSX2?
The short answer is the Famicom Disk version, by a small margin, it’s just such a solidly designed classic game. While it’s mostly due to the platform, if you play the Famicom version immediately after the MSX2 version, while the graphics are a slight downgrade, the smoothness and responsiveness really hits you, it’s just a more refined game. The music is also marginally better on the Famicom, despite the game not even using the extra FDS sound channels.
The MSX version is still great however, and a completely different experience. And what’s most interesting is that the Famicom Disk-only sequel Dracula II: Noroi no Fuuin is clearly a sequel to both games. Simon is wearing his red gear from the MSX version, and it expands on the exploration and puzzle elements of that version that were not present in the Famicom original.
There’s a Mark III 3DS theme out. Looks perfect on a white New 3DS.
Now we just need some Mark III faceplates. It’s still crazy to me to see the Sega and Nintendo brands together like this, even after all these years of it being normal (the dual branded F-Zero GX launch screen was the first real time they co-branded, back in 2003!)
Paying attention to eBay auctions can get your some cool stuff. This Famicom was listed with just a picture of the box as the main image. One tiny detail stood out to me, so I bought it (for a quite low price).
It’s an original model of the Family Computer from either 1983 or possibly early 1984.
It features square ‘squishy’ rubber buttons for A and B on the controllers, much like the start and select buttons, and the action buttons on an early Game & Watch.
The other difference of note is a shiny finish on the bottom, compared to the textured finish of all later models.
I’ve done some restoration and cleaning including a peroxide treatment, and it turns out after the yellowing is removed, the console itself is a slightly different colour to other Famicoms, it’s got a slight red tinge. This solves the mystery of the reddish Famicom on the front of all Famicom boxes not matching the whiteness of later models – they changed the plastic around the time of the button change, but didn’t update the picture.
As far as I can tell, the early models didn’t feature an expansion port cover or arrow sticker on the front right – hence them not featuring on the box either. So these are not ‘missing’ here, they were never there.
Nintendo recalled all early consoles because of a bug that could cause it to crash, and because the square squishy buttons damaged easily and could get caught on the corners. After playing a few games with these controllers for a few minutes, they’re quite solid, but definitely inferior as buttons the the hard round ones with membrane switch that replaced them (Nintendo also phased out this button style in later Game & Watch releases. They have a long travel distance, and while they work fine for holding or pressing sporadically, if you have a game that requires hitting a button in quick succession (e.g. a beat em up), it feels ‘slow’ as you have to do a more substantial press each time.
The manual has square buttons featured as well, so this set is all-original.
Here are the three generations of original Famiom. Square button, round button, and round button with Famicom Family ‘FF’ logo. Note the slightly different colors of plastic, my second gen Famicom is the only one I would actually call ‘white’, it makes the ‘normal’ beige colour one on the right look yellow.
Intesrtingly the console box was never updated to feature the ‘FF’ logo.
Sometimes it’s difficult being a fan of Japanese games when living outside of Japan. If you’re in a PAL country, older RF-only NTSC-J consoles cannot ever display properly on PAL screens. You could possibly tune in a fuzzy black and white picture with no sound, at best. Even if your TV was NTSC compatible via other inputs (eg composite), it is unlikely to support NTSC over RF.
You can mod most RF-only systems to output composite video or better, but personally I prefer not to mod rarer or older consoles such as the SG-1000, Color TV Game 6, or some of my original Famicoms.
No modding for you!
The traditional method was to use an NTSC-J compatible VCR which takes in the RF signal and outputs in PAL composite, but they’re getting harder to come by, are cumbersome, and you also end up with additional artifacting from the composite signal itself.
So here is a cheap solution, a $20 NTSC RF to VGA box – essentially designed as an external analogue NTSC TV capture card. It takes in RF (or composite via side inputs) and outputs in VGA plus 3.5mm stereo jack for audio, with various scaling options.
It can tune in these older consoles, and output via VGA, and the results are much better than I expected. The scaling, for what it can do with a fuzzy RF image, is quite solid. Options are selectable via an on-screen menu, and it even comes with a remote control.
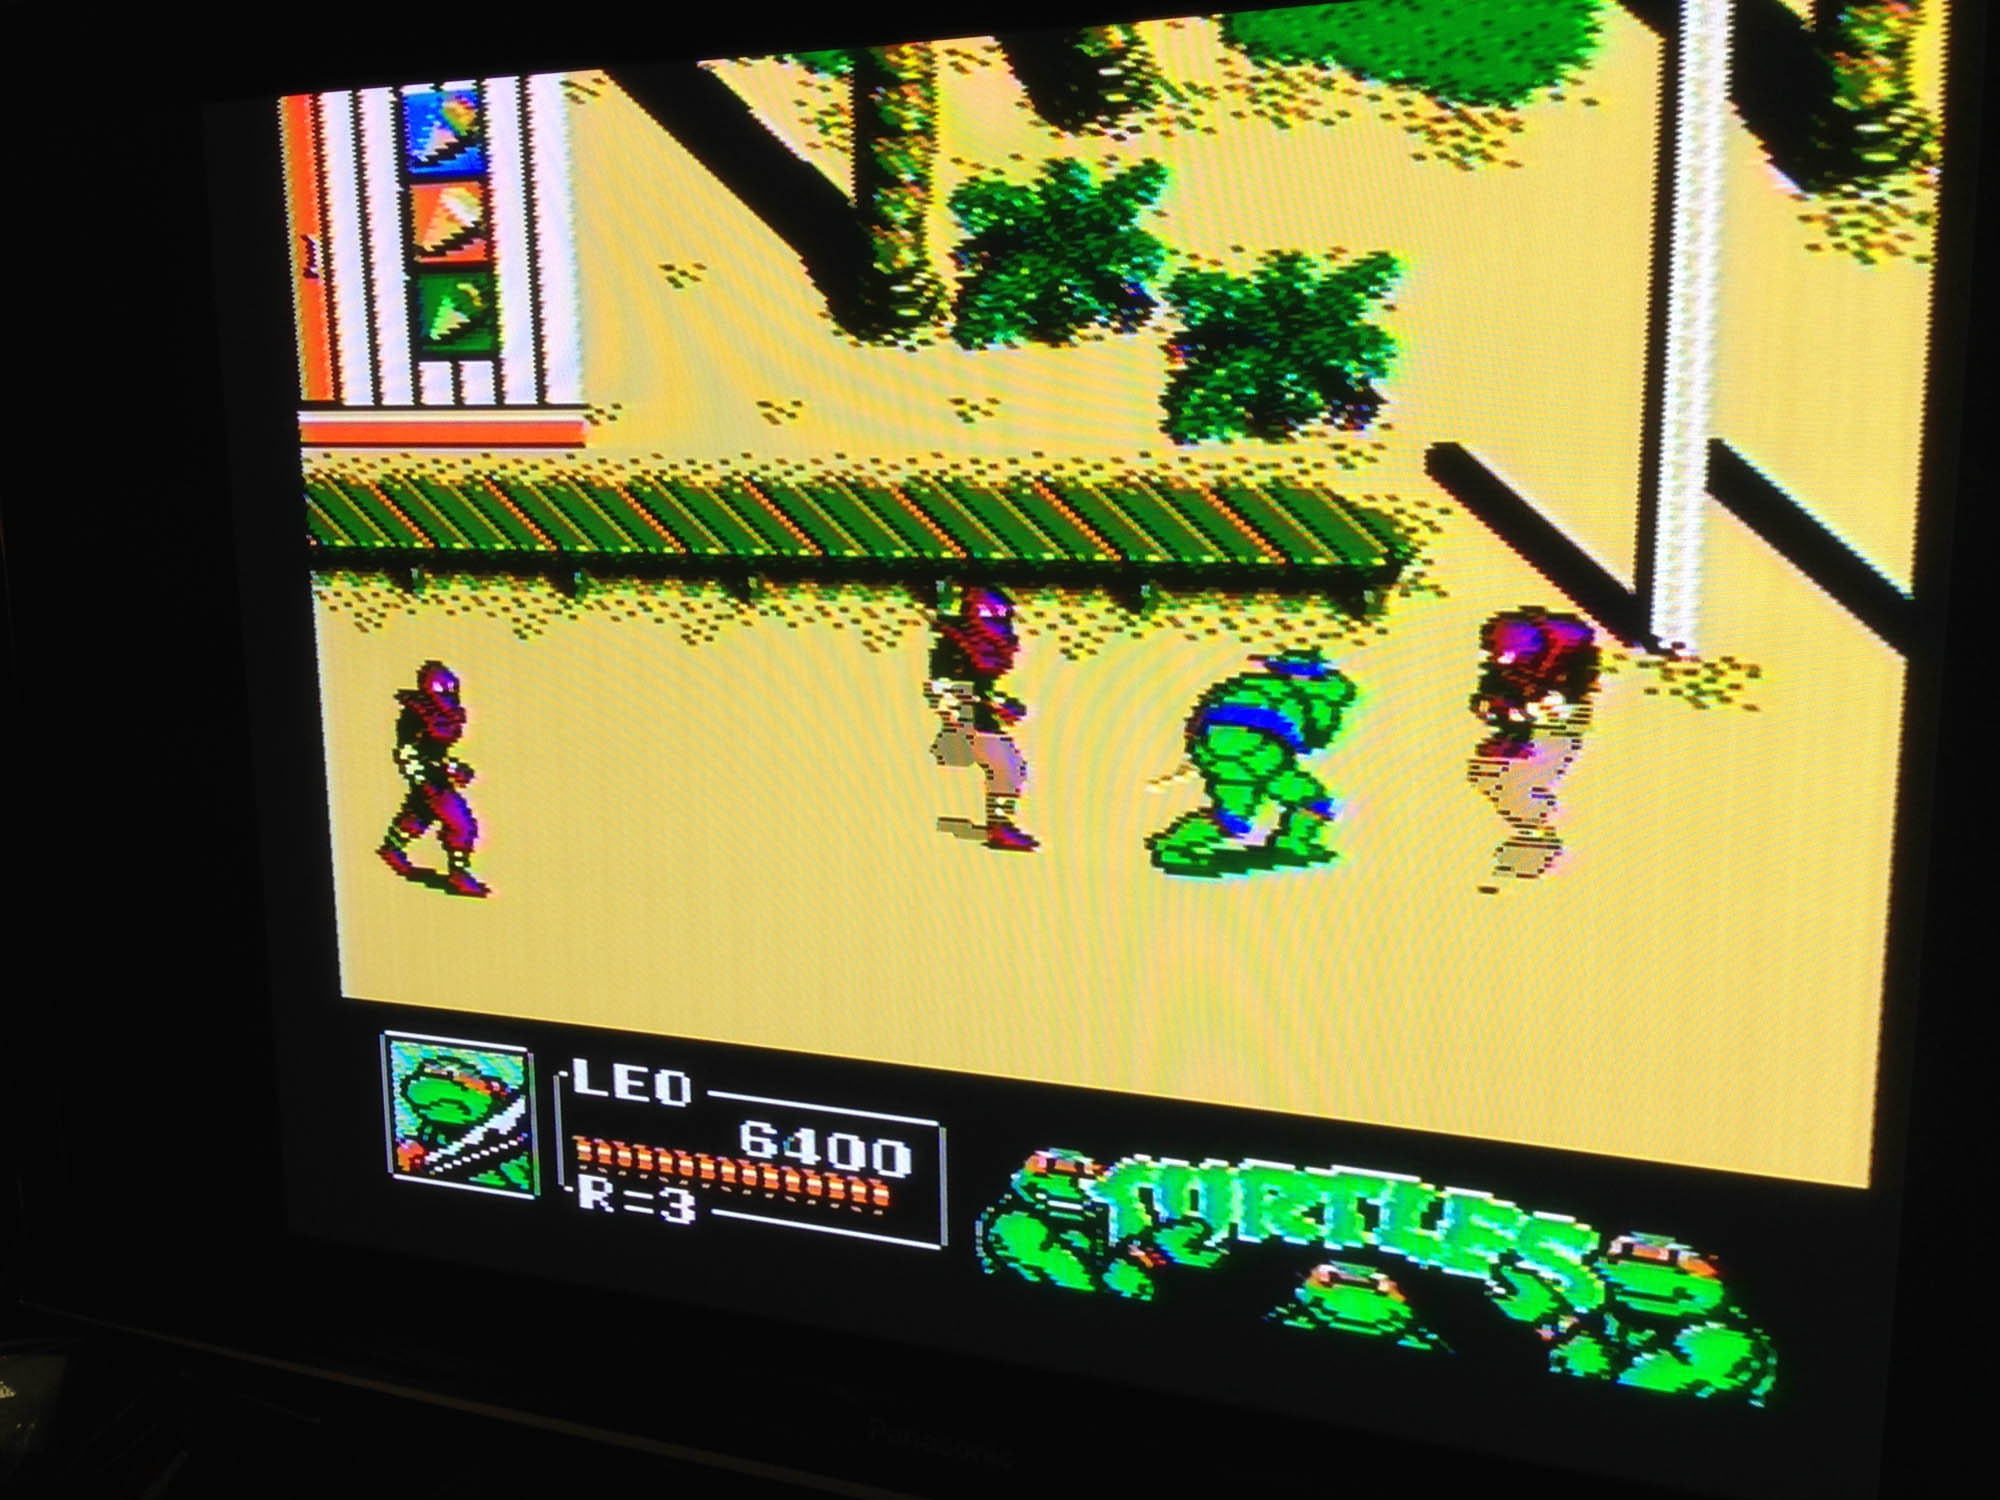
And here are the results, Turtles 2 on on original Famicom to a 1080p Panasonic plasma.
The distortion lines are just from photographing the TV, it’s actually quite clean.
I’ve made a video of it running here:
The downside is that the tuner is NTSC-U, so still not 100% compatible with all Japanese consoles. I couldn’t get the SG-1000 working perfectly, the colours were off. However the Color TV Game 6 worked great, as did two different Famicoms, and a Super Famicom via RF.
It seems to have particular trouble getting sync with primarily plain background games. It eventually clicks and then stays in sync, but this can take a couple of minutes. However, in all these cases, sound is pretty much perfect the whole time.
Overall, it’s a pretty cheap solution to at least test RF consoles, and good enough to play many!
Update: I’ve since gotten a new TV which has no VGA input, but which has an international analogue tuner, so I no longer need or can use this box, but will hang onto it for possible future usages.
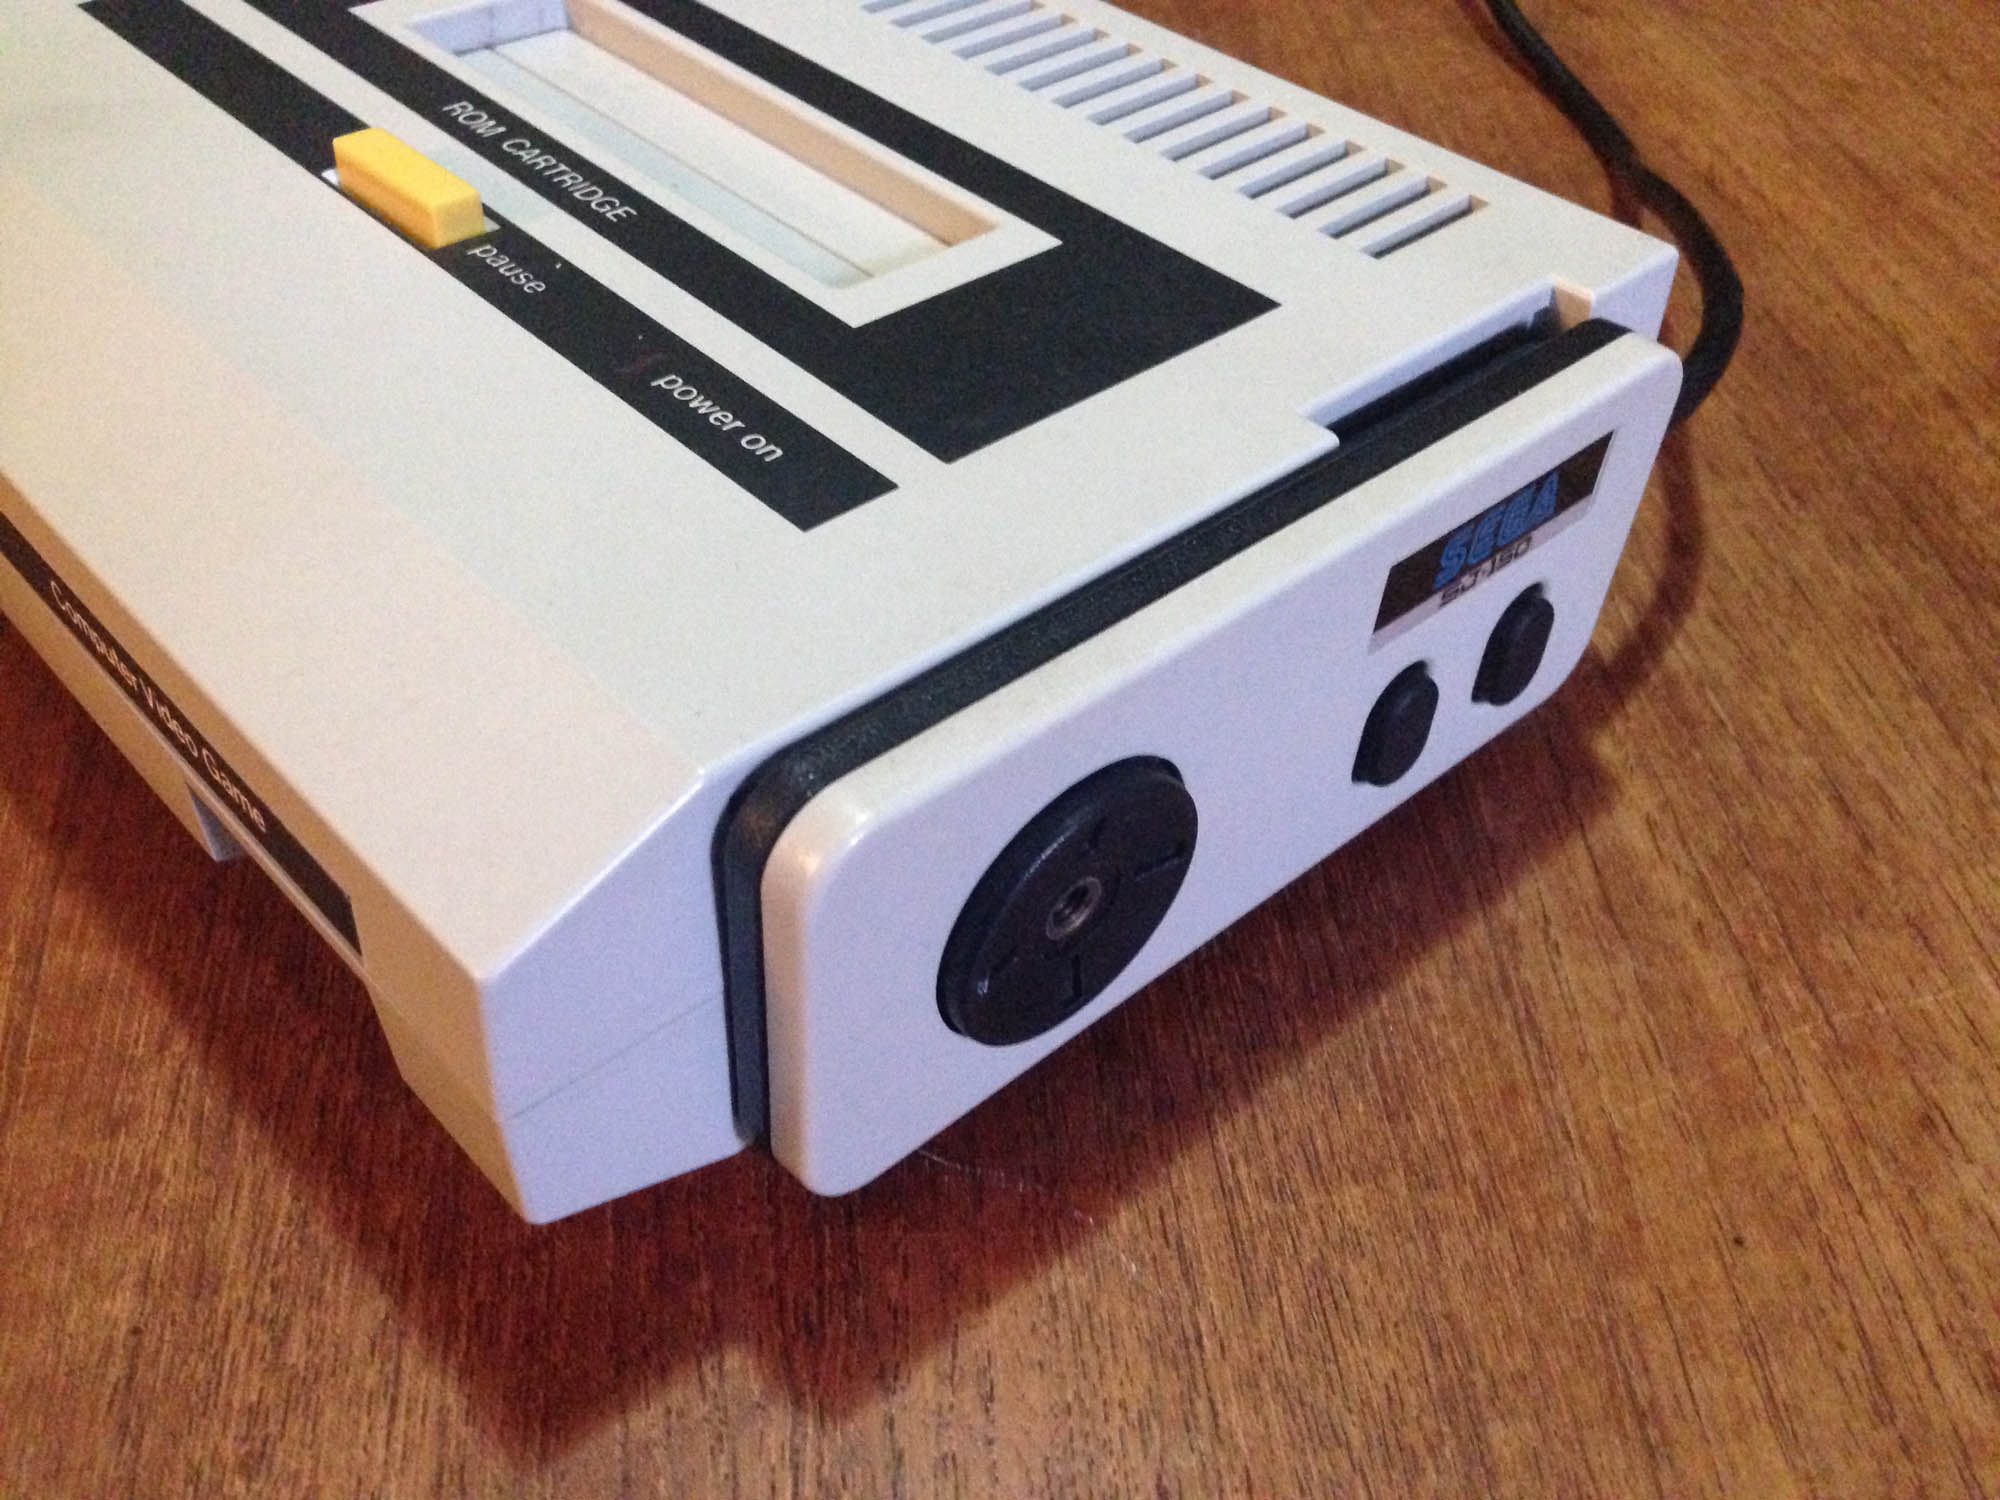
It was in 1983 that this website’s co-namesake entered the home video game market, with their first machine, the Sega SG-1000.
Released the same month as the Famicom (some sources claim the same day), it was a generation behind it in technology and design, featuring performance equivalent to the ColecoVision and first generation MSX. Sega couldn’t have predicted hurricane Famicom was about to redefine video games.
It plays Atari-style tall cassettes (cartridges), and features and Atari style joystick which is tethered to the left of the console.
The back features a port to attach a keyboard. ‘Home computer’ versions of the hardware with the keyboard integrated were released as the Sega SC-3000.
It can also play Sega My Card software (like Dragon Wang here) with the ‘Card Catcher’ adapter, which was released to coincide with the launch of the SG-1000 II a year later.
About that SJ-200 joystick – it’s pretty awful. Very similar in responsiveness to an original Atari VCS joystick, but with a worse design. Both the joystick and buttons are stiff and unresponsive, even in a perfectly working controller. Inside it uses a primitive bending metal ‘leaf connector’ system, which was cheap but no substitute for the microswitches in arcade joysticks, or the innovative rubber membrane system Nintendo utilised in its Game & Watch series and brought to the Famicom.
On the right of the console there’s a standard Sega controller connector plug, which unfortunately is only for player 2. Sega actually released an adapter that allowed you to open the console and replace the player 1 SJ-200 with another controller port, but it’s apparently impossible to find. I might try and make up a home-made one to use Mark III controllers.
Size-wise it’s comparable to a Mark III, and deceptively flat.
Output is RF-only, which means a classic fuzzy picture, if you can even tune it in (depending on where you live).
The Konami game ‘High School Graffiti: Mikie’ where you play as a teen heart throb, to the tune of Beatles classics.
It’s a pretty cool collector piece, but due to the joystick and RF-only output is not the best choice to actually play on. The Mark III is fully backward compatible with SG-1000 games, has the card slot built in, and (with a bit of ingenuity) has very nice RGB graphics output.
Do you think Nintendo started in home video gaming with the Famicom? The Game & Watch?
It actually all started in 1977 with this, the Color-TV Game 6.
Pre-dating the Famicom by six years, The Color-TV Game 6 was a Pong clone, offering six variations on the basic light tennis formula. Above is the first edition, CTG-6S, which came in a creamy white colour. Subsequent releases were orange, below right is the most common variant, the CTV-6V.
You can play a classic Pong type game, plus variations with half sized paddles, and a mode with four paddles.
It runs off six C batteries, and connects via RF as per all consoles of the era.
The orange re-releases also added the ability to use an external power adapter.
The orange ones also had improved dials. They rotate more smoothly, have less ‘give’ before they star registering, and stop rotating when your paddle is off the screen. CTG-6S dials just keep rotating, and your paddle comes back from the top of the screen after moving off the bottom, and vice versa.
The manuals of these two variants.
It’s pretty primitive but works perfectly 38 years later. The simple circuitry is pretty sturdy and will likely outlast most consoles easily.
It was followed up by the Color TV-Game 15 which featured more pong versions, Color TV-Game Racing which played a car game, Color TV-Game Block Breaker which was a Breakout clone, the Computer TV-Game which played Othello, and finally the Family Computer.
Here’s the very first model of the Sega Mega Drive.
That little ® next to ‘Sega’ at the bottom right means it is the first, Japan-only model.
The next batch of models, like this one, are missing the ®.
Sega loved covering the top of their consoles with semi-nonsensical text. For the Mega Drive it’s ‘AV Intelligent Terminal High Grade Multipurpose Use’.
Following the the tradition of the Mark III‘s amazing console top-promise (pic taken from my Mark III restoration article, hence no reset button and cassette slot flap)
And of course the inaccurate and needlessly complicated usage diagram on the top of the Master System.
Time for some launch games. The only true Alex Kidd sequel may be dated, but would have been pretty impressive in 1988. Especially because the early, made in Japan models have far better audio than later made in Taiwan models.
For more info on the numerous Mega Drive models, see this legendary Sega 16 thread.